Need Help? We are right here!
Need Help? We are right here!
Thanks for your Enquiry. Our team will soon reach out to you.
If you don't hear from us within 24 hours, please feel free to send a follow-up email to info@xecurify.com
Search Results:
×ADFS Single Sign-On (SSO) integration by miniOrange allows users to login into multiple applications using an existing username and password of an ADFS account. Here ADFS will act as an SAML Identity Provider (IDP) and your applications will act as a Service Provider (SP). miniOrange acts as a broker to communicate with IDP and SP and provide secure login access to users.
Active Directory Federation Services (ADFS) handles the responsibility of authenticating users within the application, making it easier for admins to integrate SSO into their applications. Overall this eliminates the need to manage different identities as all information is stored in a unified location - ADFS. Once ADFS SSO is configured, you will be able to :
miniOrange offers free help through a consultation call with our System Engineers to Install or Setup ADFS SSO solution in your environment with 30-day free trial.
For this, you need to just send us an email at idpsupport@xecurify.com to book a slot and we'll help you in no time.
Mentioned below are steps to configure ADFS as IDP via SAML and OAuth configuration. Follow the steps accordingly based on your requirement (SAML or OAuth).
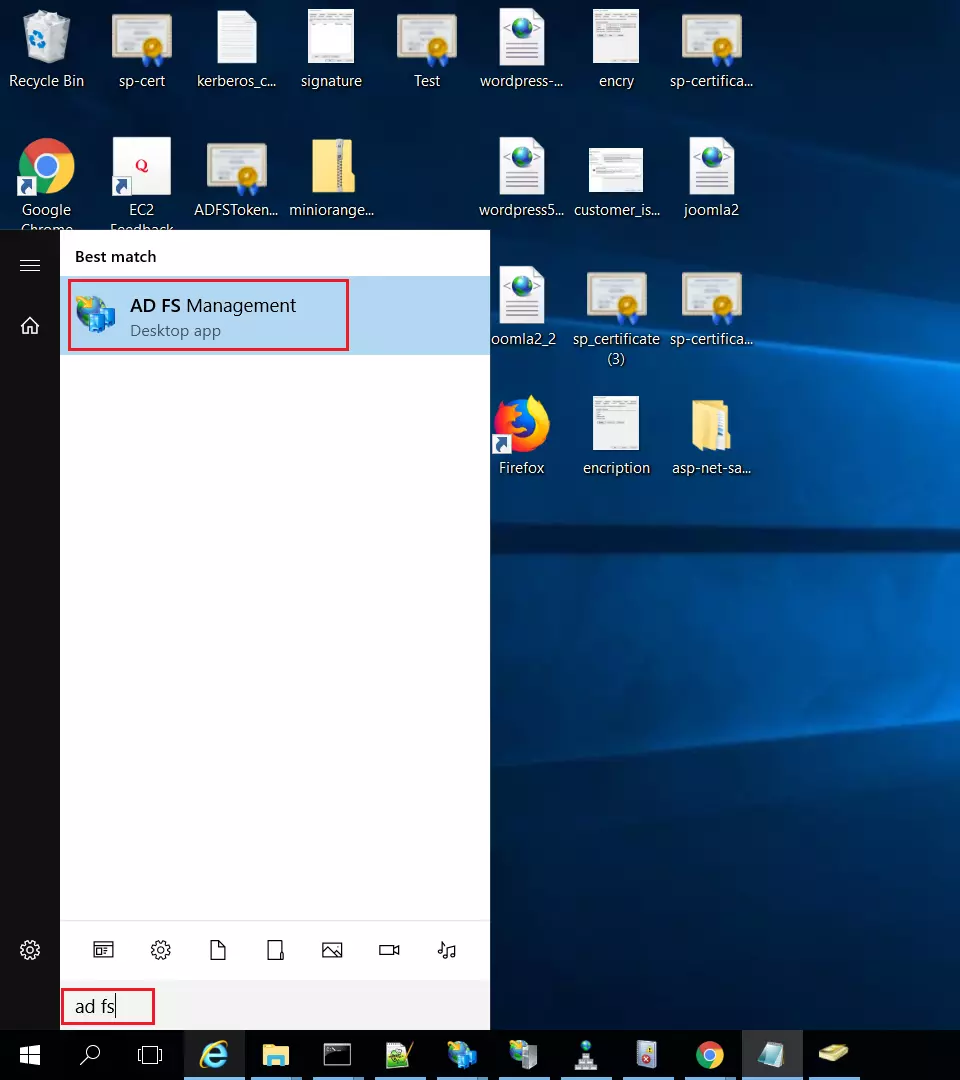

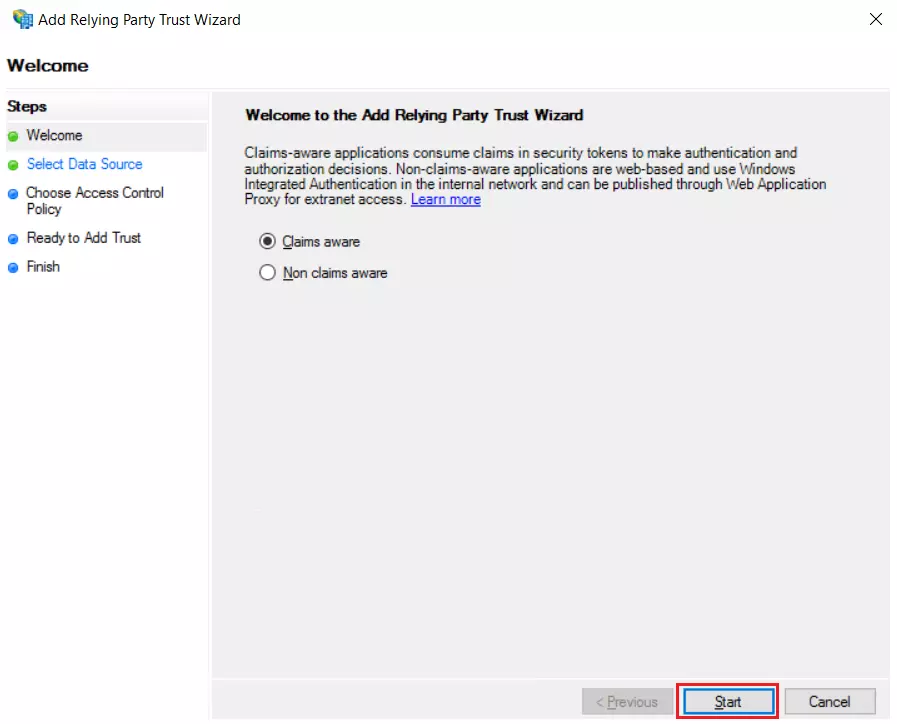
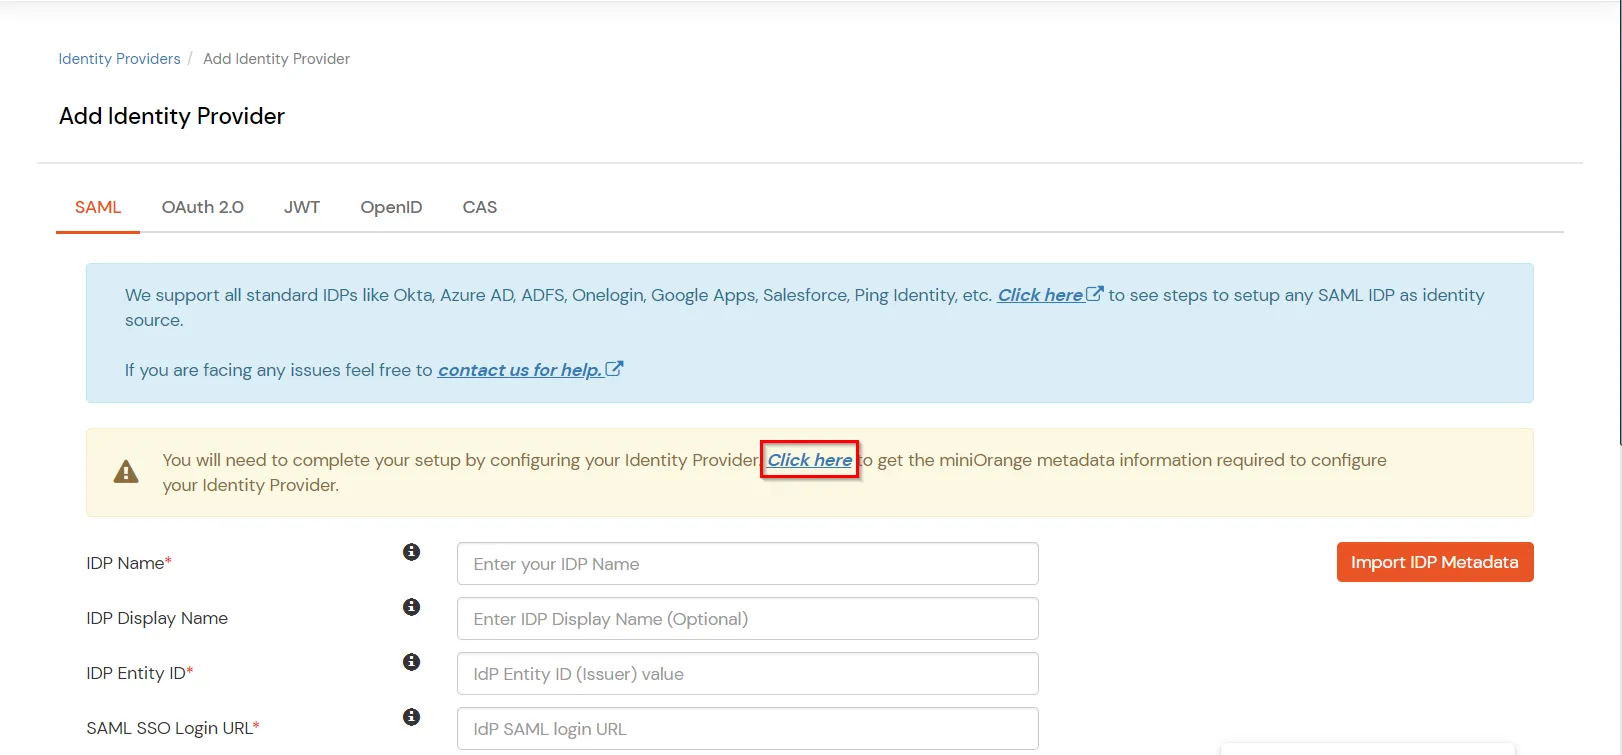
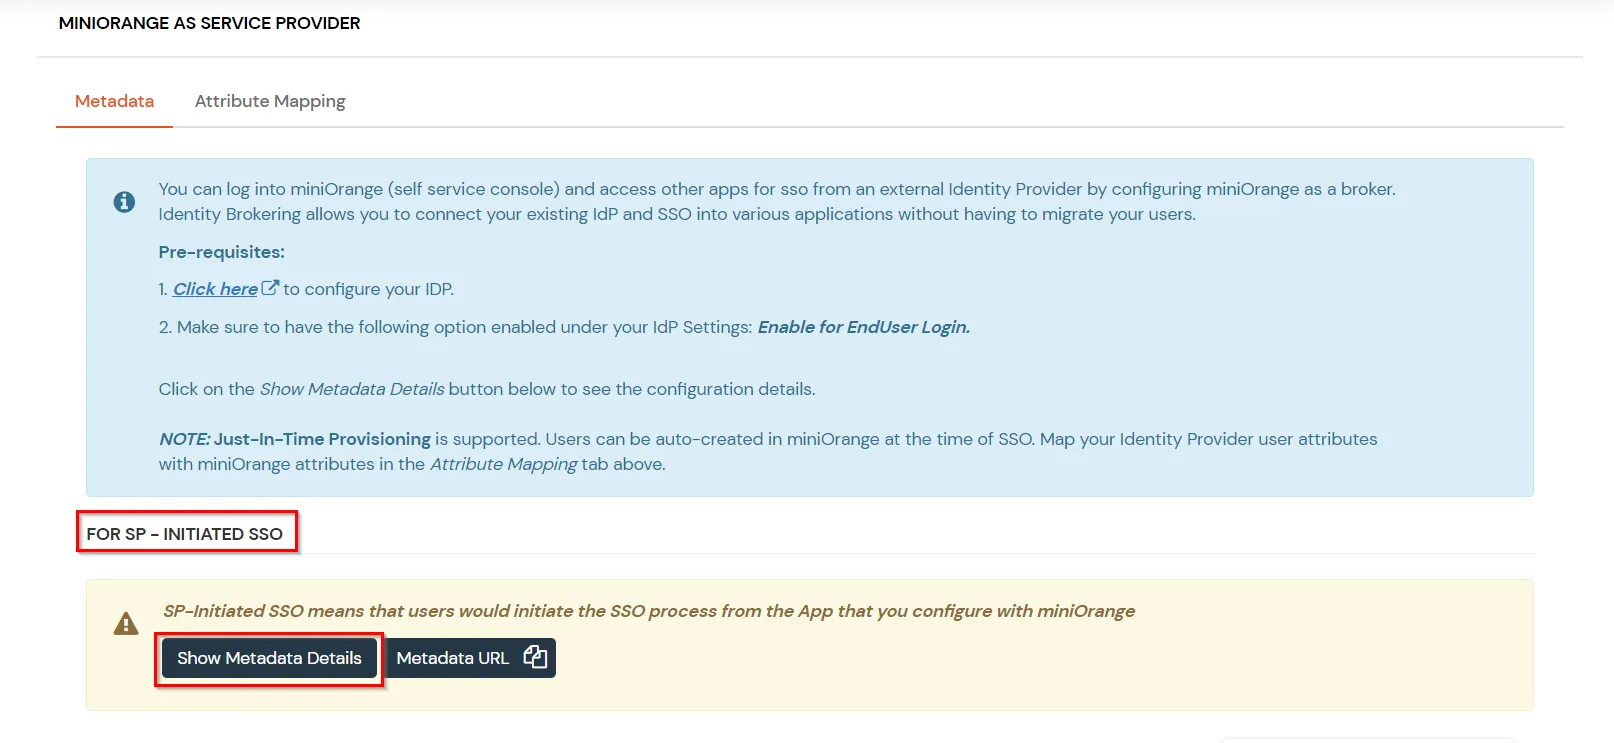
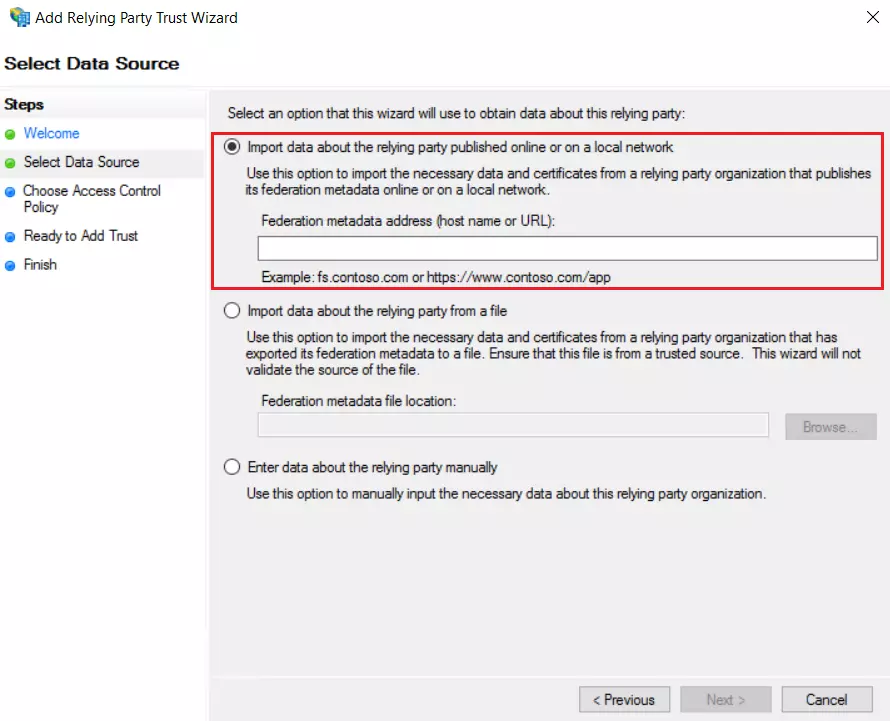
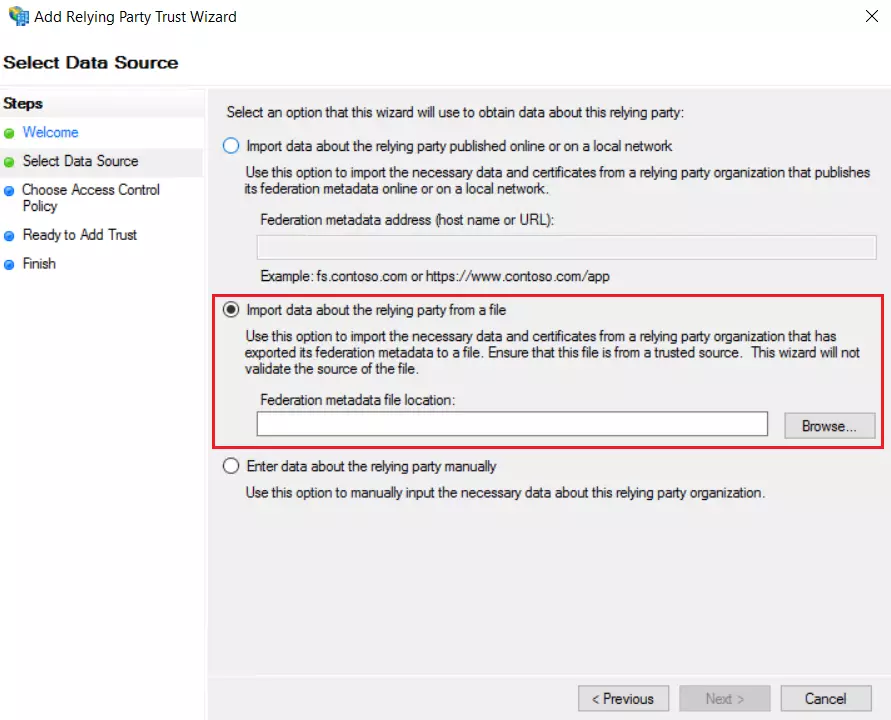
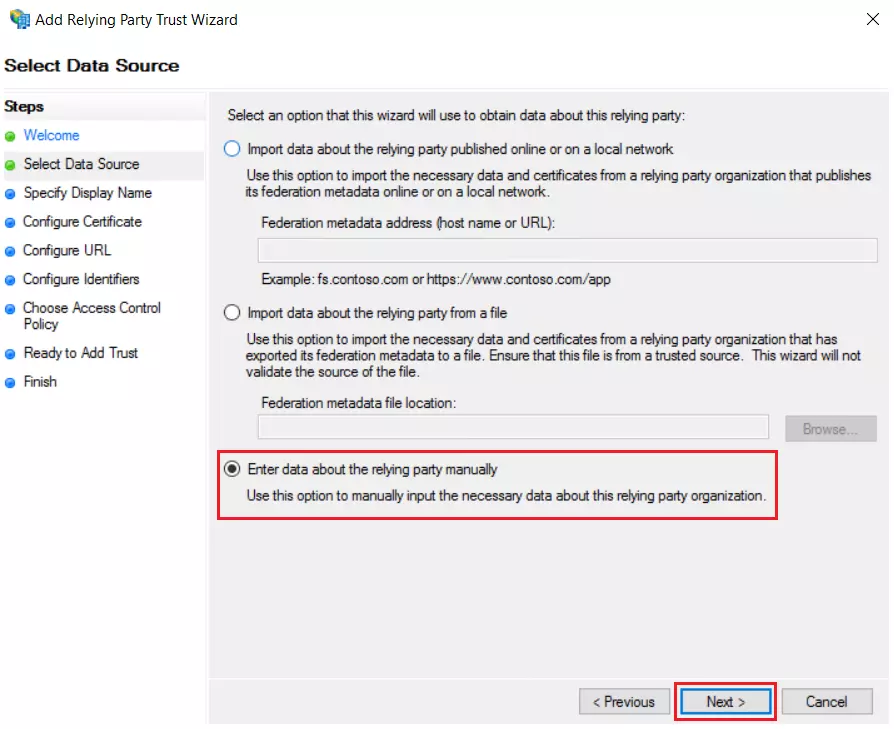
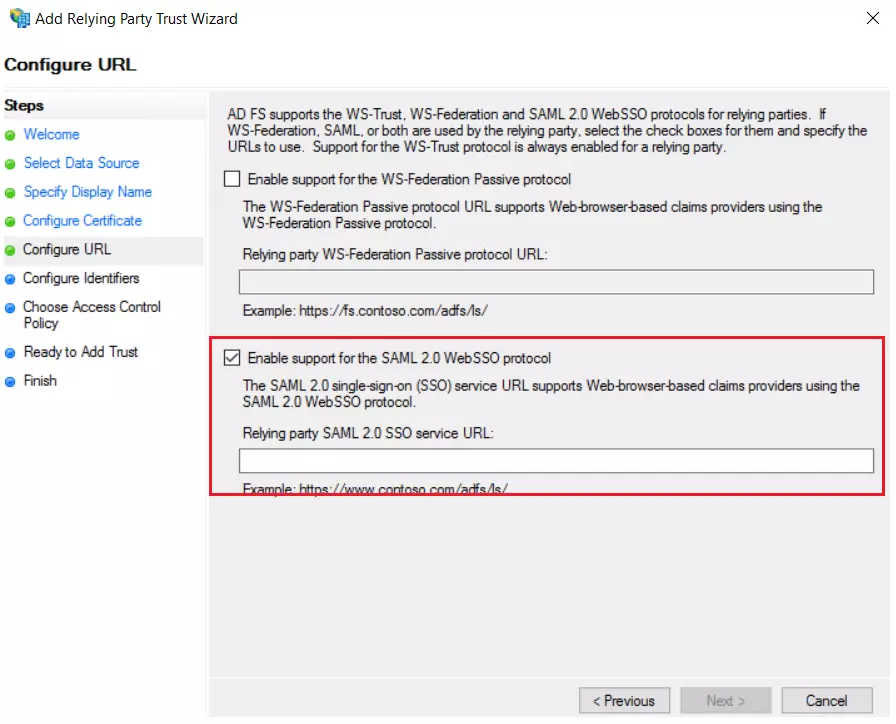
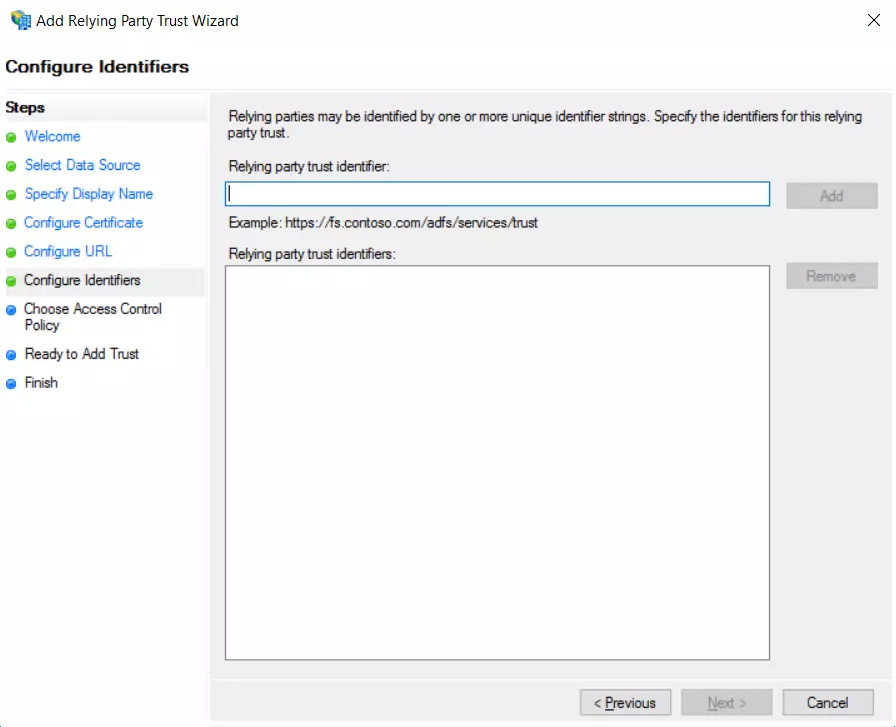
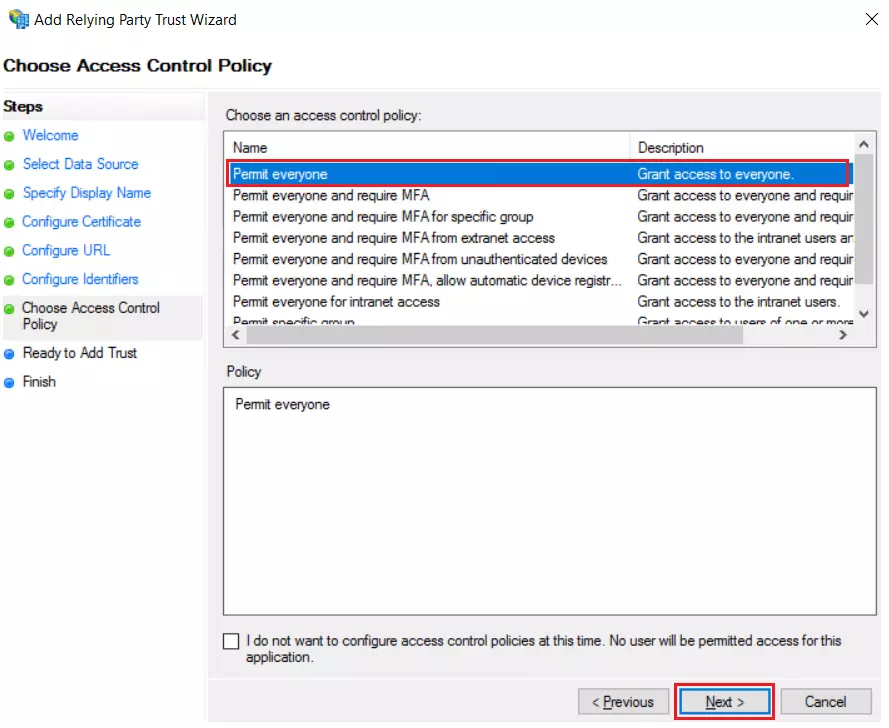
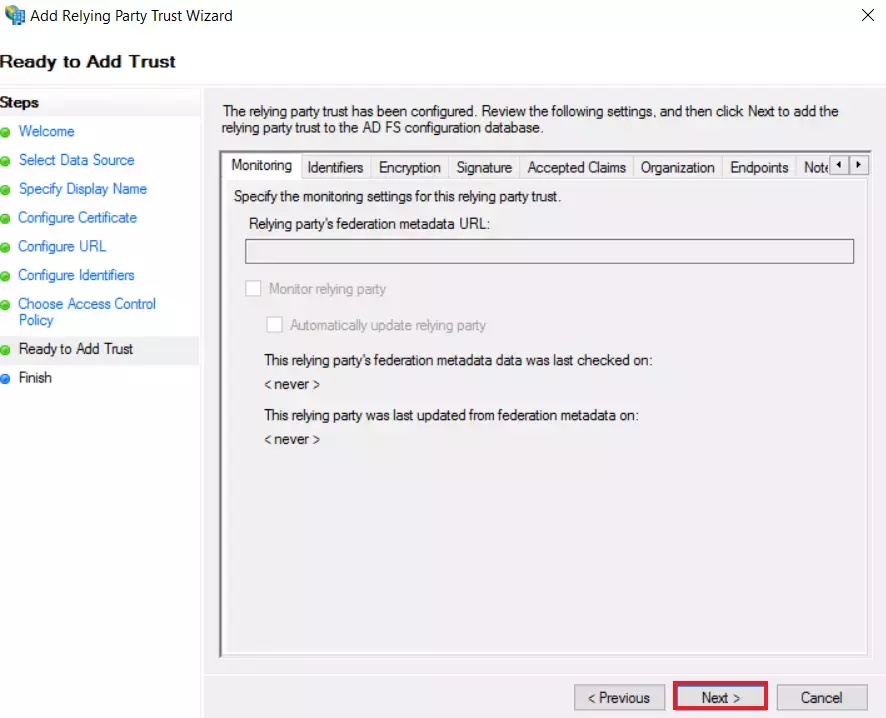

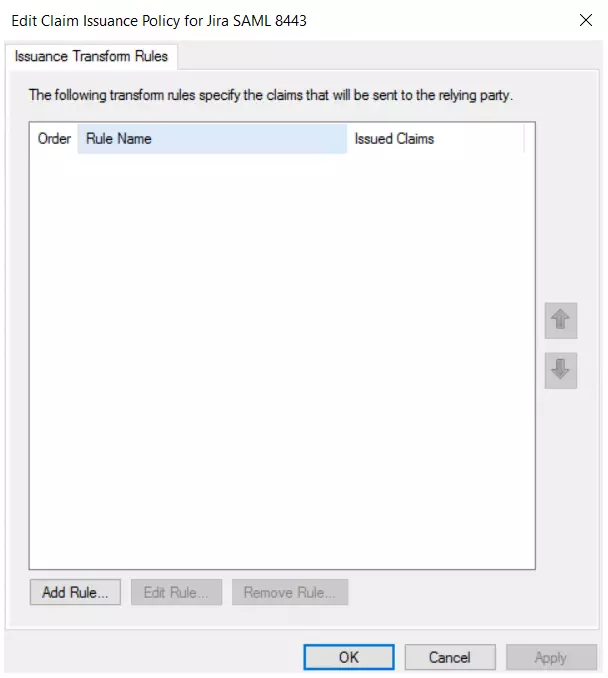
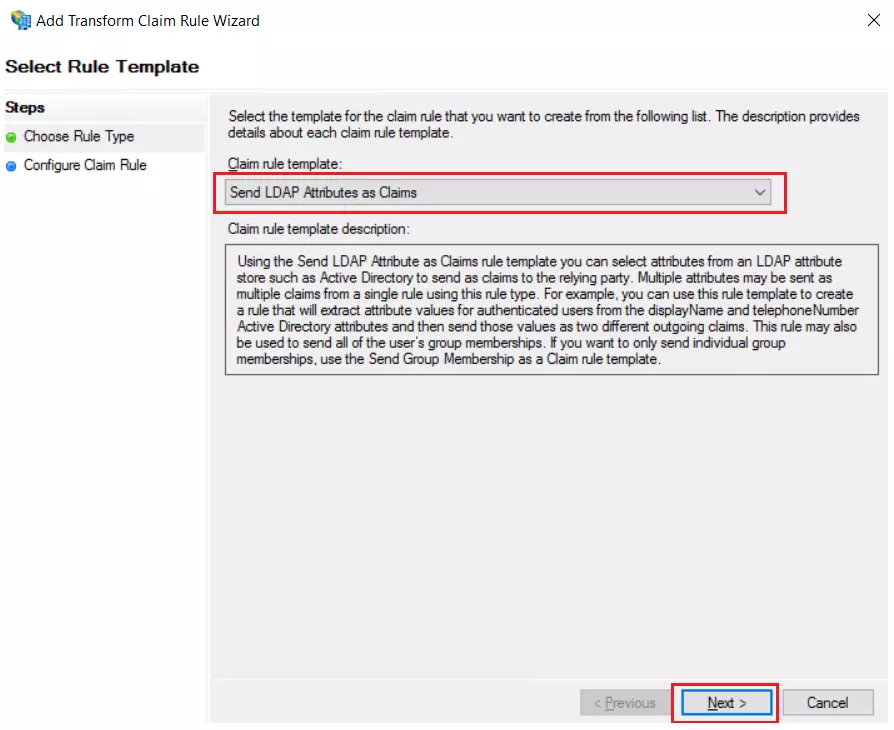
| Claim rule name: | Attributes |
| Attribute Store: | Active Directory |
| LDAP Attribute: | E-Mail-Addresses |
| Outgoing Claim Type: | Name ID |
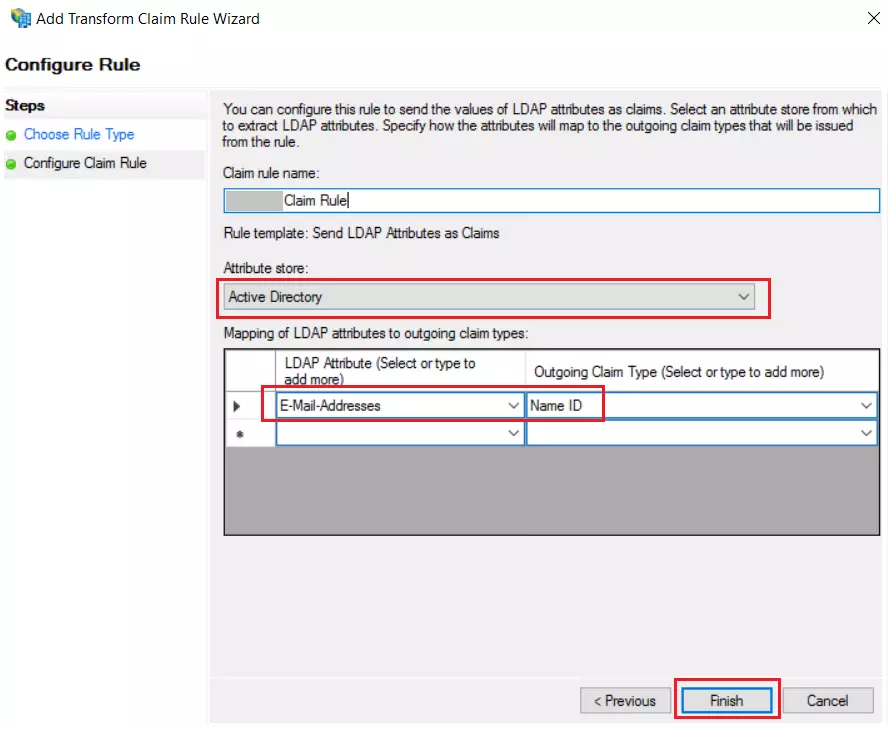
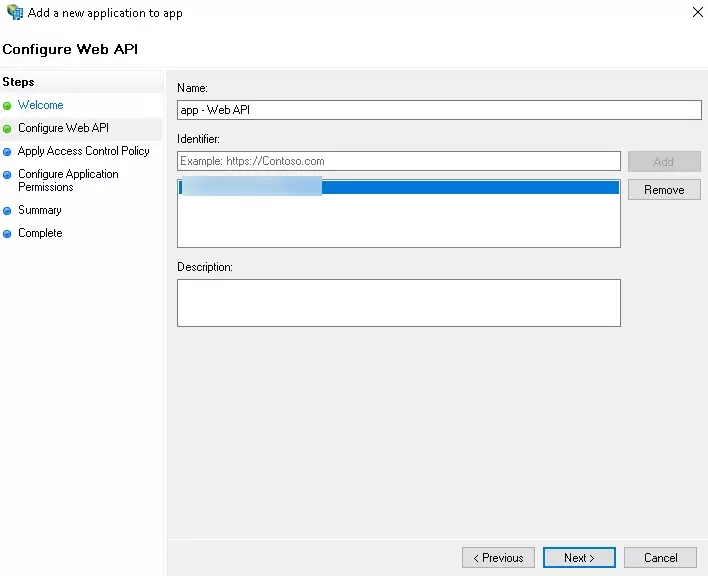
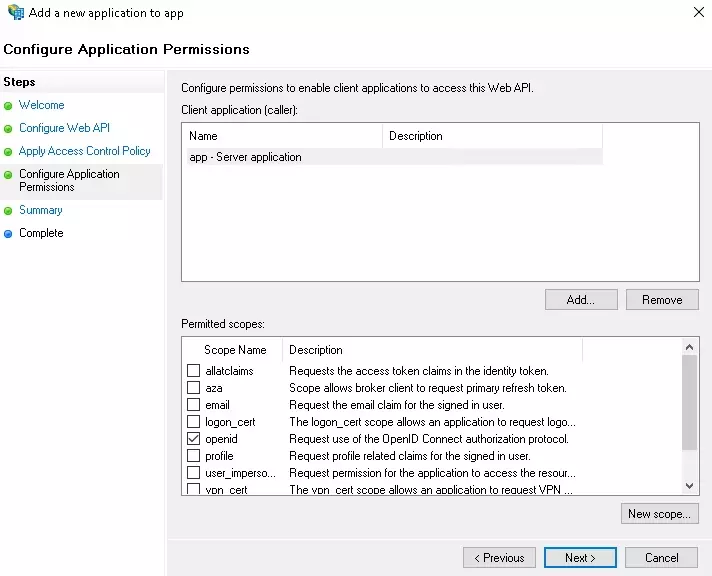
Follow the steps to configure ADFS as IdP by OAuth configuration.

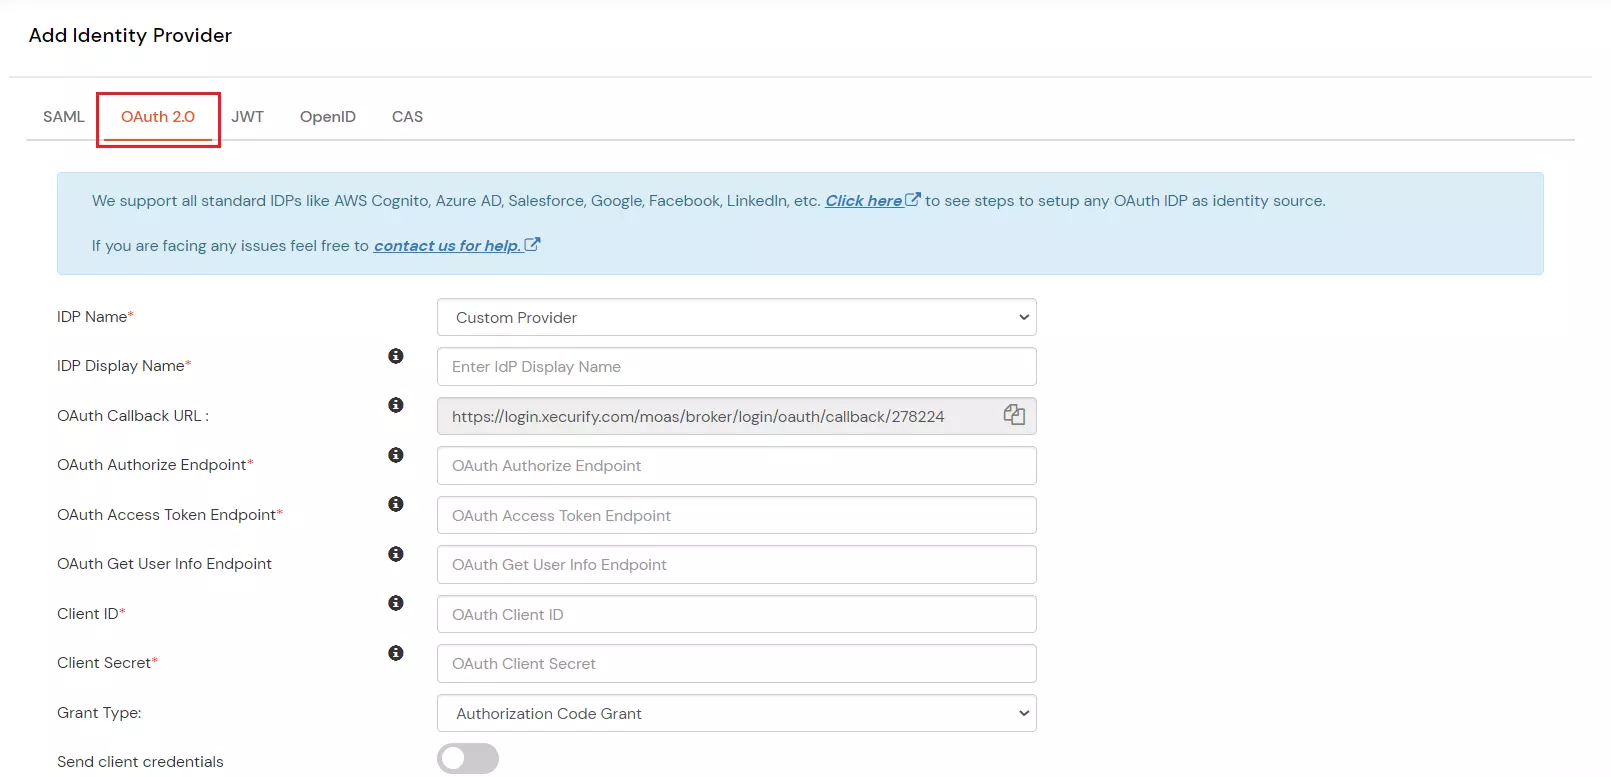
| IdP Name | Custom Provider |
| IdP Display Name | Choose appropriate Name |
| OAuth Authorize Endpoint | https://{Domain URL}/adfs/oauth2/authorize | OAuth Access Token Endpoint | https://{Domain URL}/adfs/oauth2/token | OAuth Get User Info Endpoint (optional) | https://{Domain URL}/adfs/oauth2/userinfo |
| Client ID | From step 2 |
| Client secret | From step 2 |
| Scope | auto |


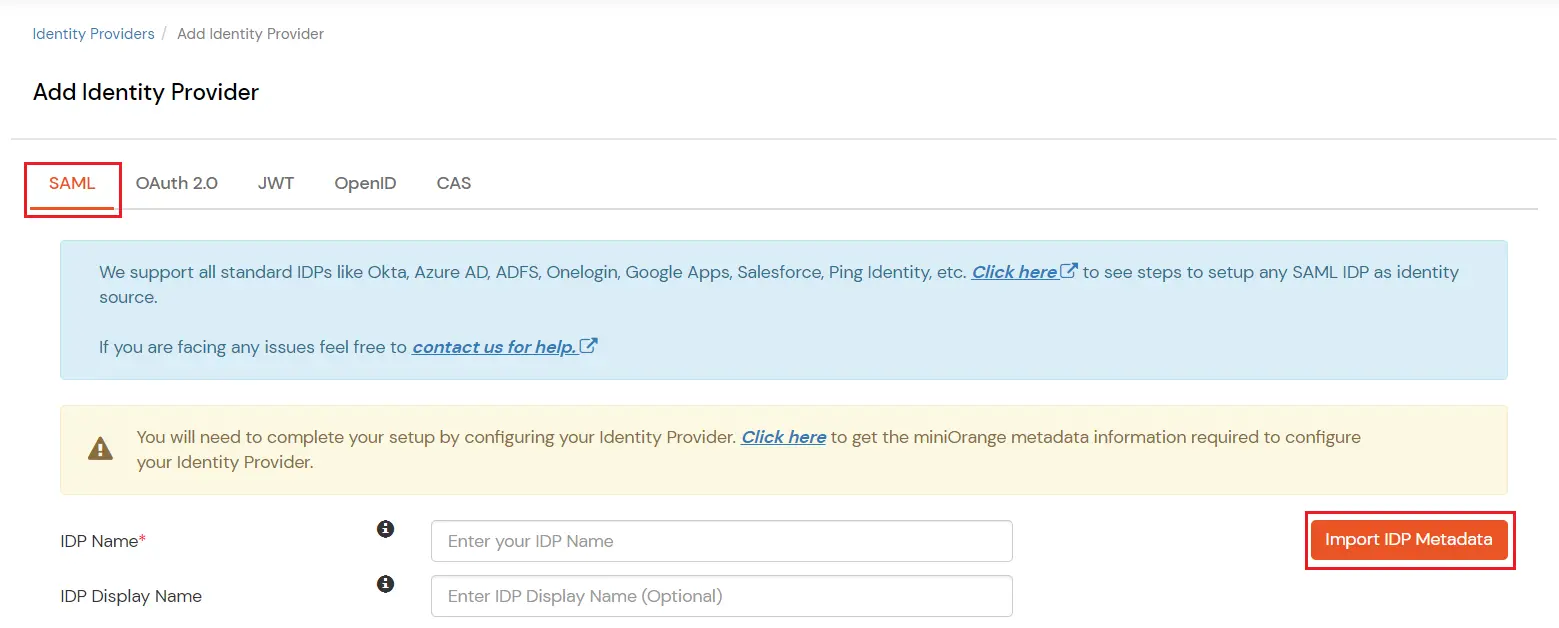
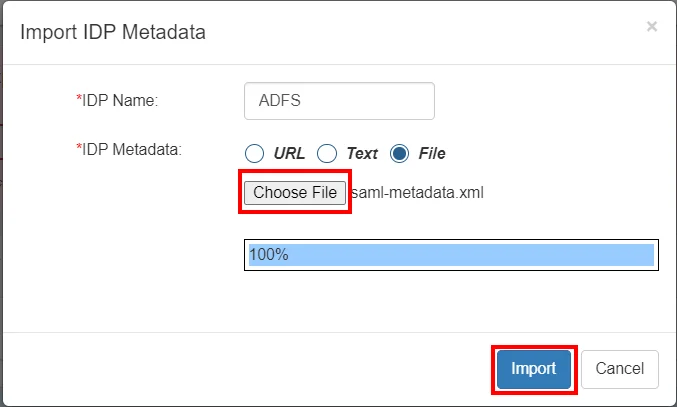
| Domain Mapping | Can be used to redirect specific domain user to specific IDP |
| Show IdP to Users | Enable this if you want to show this IDP to all users during Login |
| Send Configured Attributes | Enabling this would allow you to add attributes to be sent from IDP |
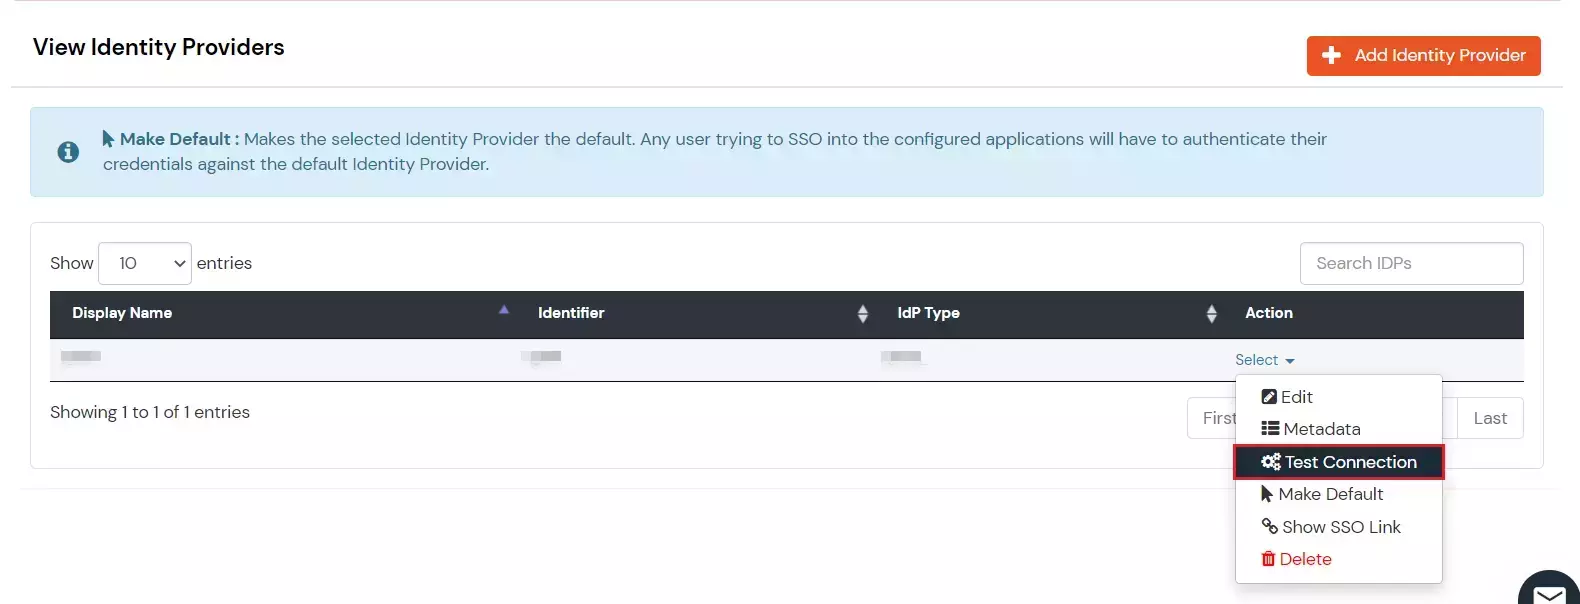
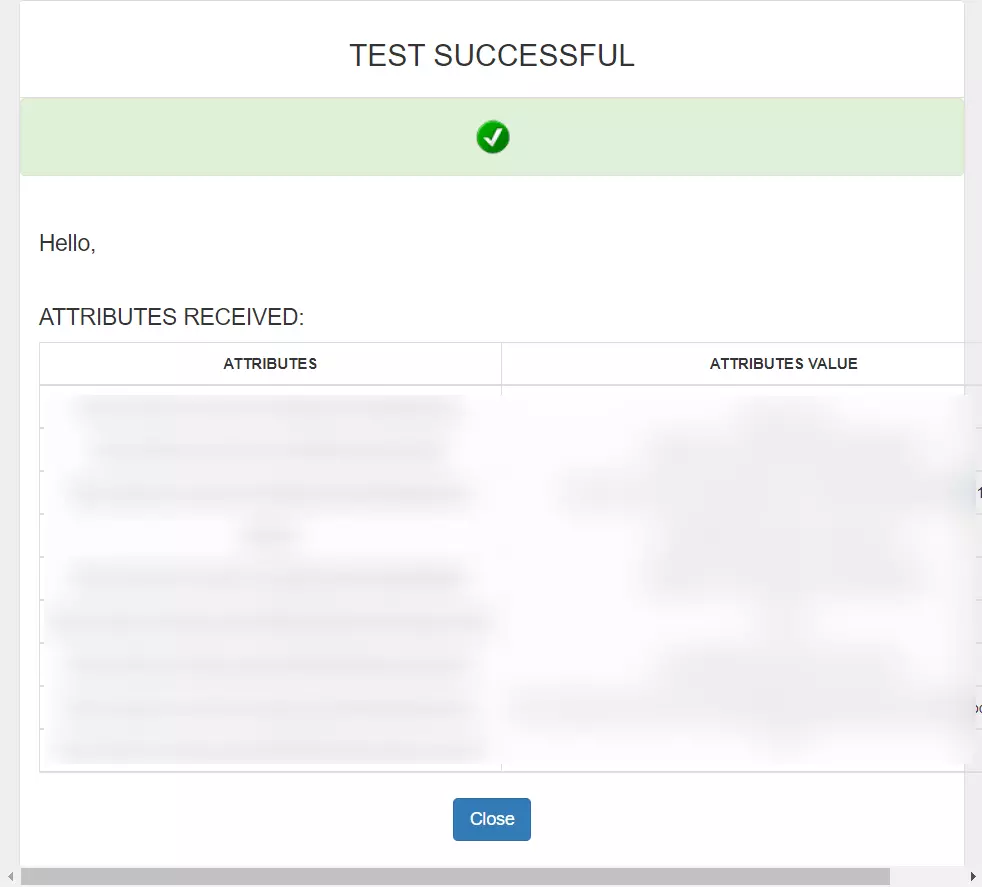
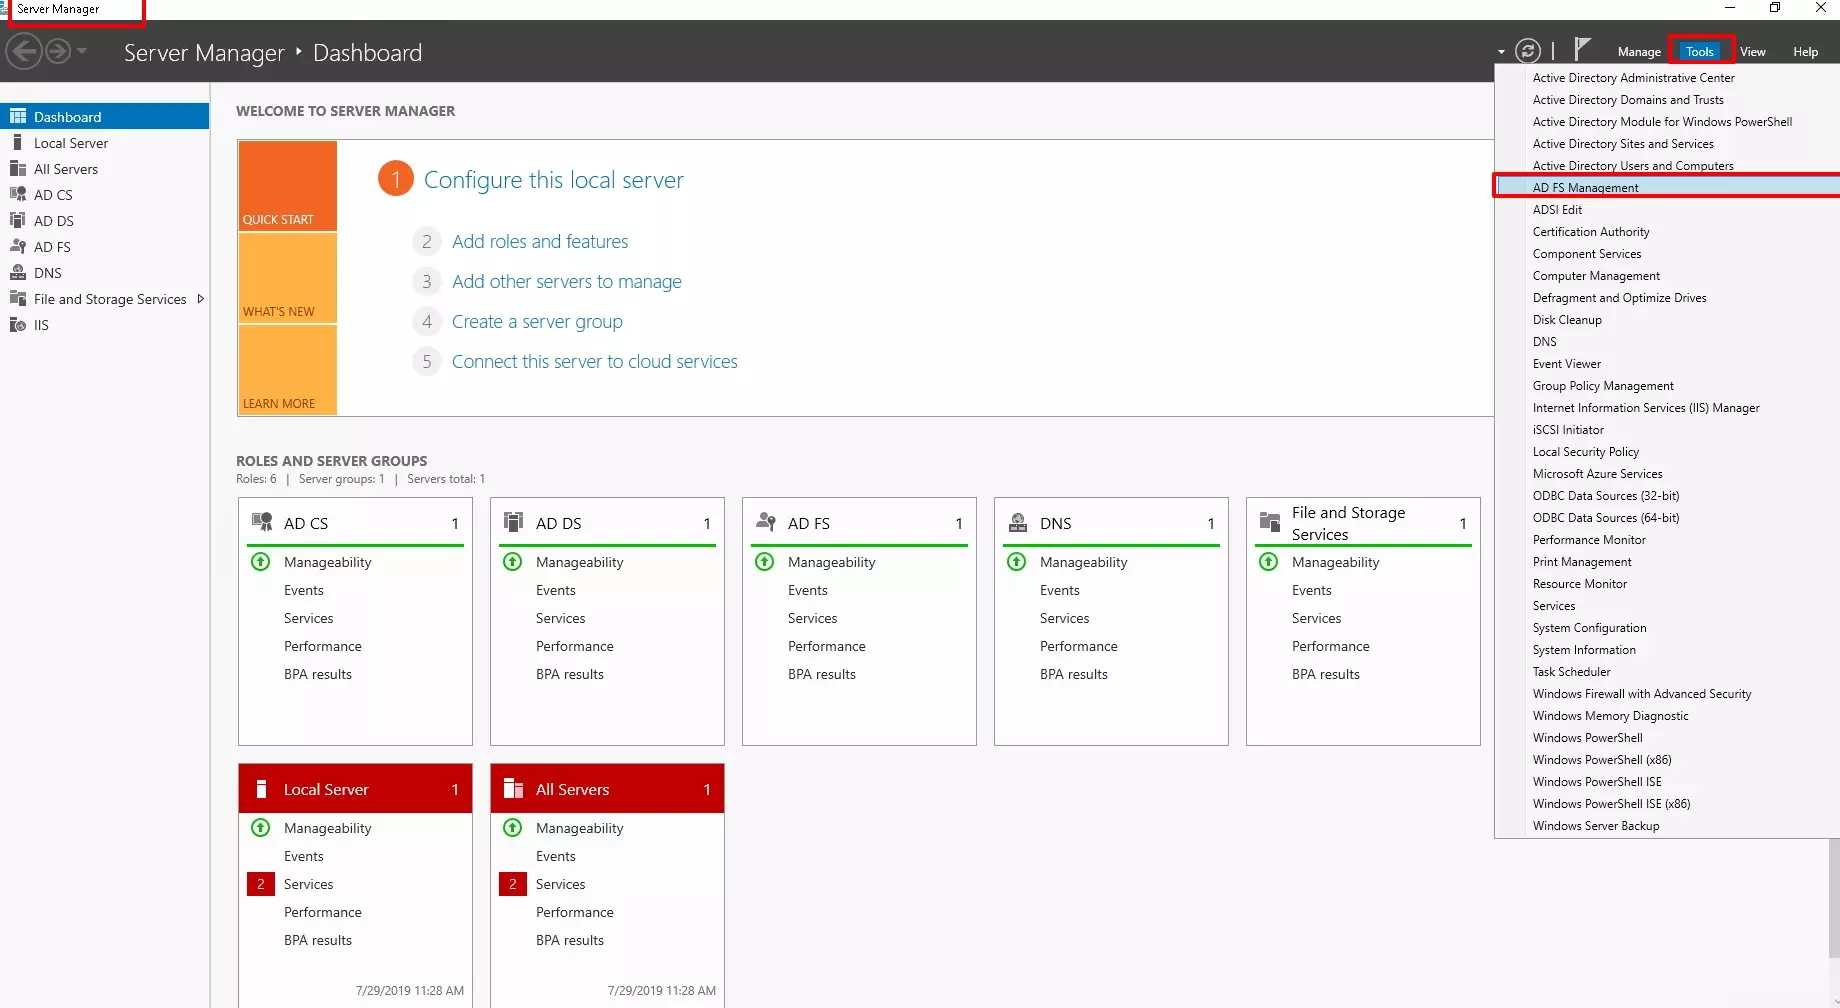
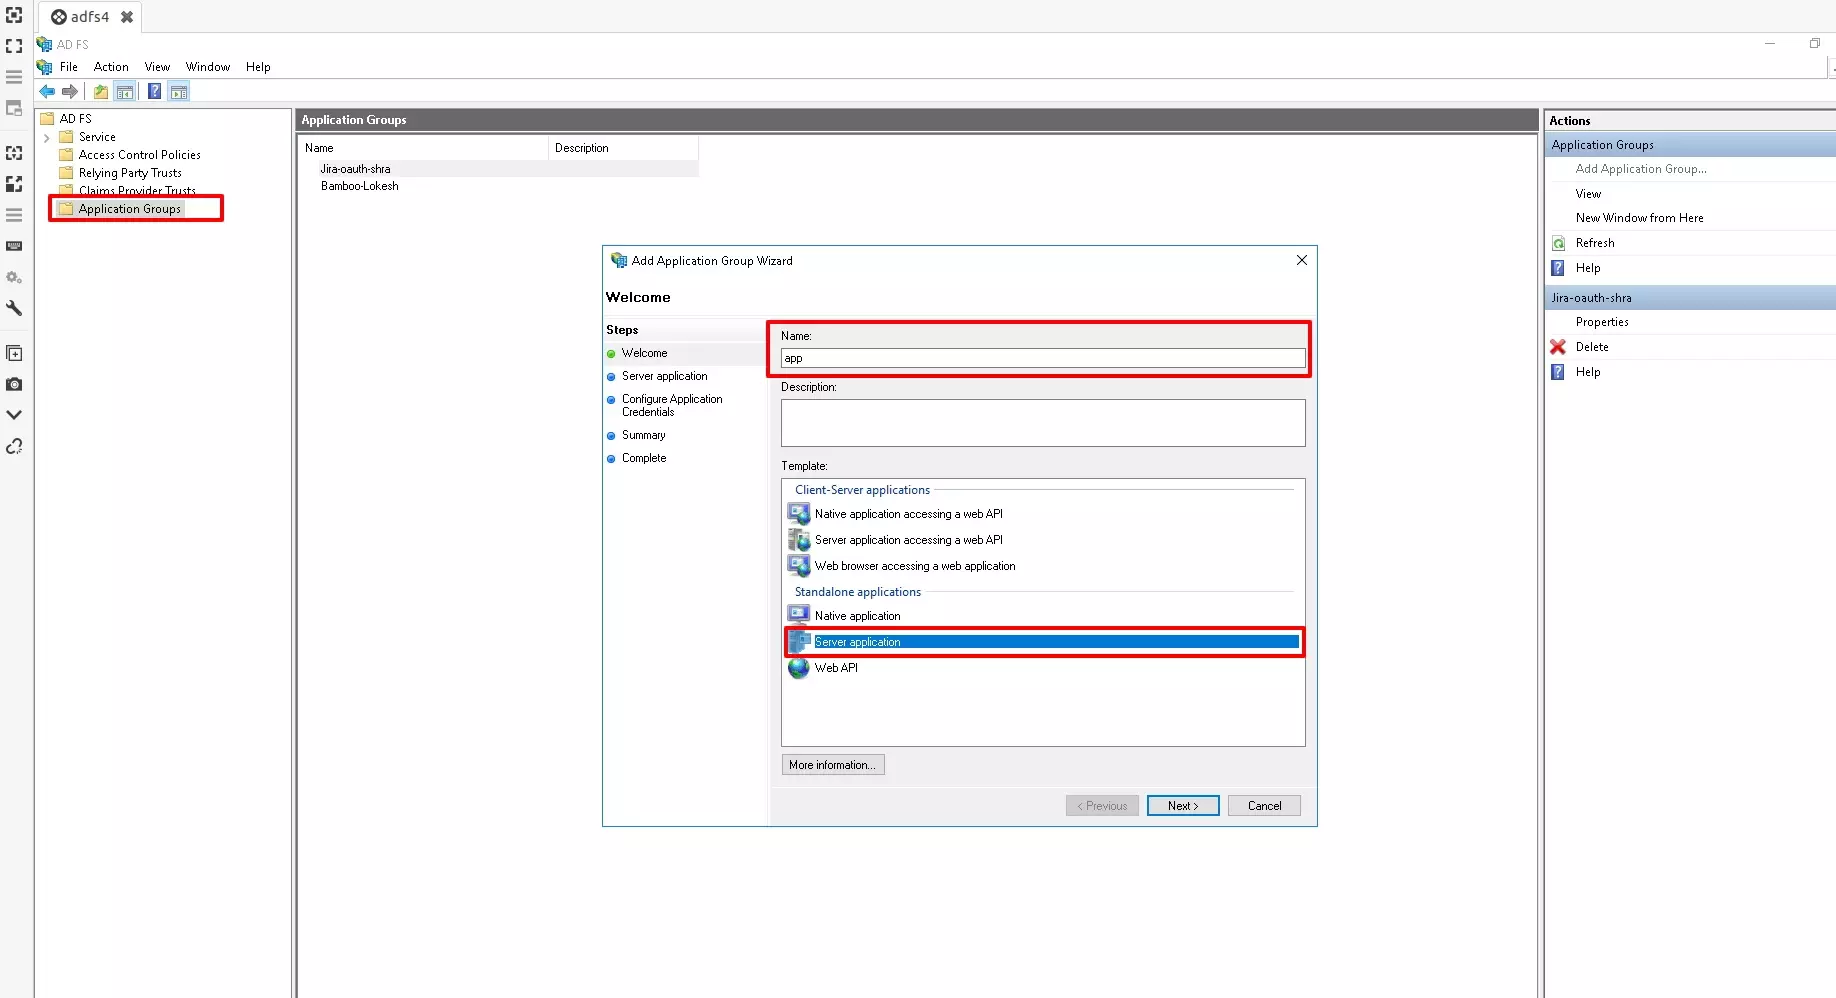
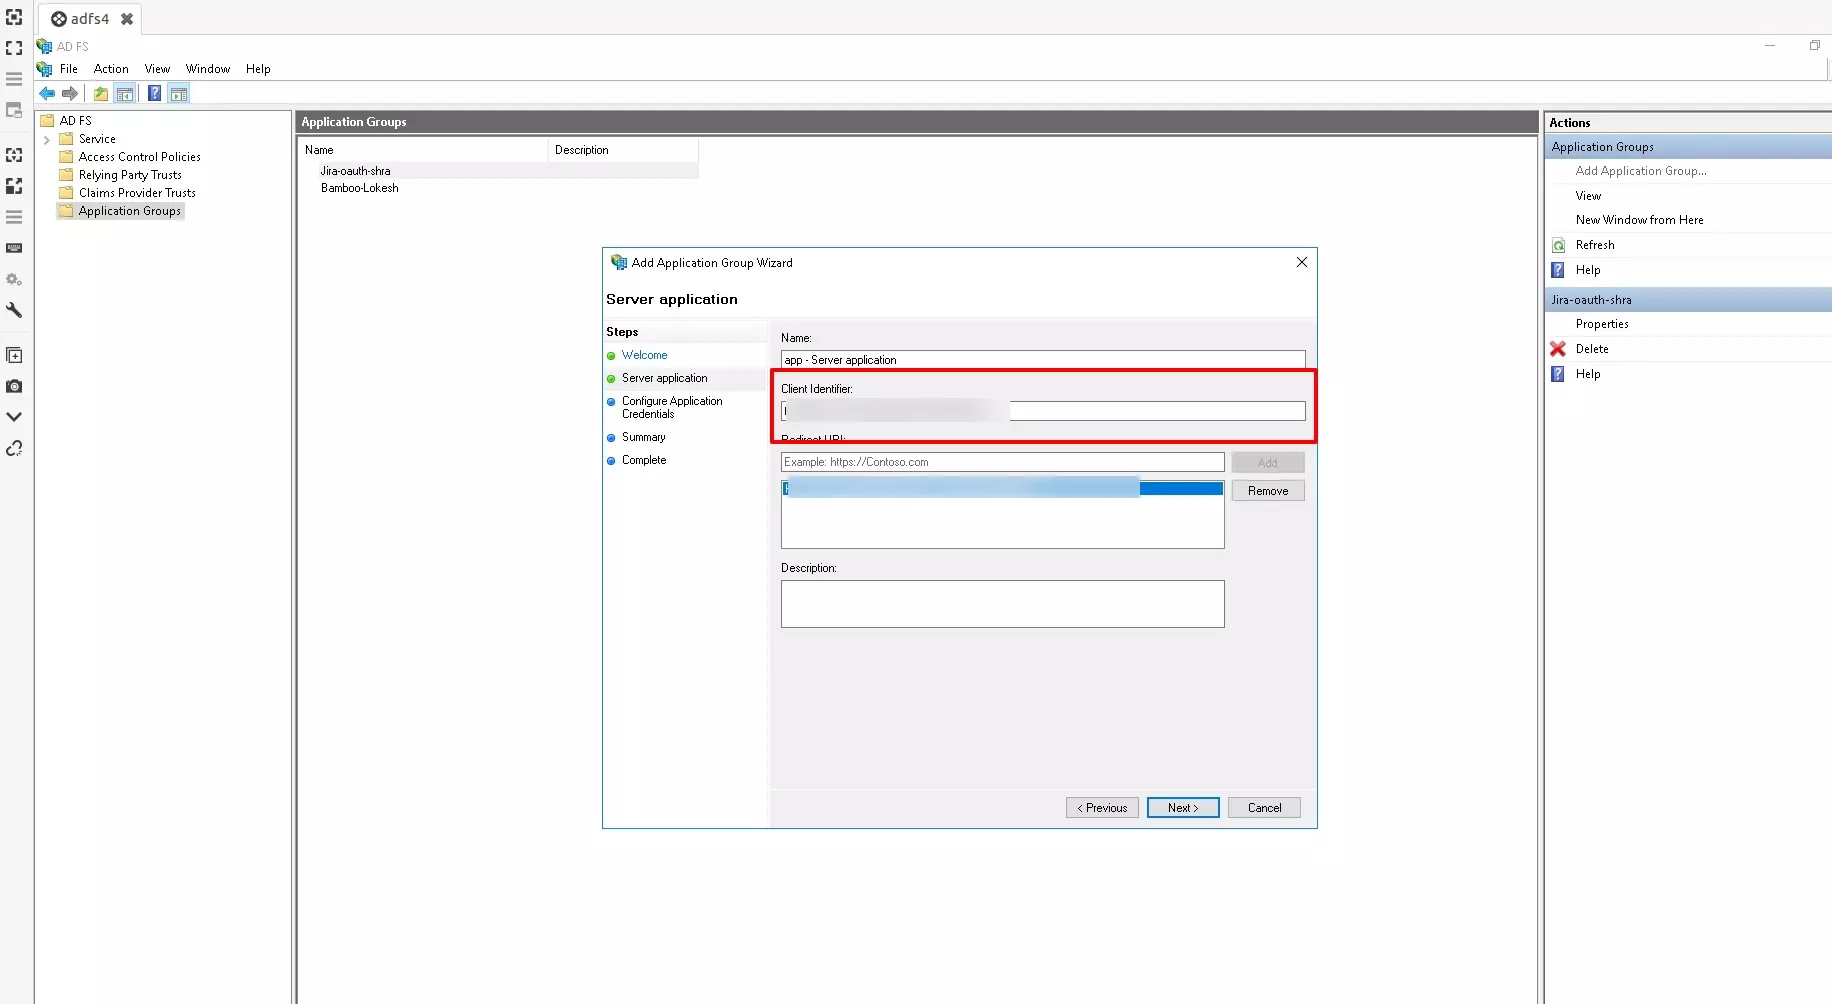
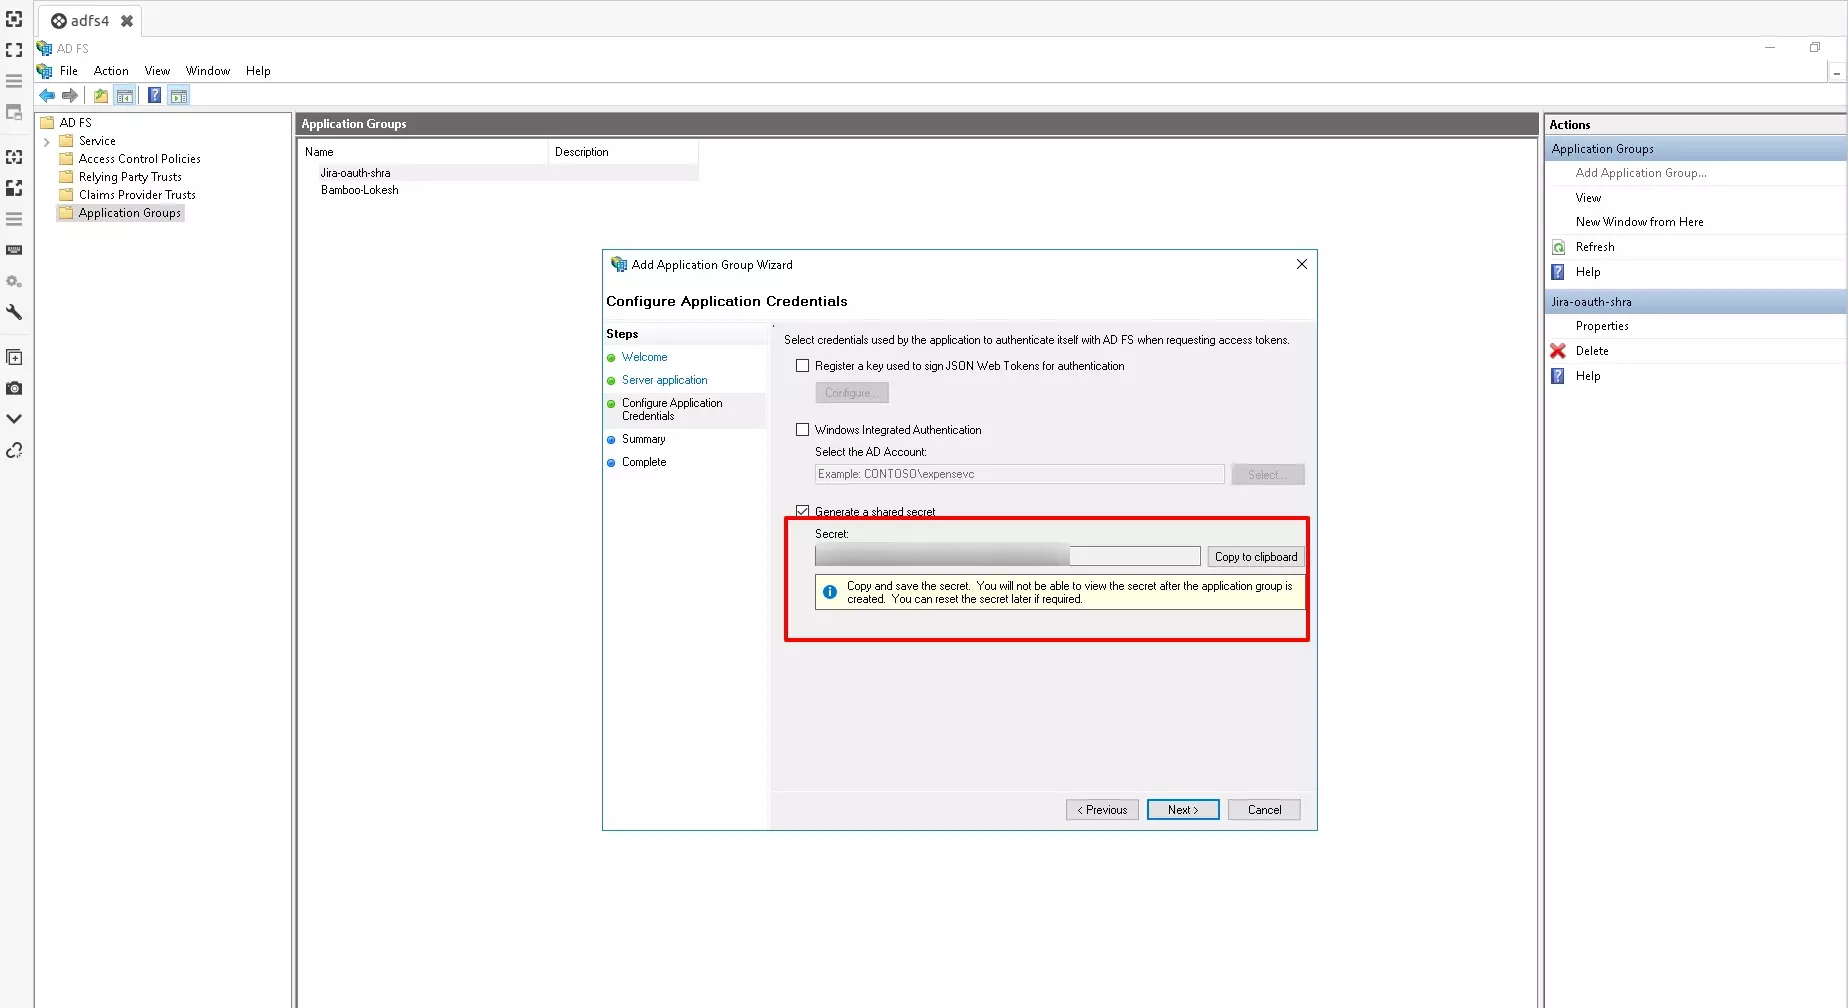
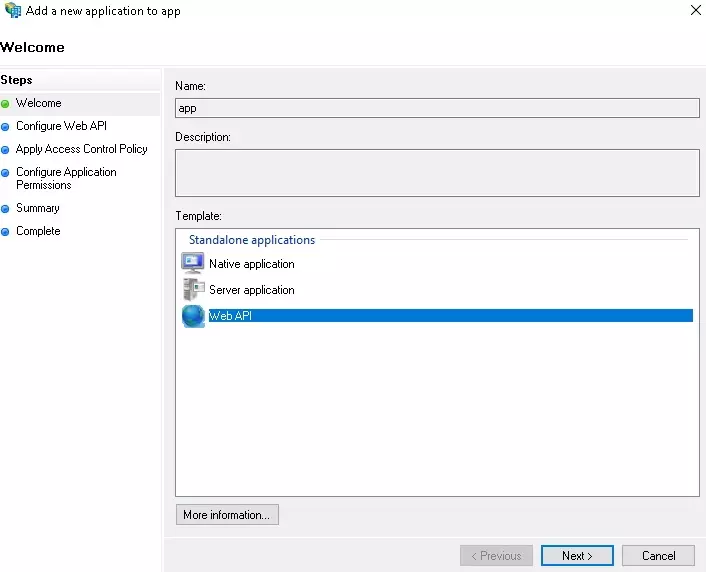
If you have already configured your application in miniOrange you can skip the following steps.

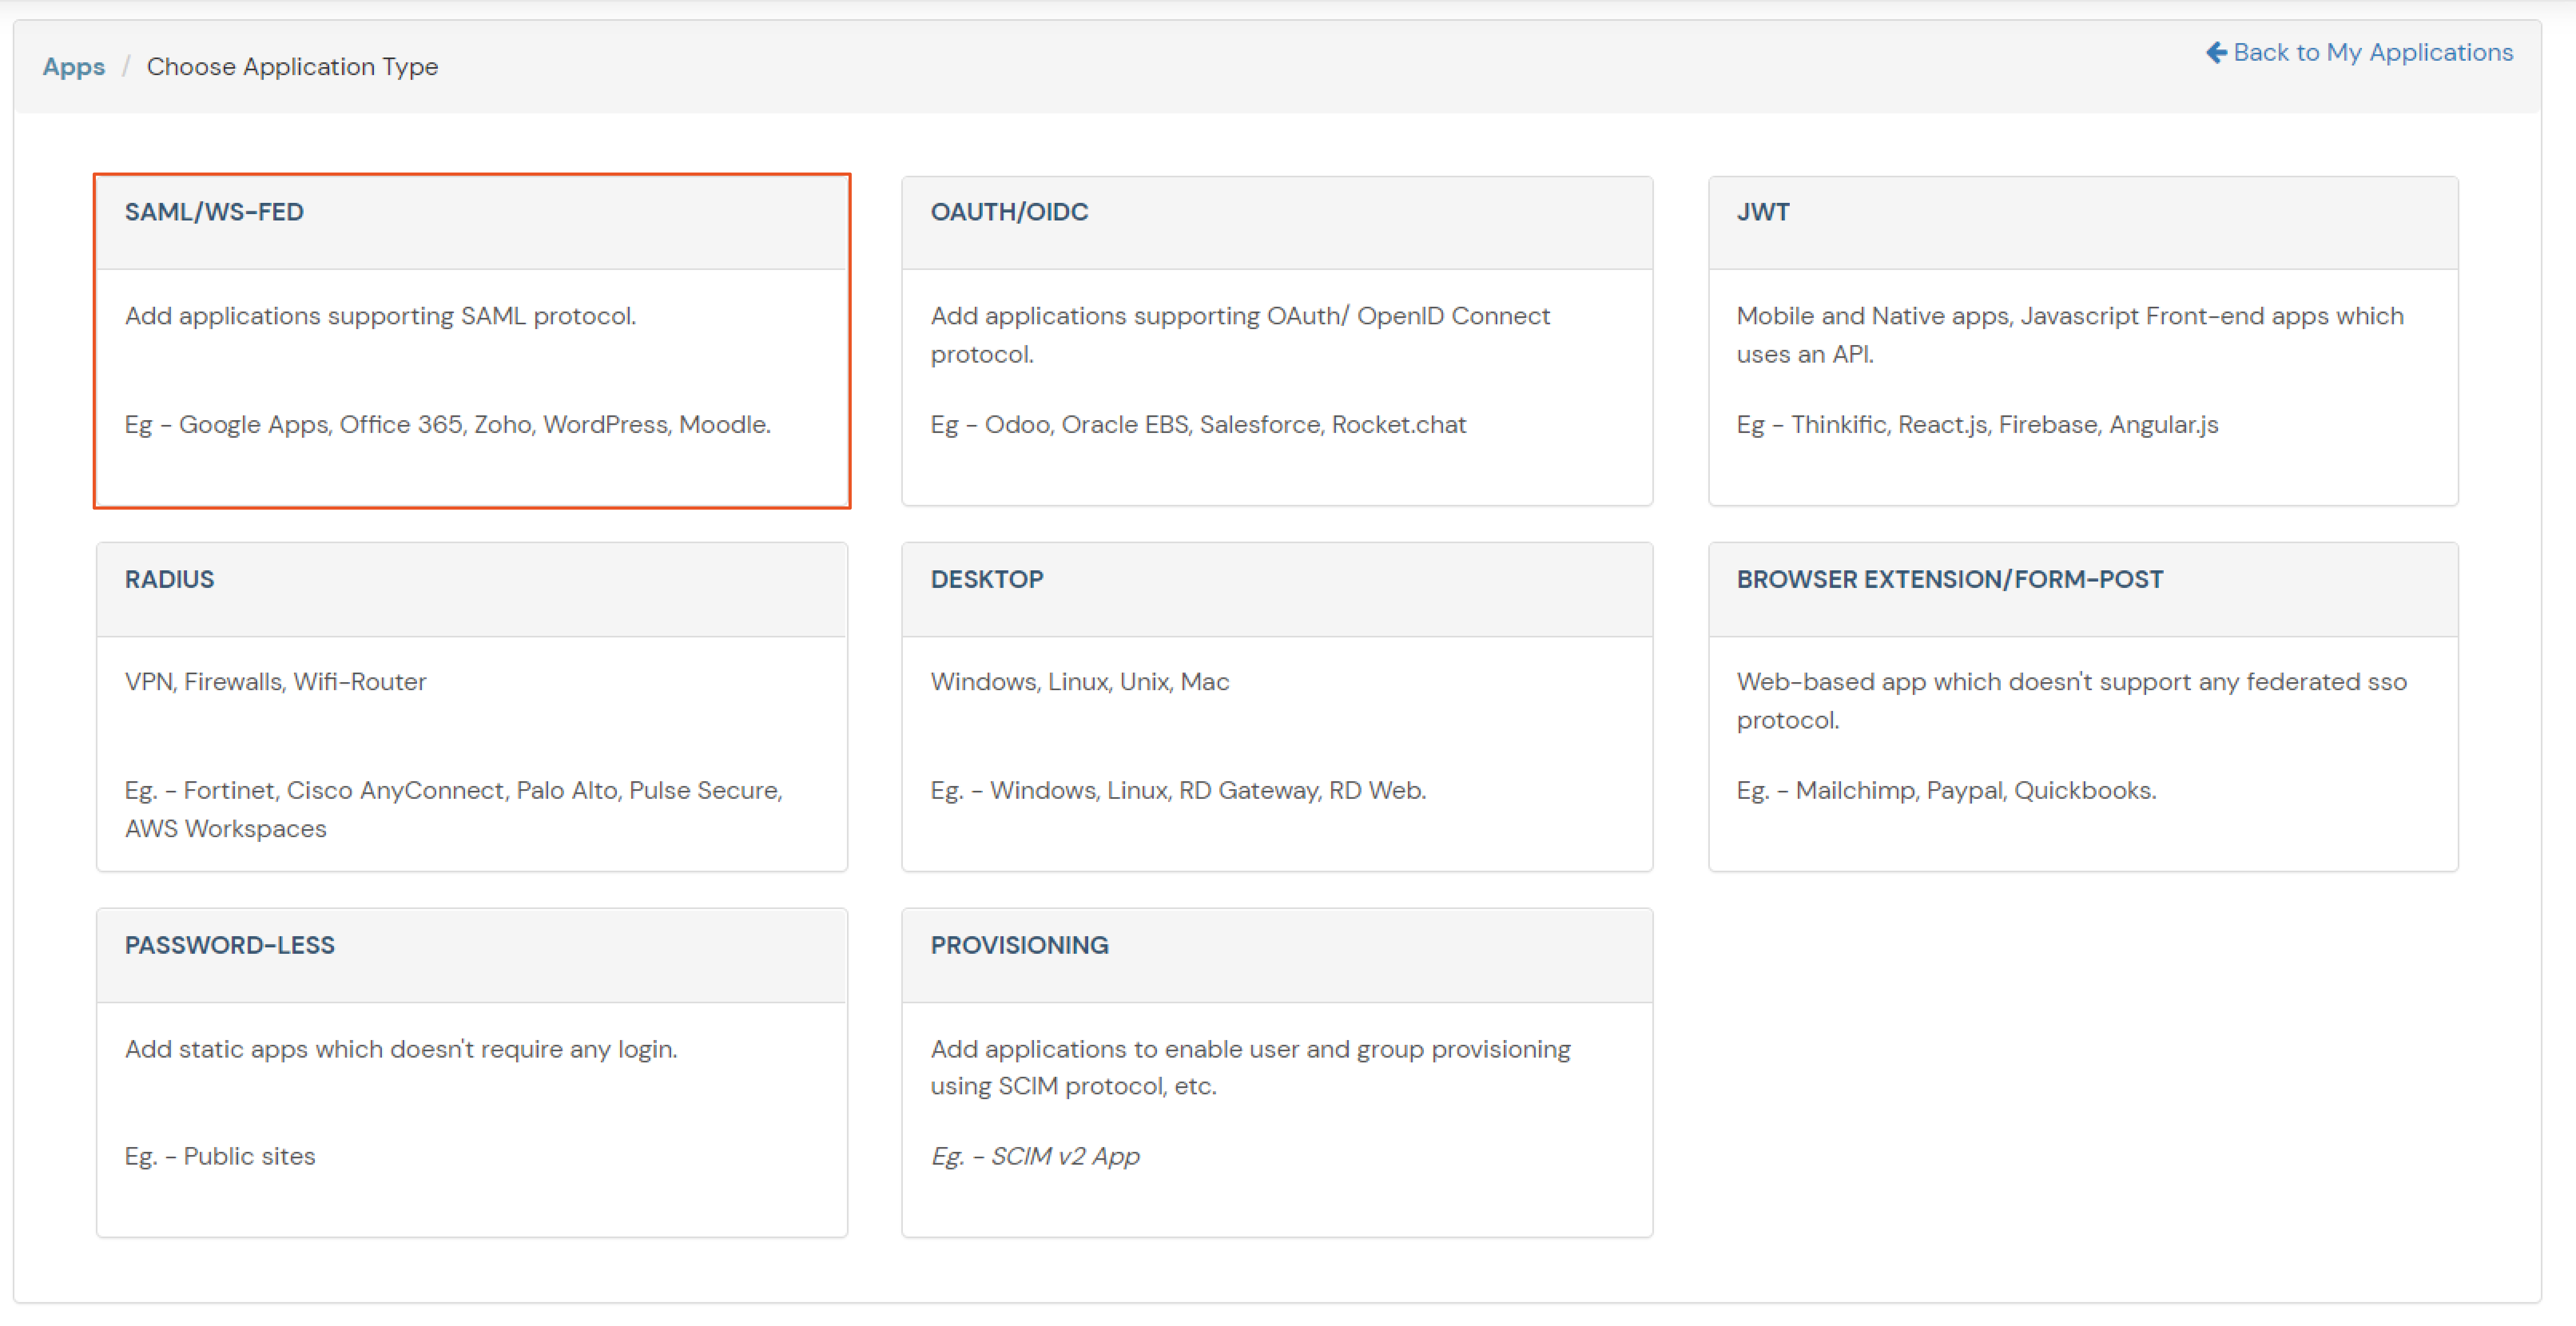
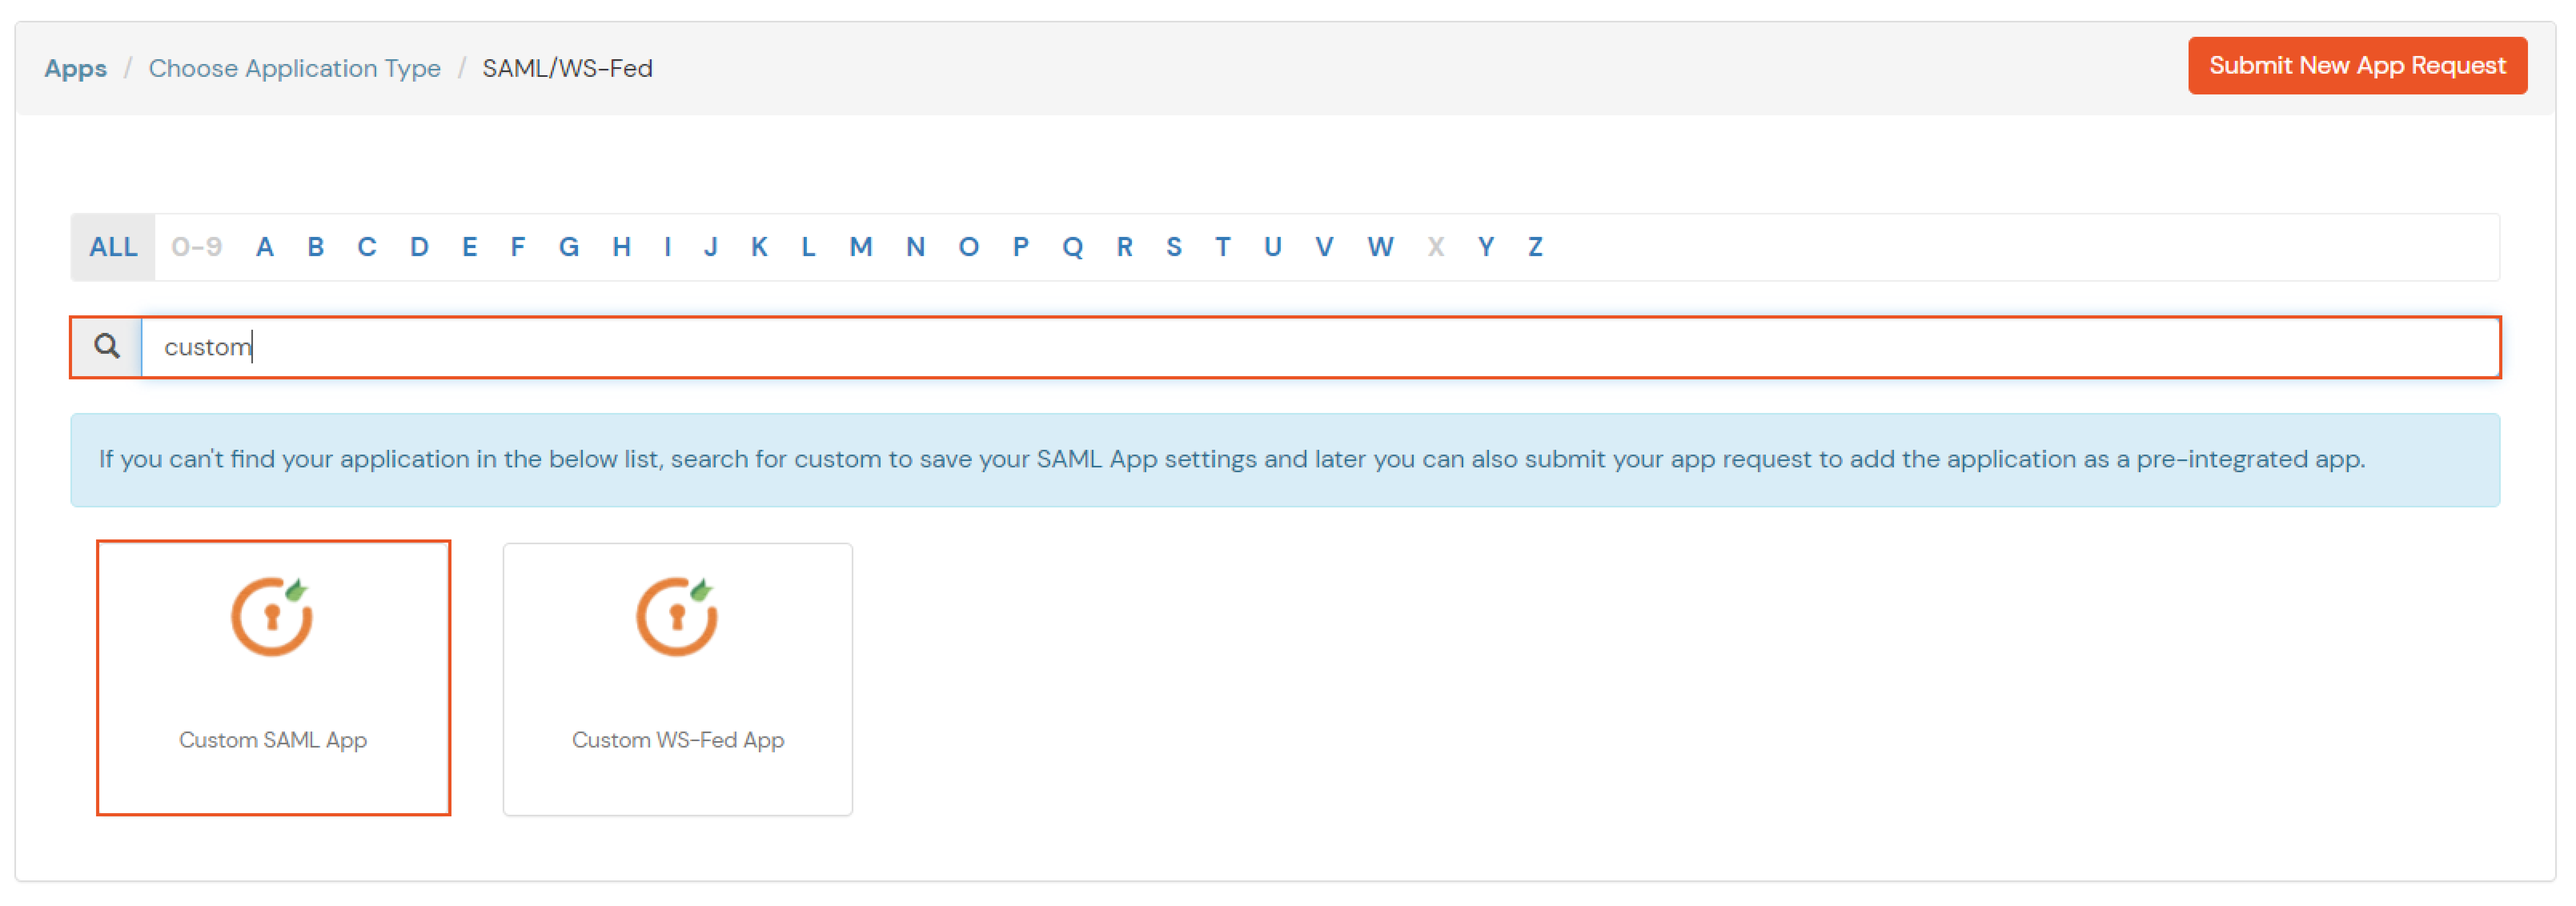
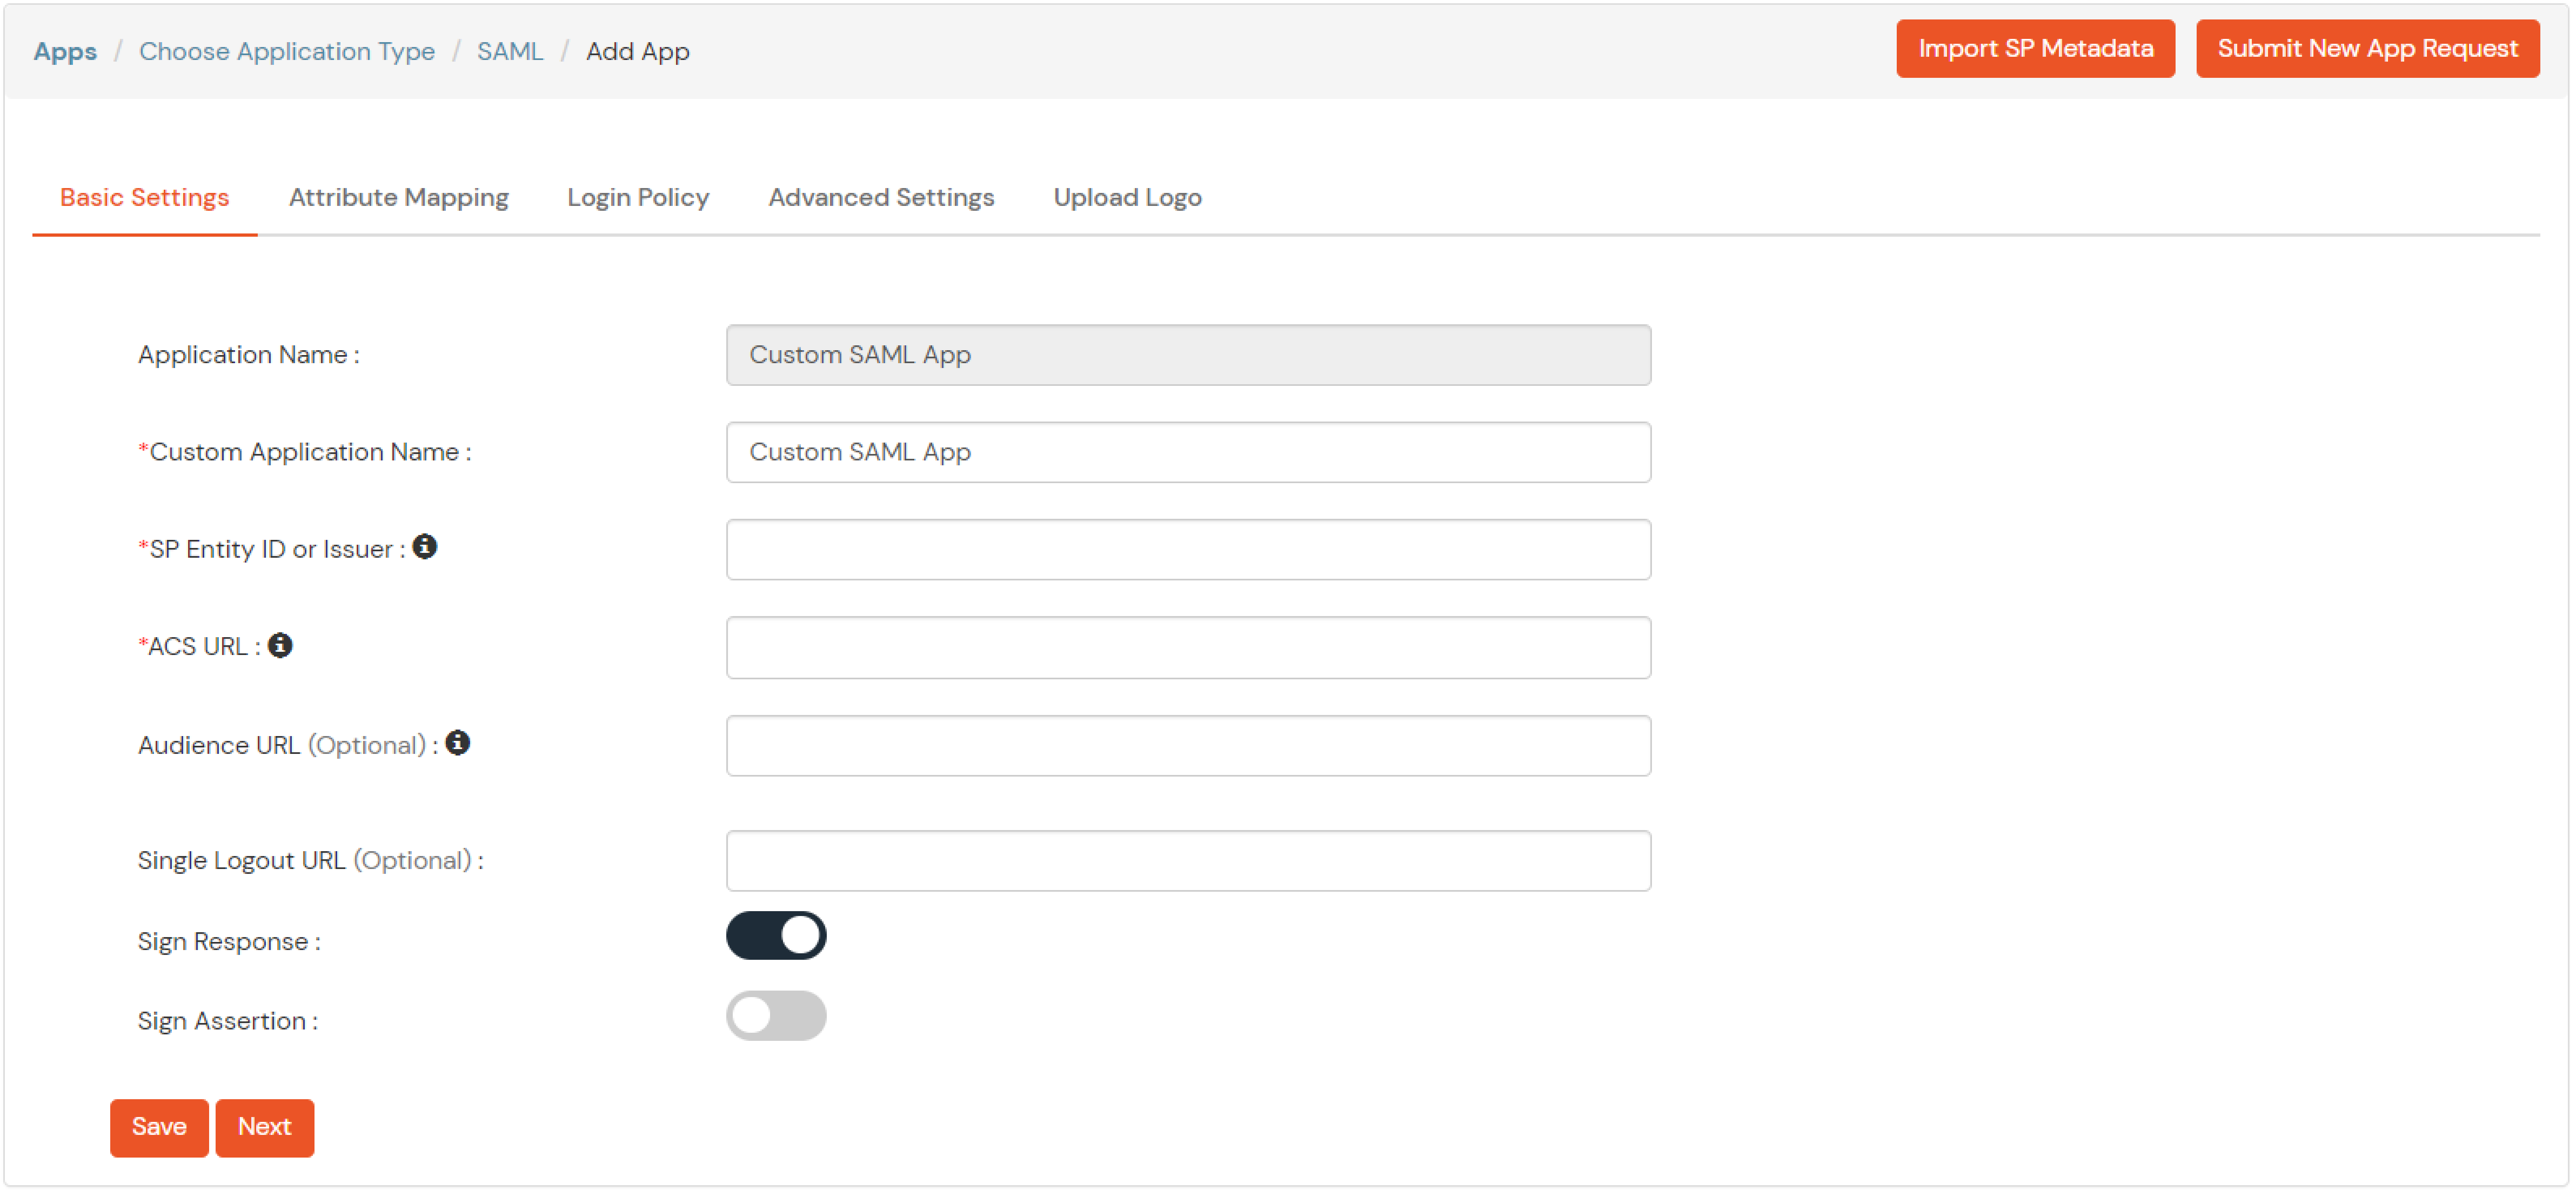
| Service Provider Name | Choose appropriate name according to your choice |
| SP Entity ID or Issuer | Your Application Entity ID |
| ACS URL X.509 Certificate (optional) | Your Application Assertion Consumer Service URL |
| NameID format | Select urn:oasis:names:tc:SAML:1.1:nameid-format:emailAddress |
| Response Signed | Unchecked |
| Assertion Signed | Checked |
| Encrypted Assertion | Unchecked |
| Group policy | Default |
| Login Method | Password |


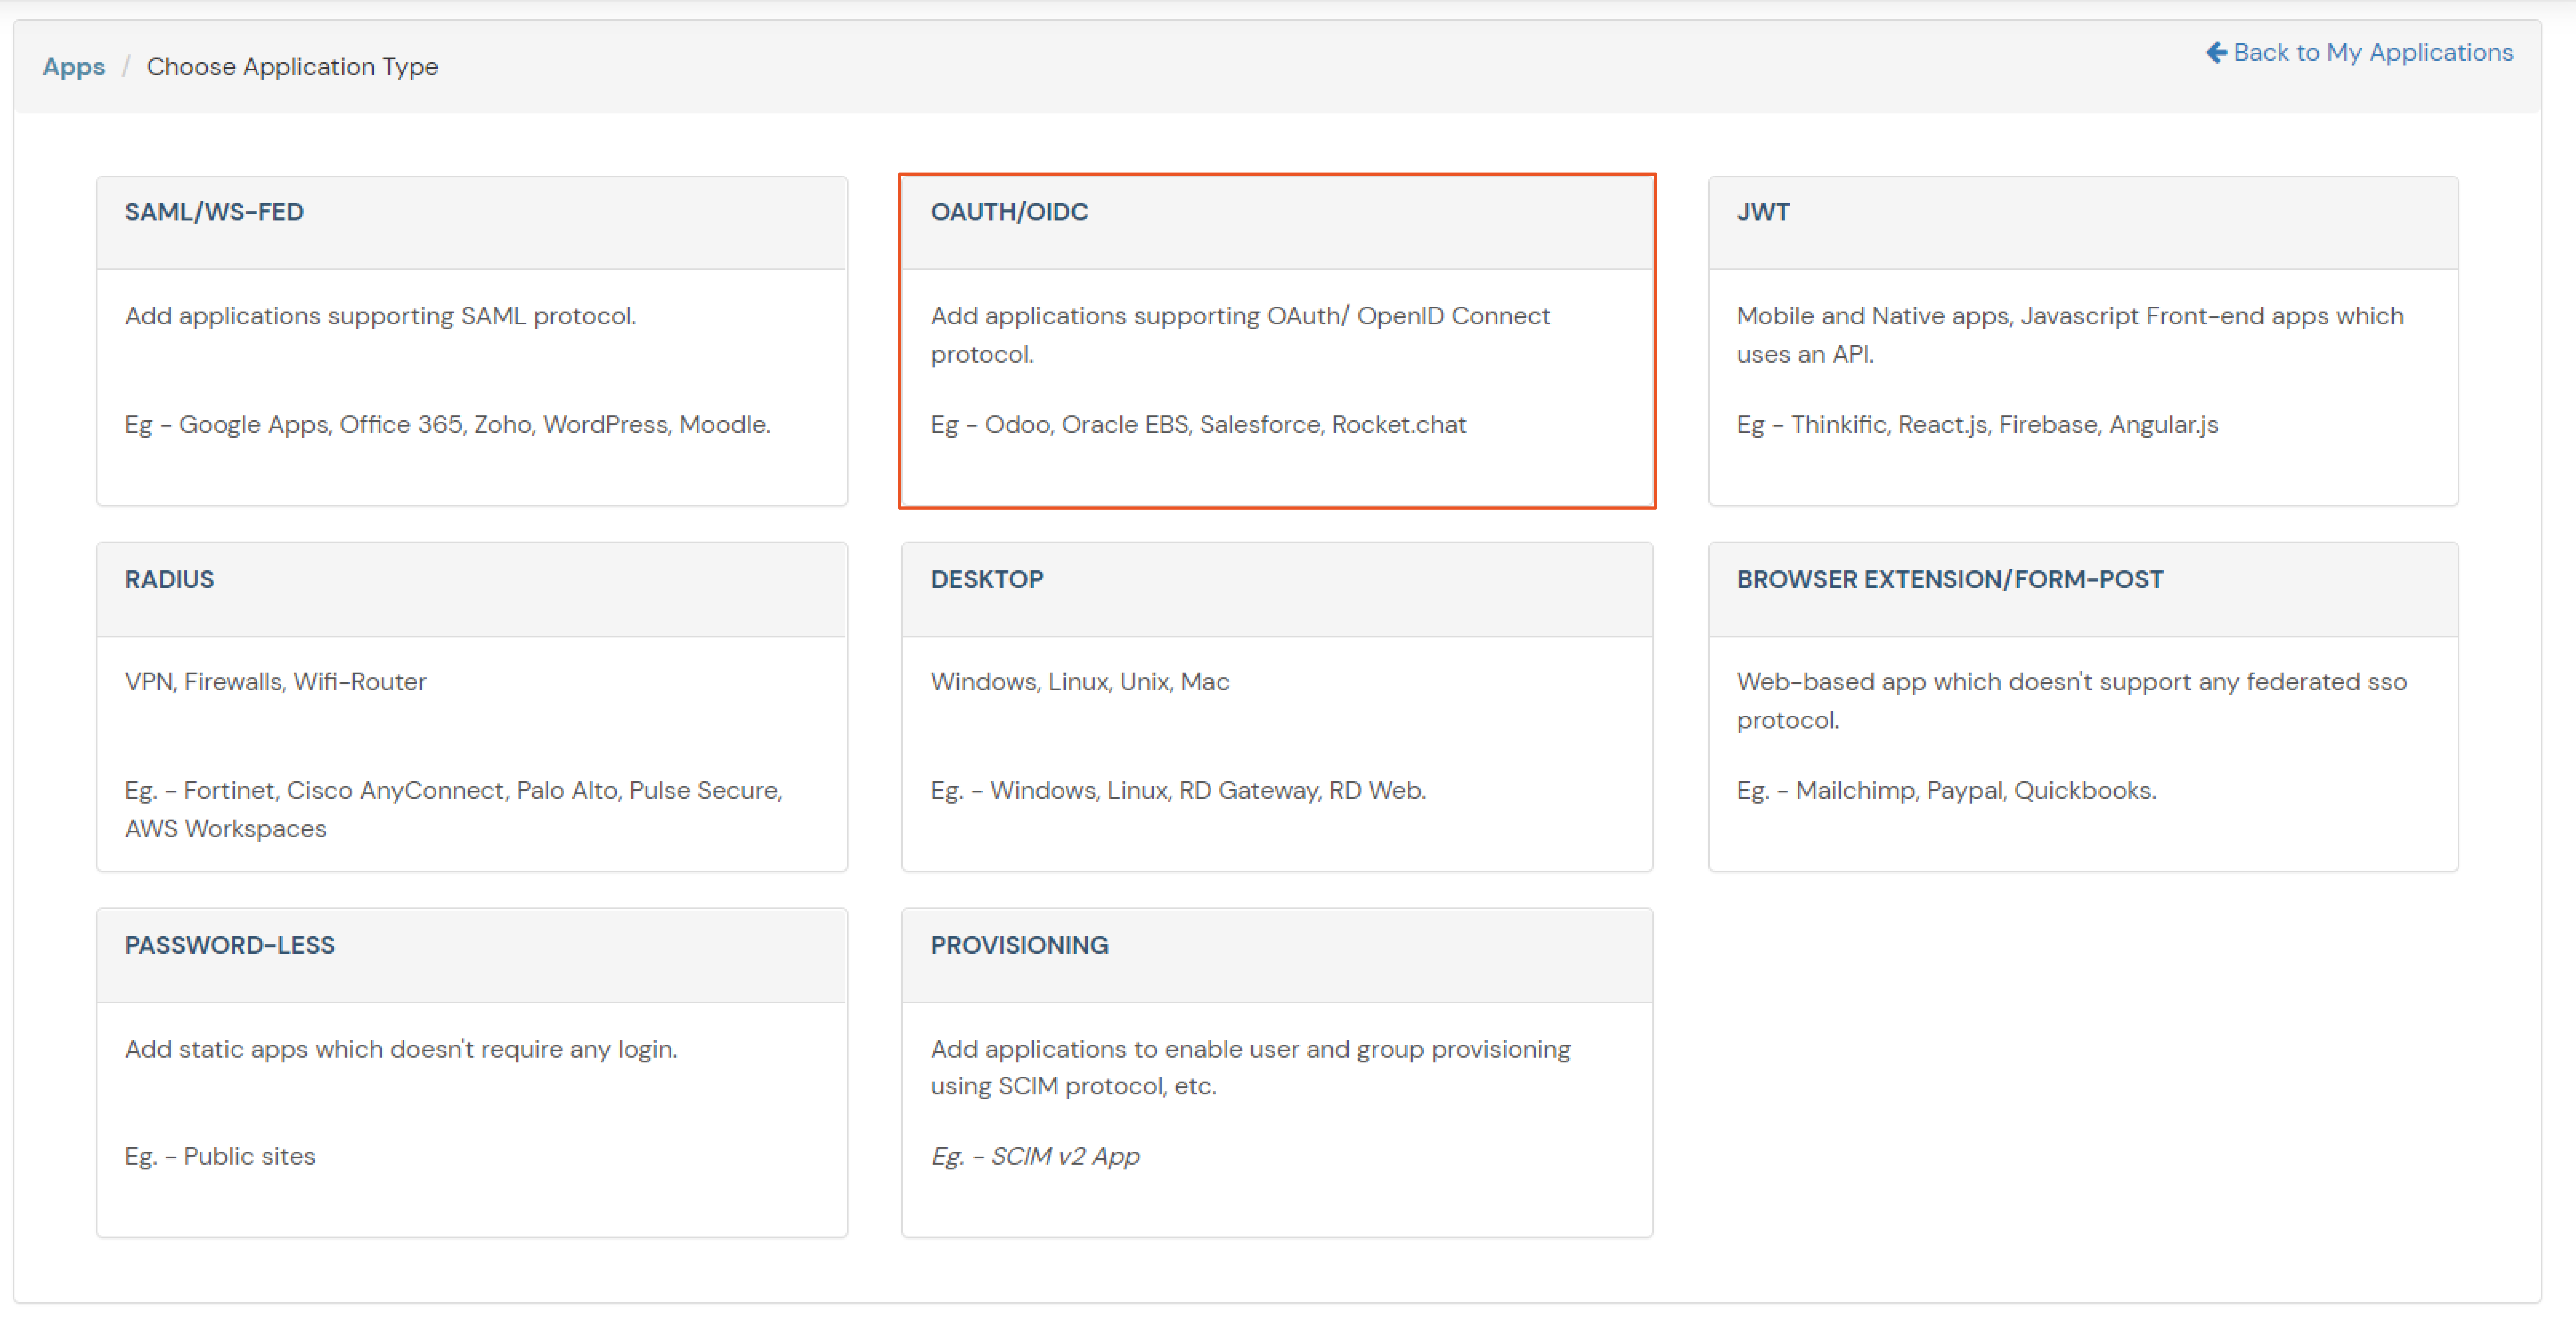
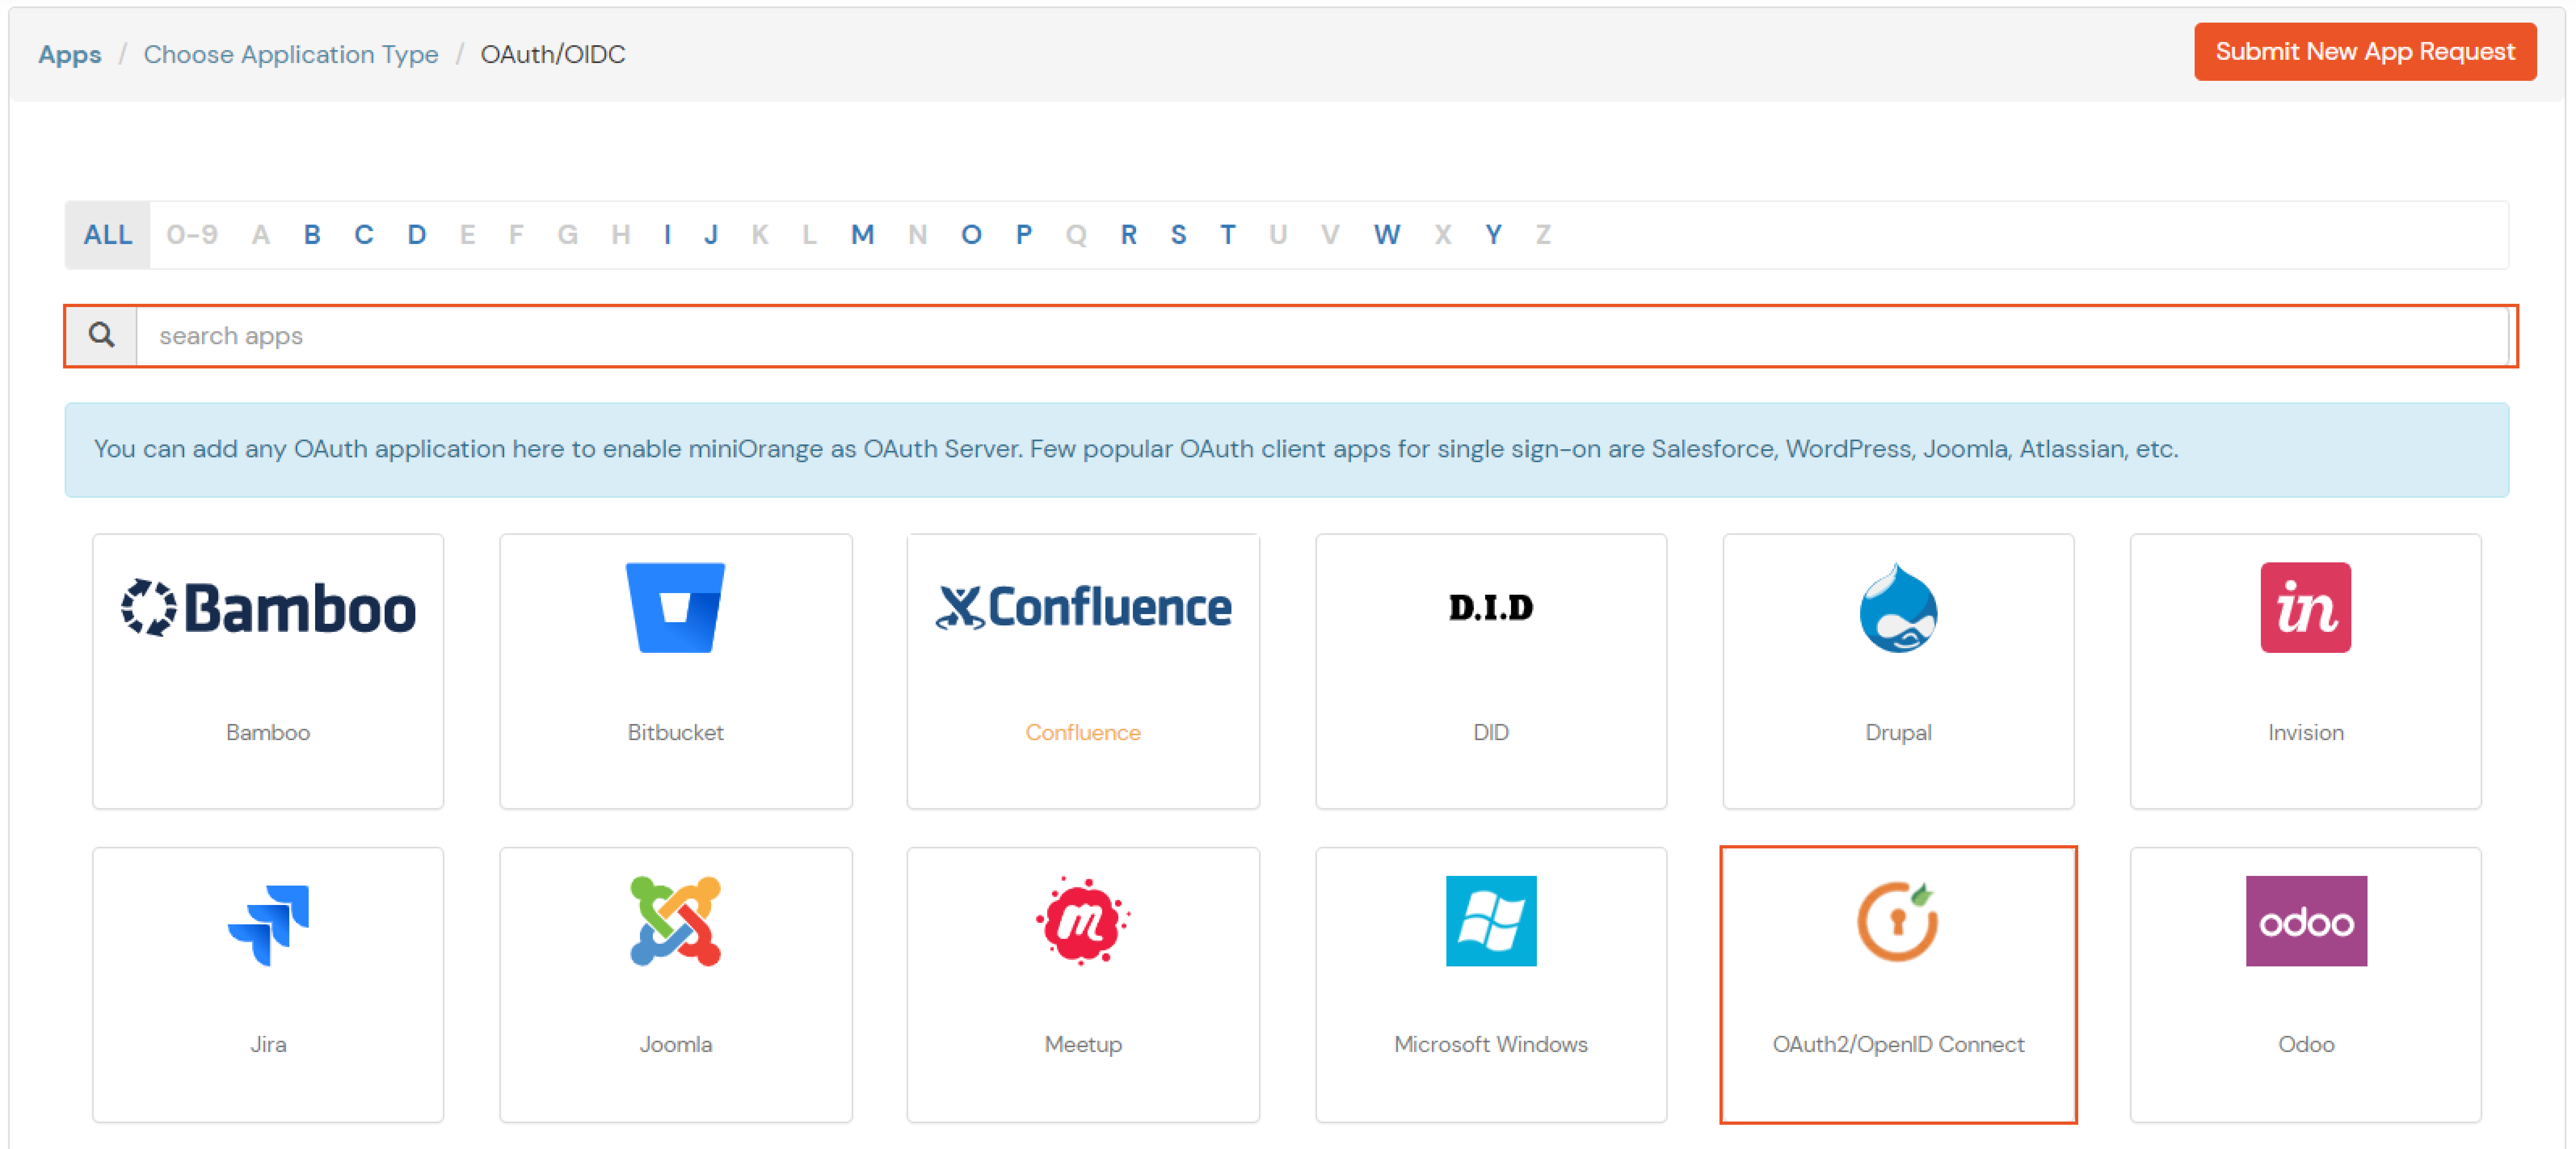
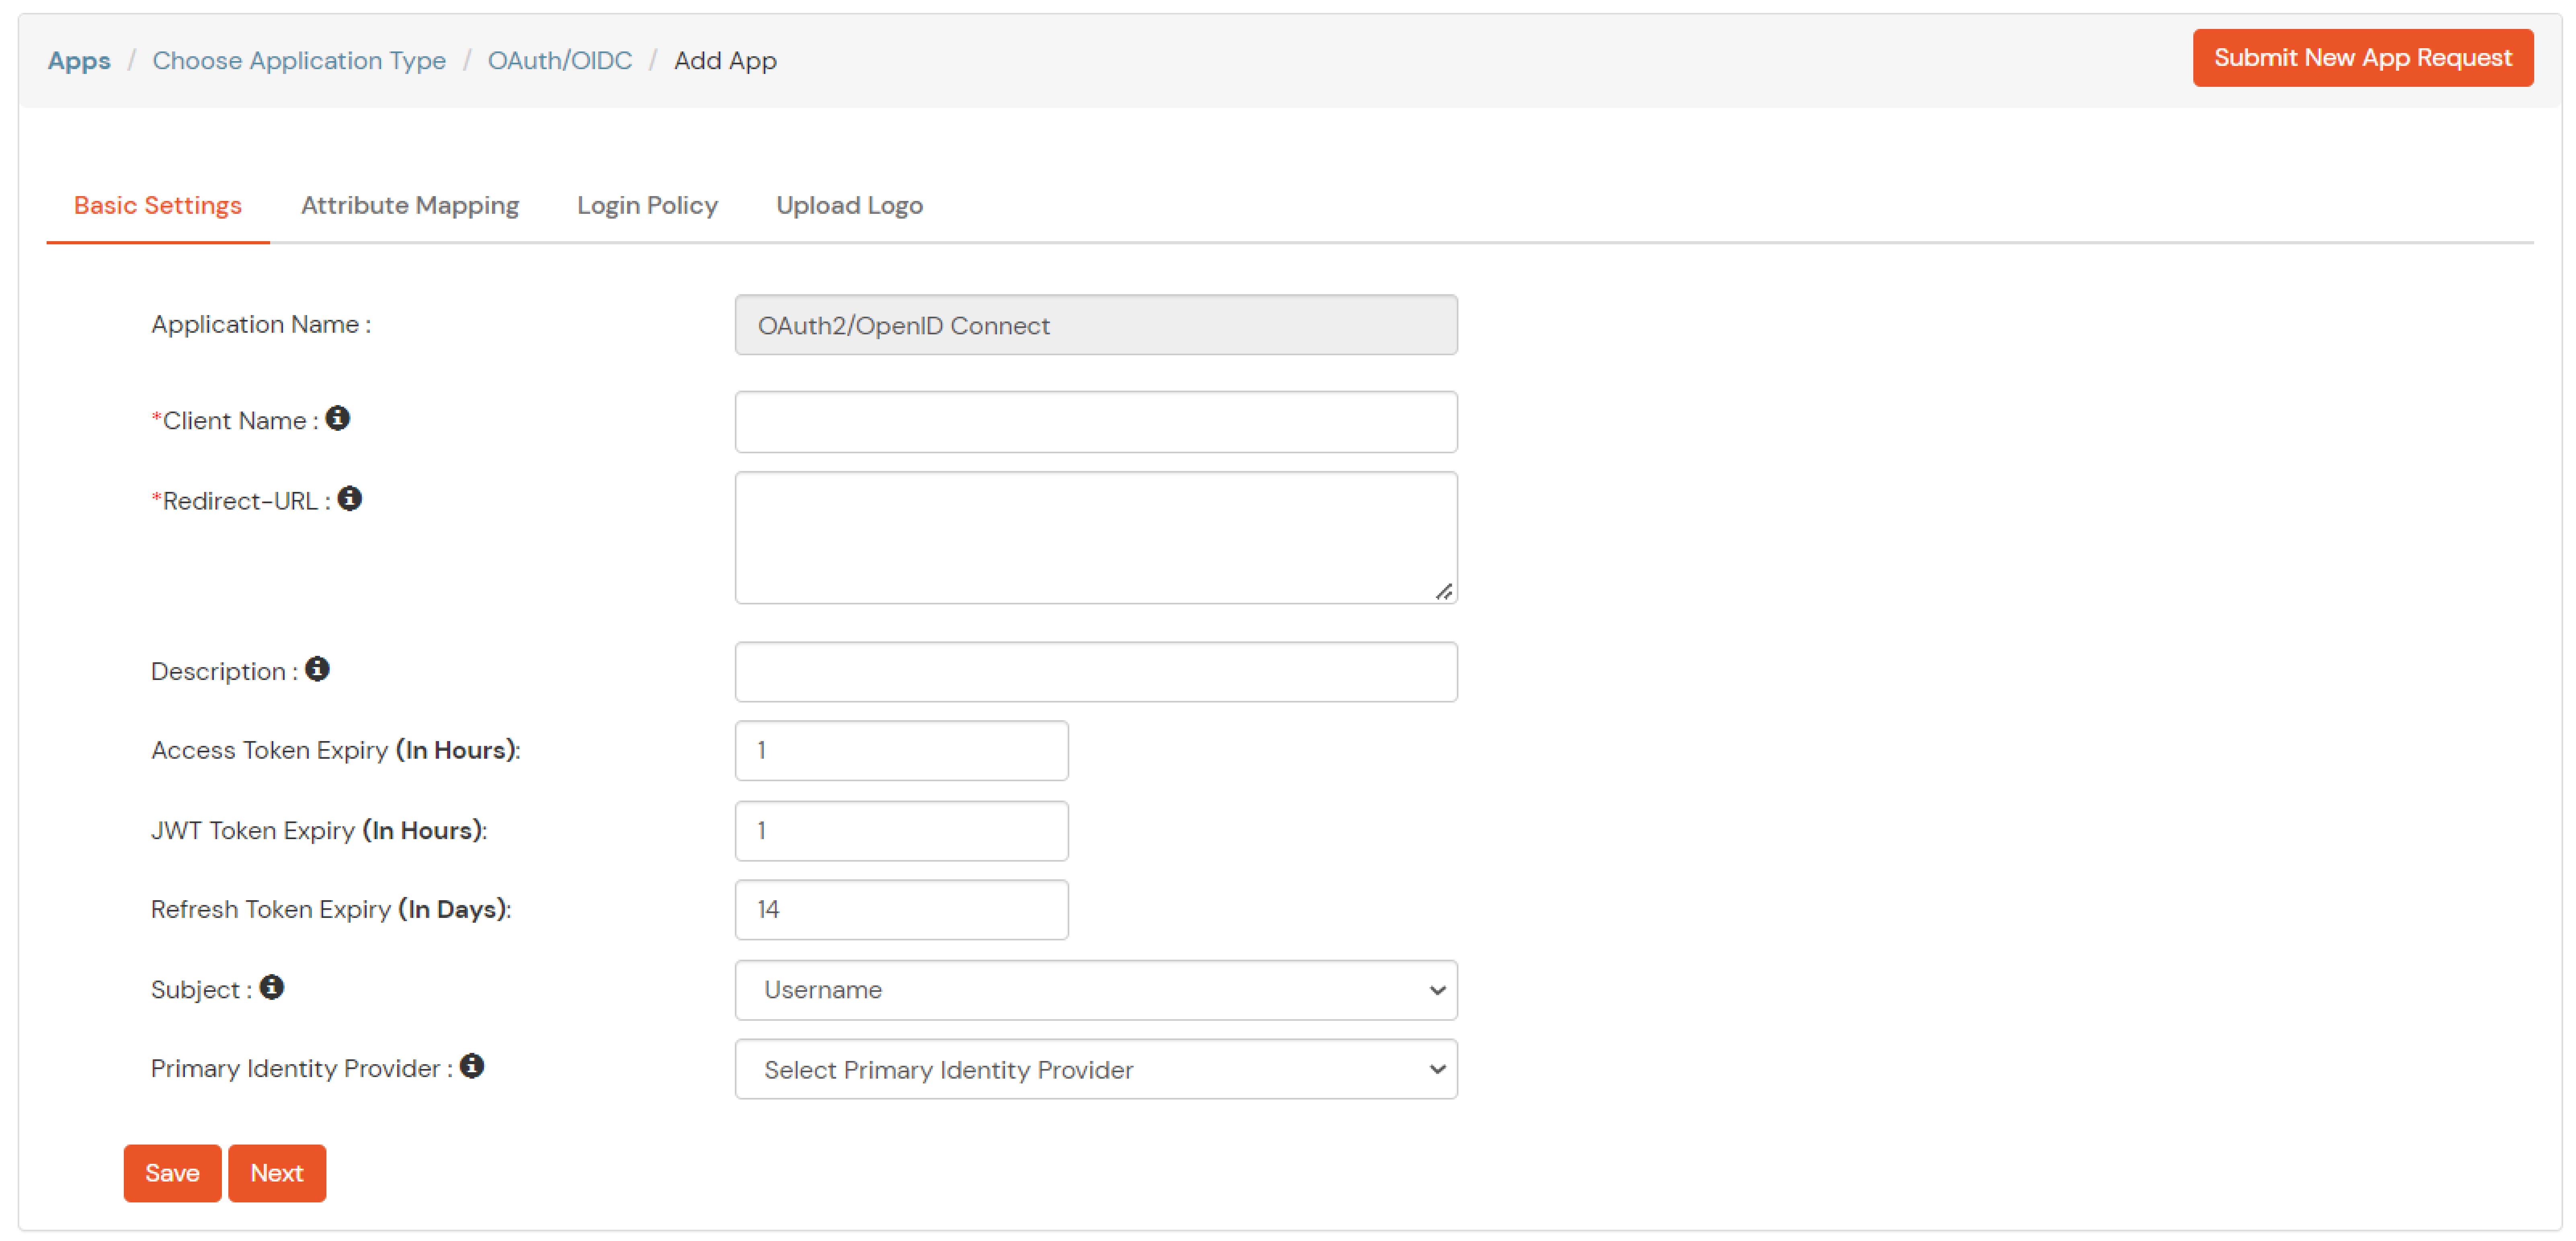
| Client Name | Add appropriate Name |
| Redirect URL | Get the Redirect-URL from your OAuth Client |
| Description | Add if required |
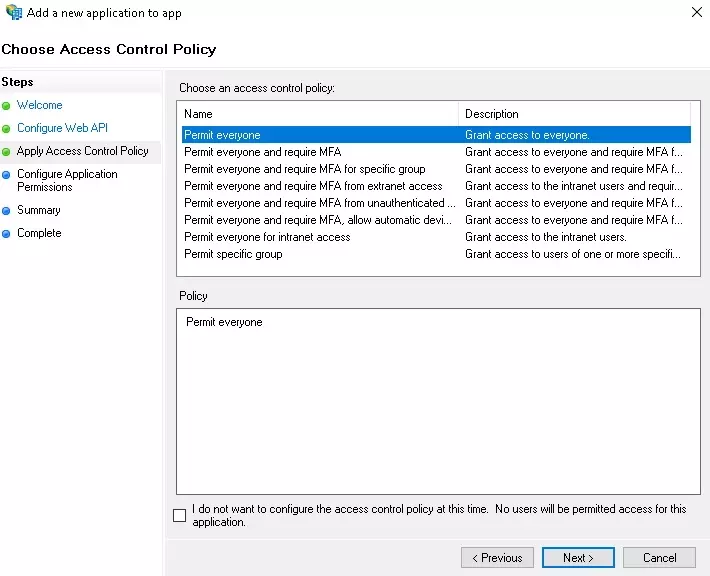
| Group Name | Default |
| Policy Name | As per your Choice |
| Login Method | Password |

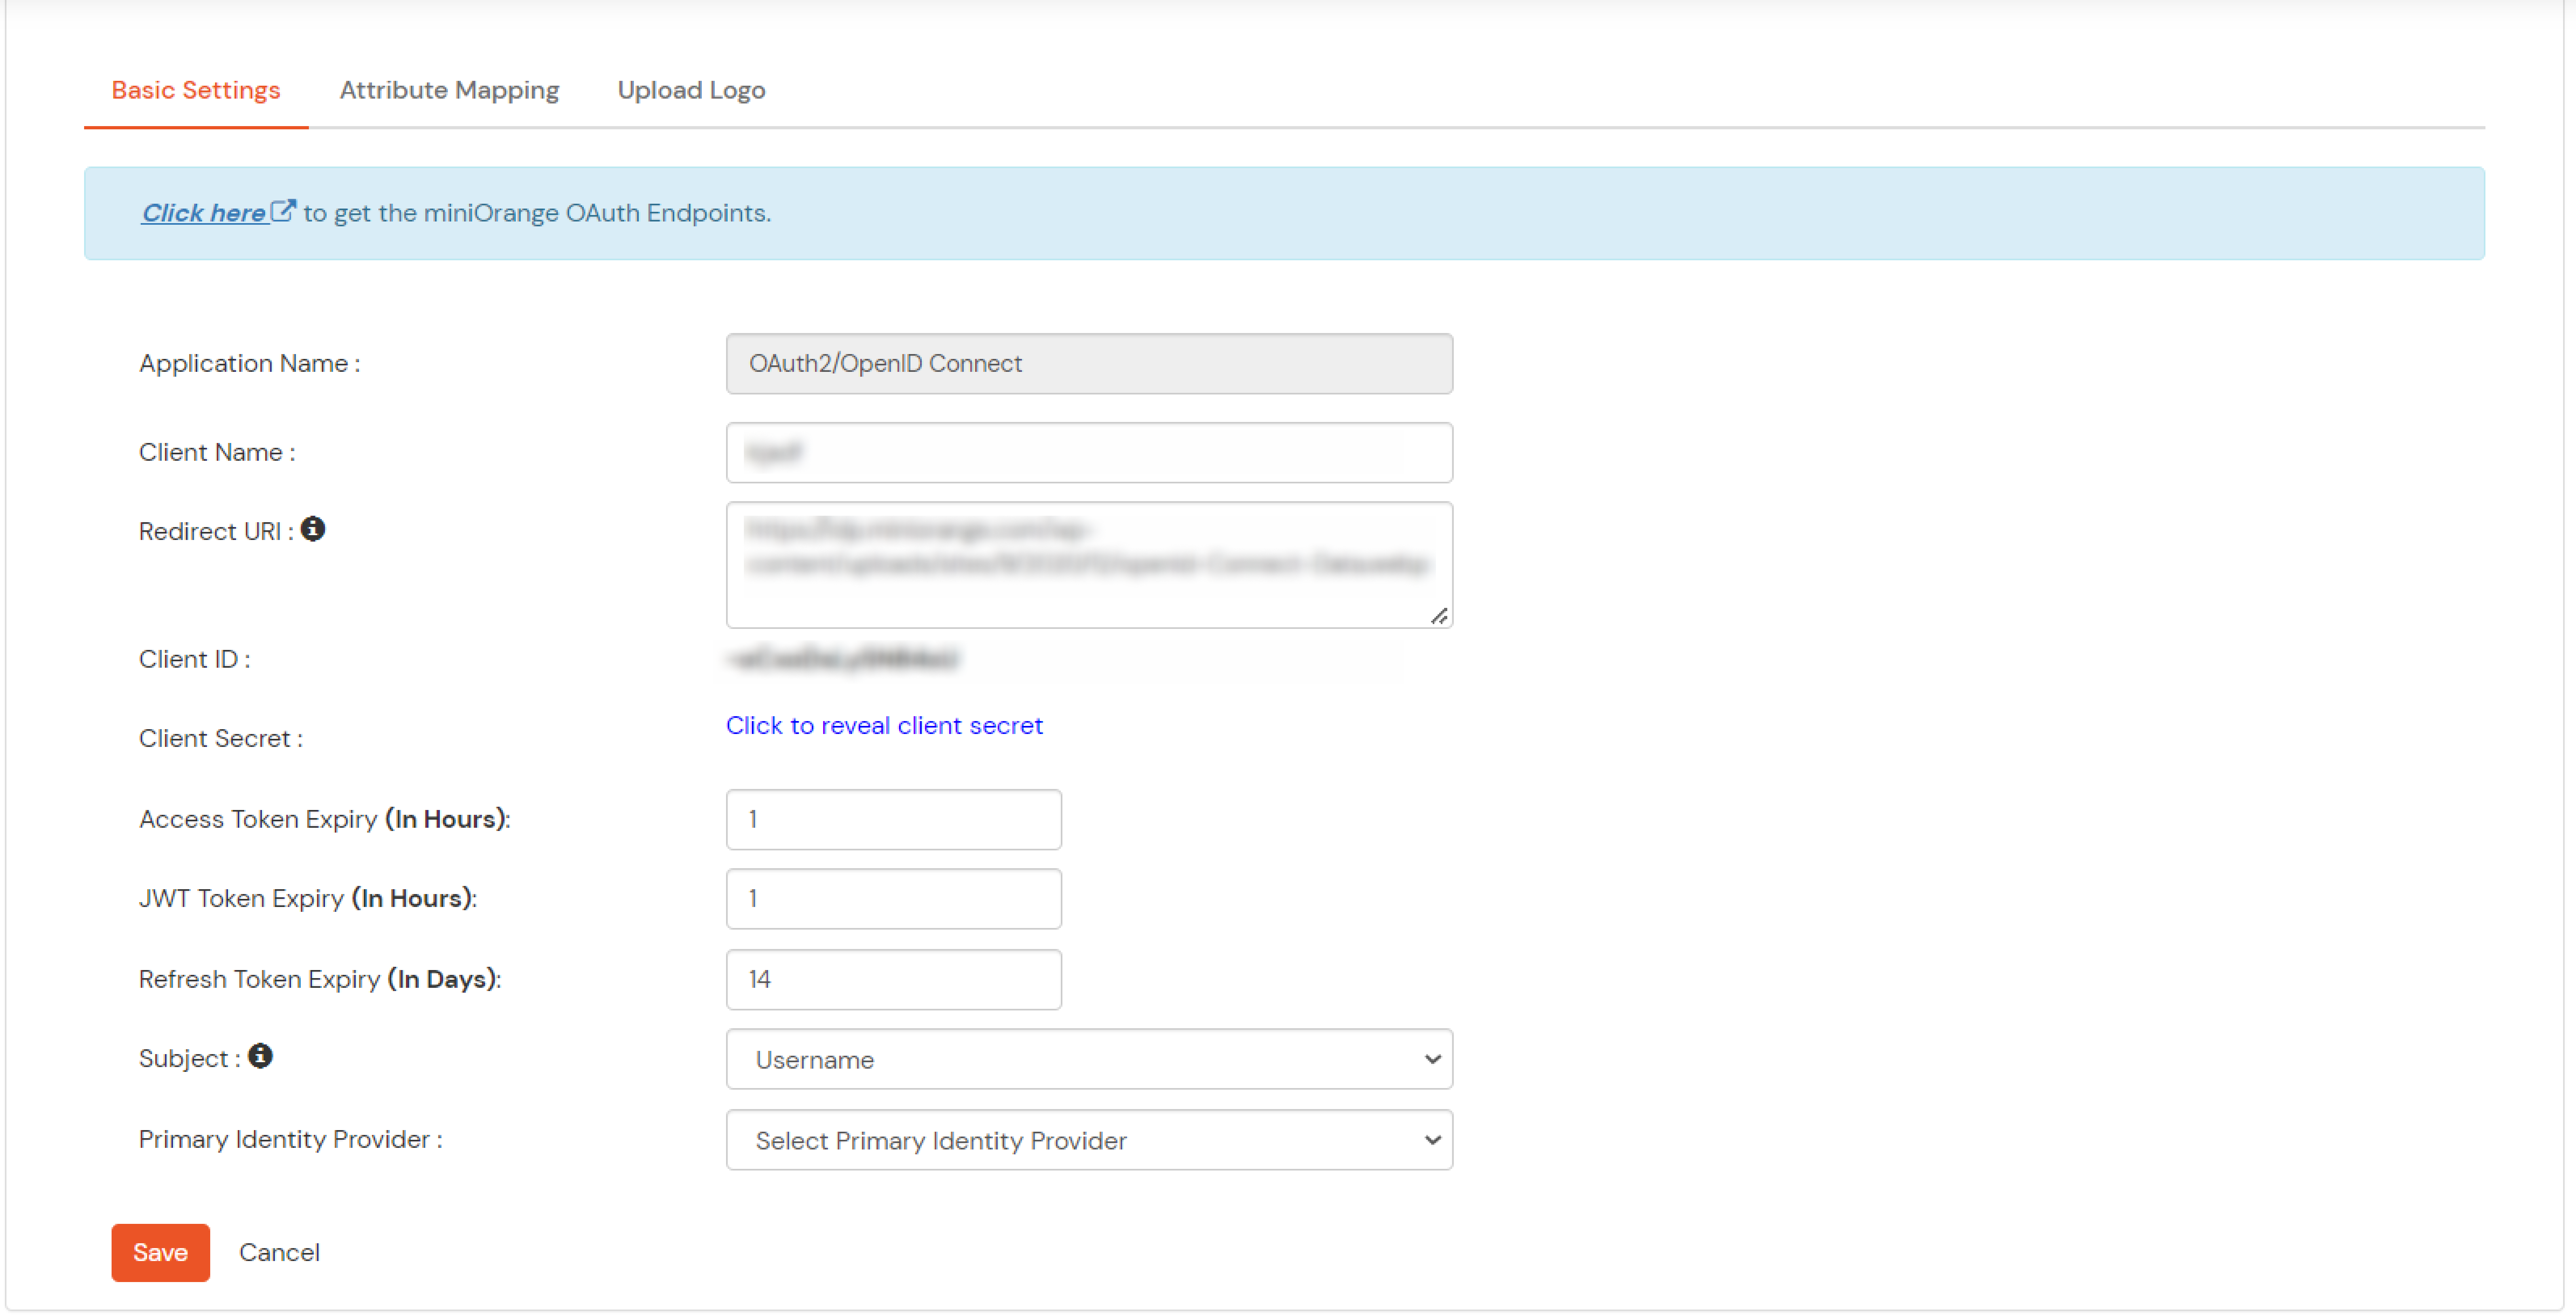
Note: Choose the Authorization Endpoint according to the identity source you configure.
https://{mycompany.domainname.com}/moas/idp/openidssohttps://{mycompany.domainname.com}/broker/login/oauth{customerid}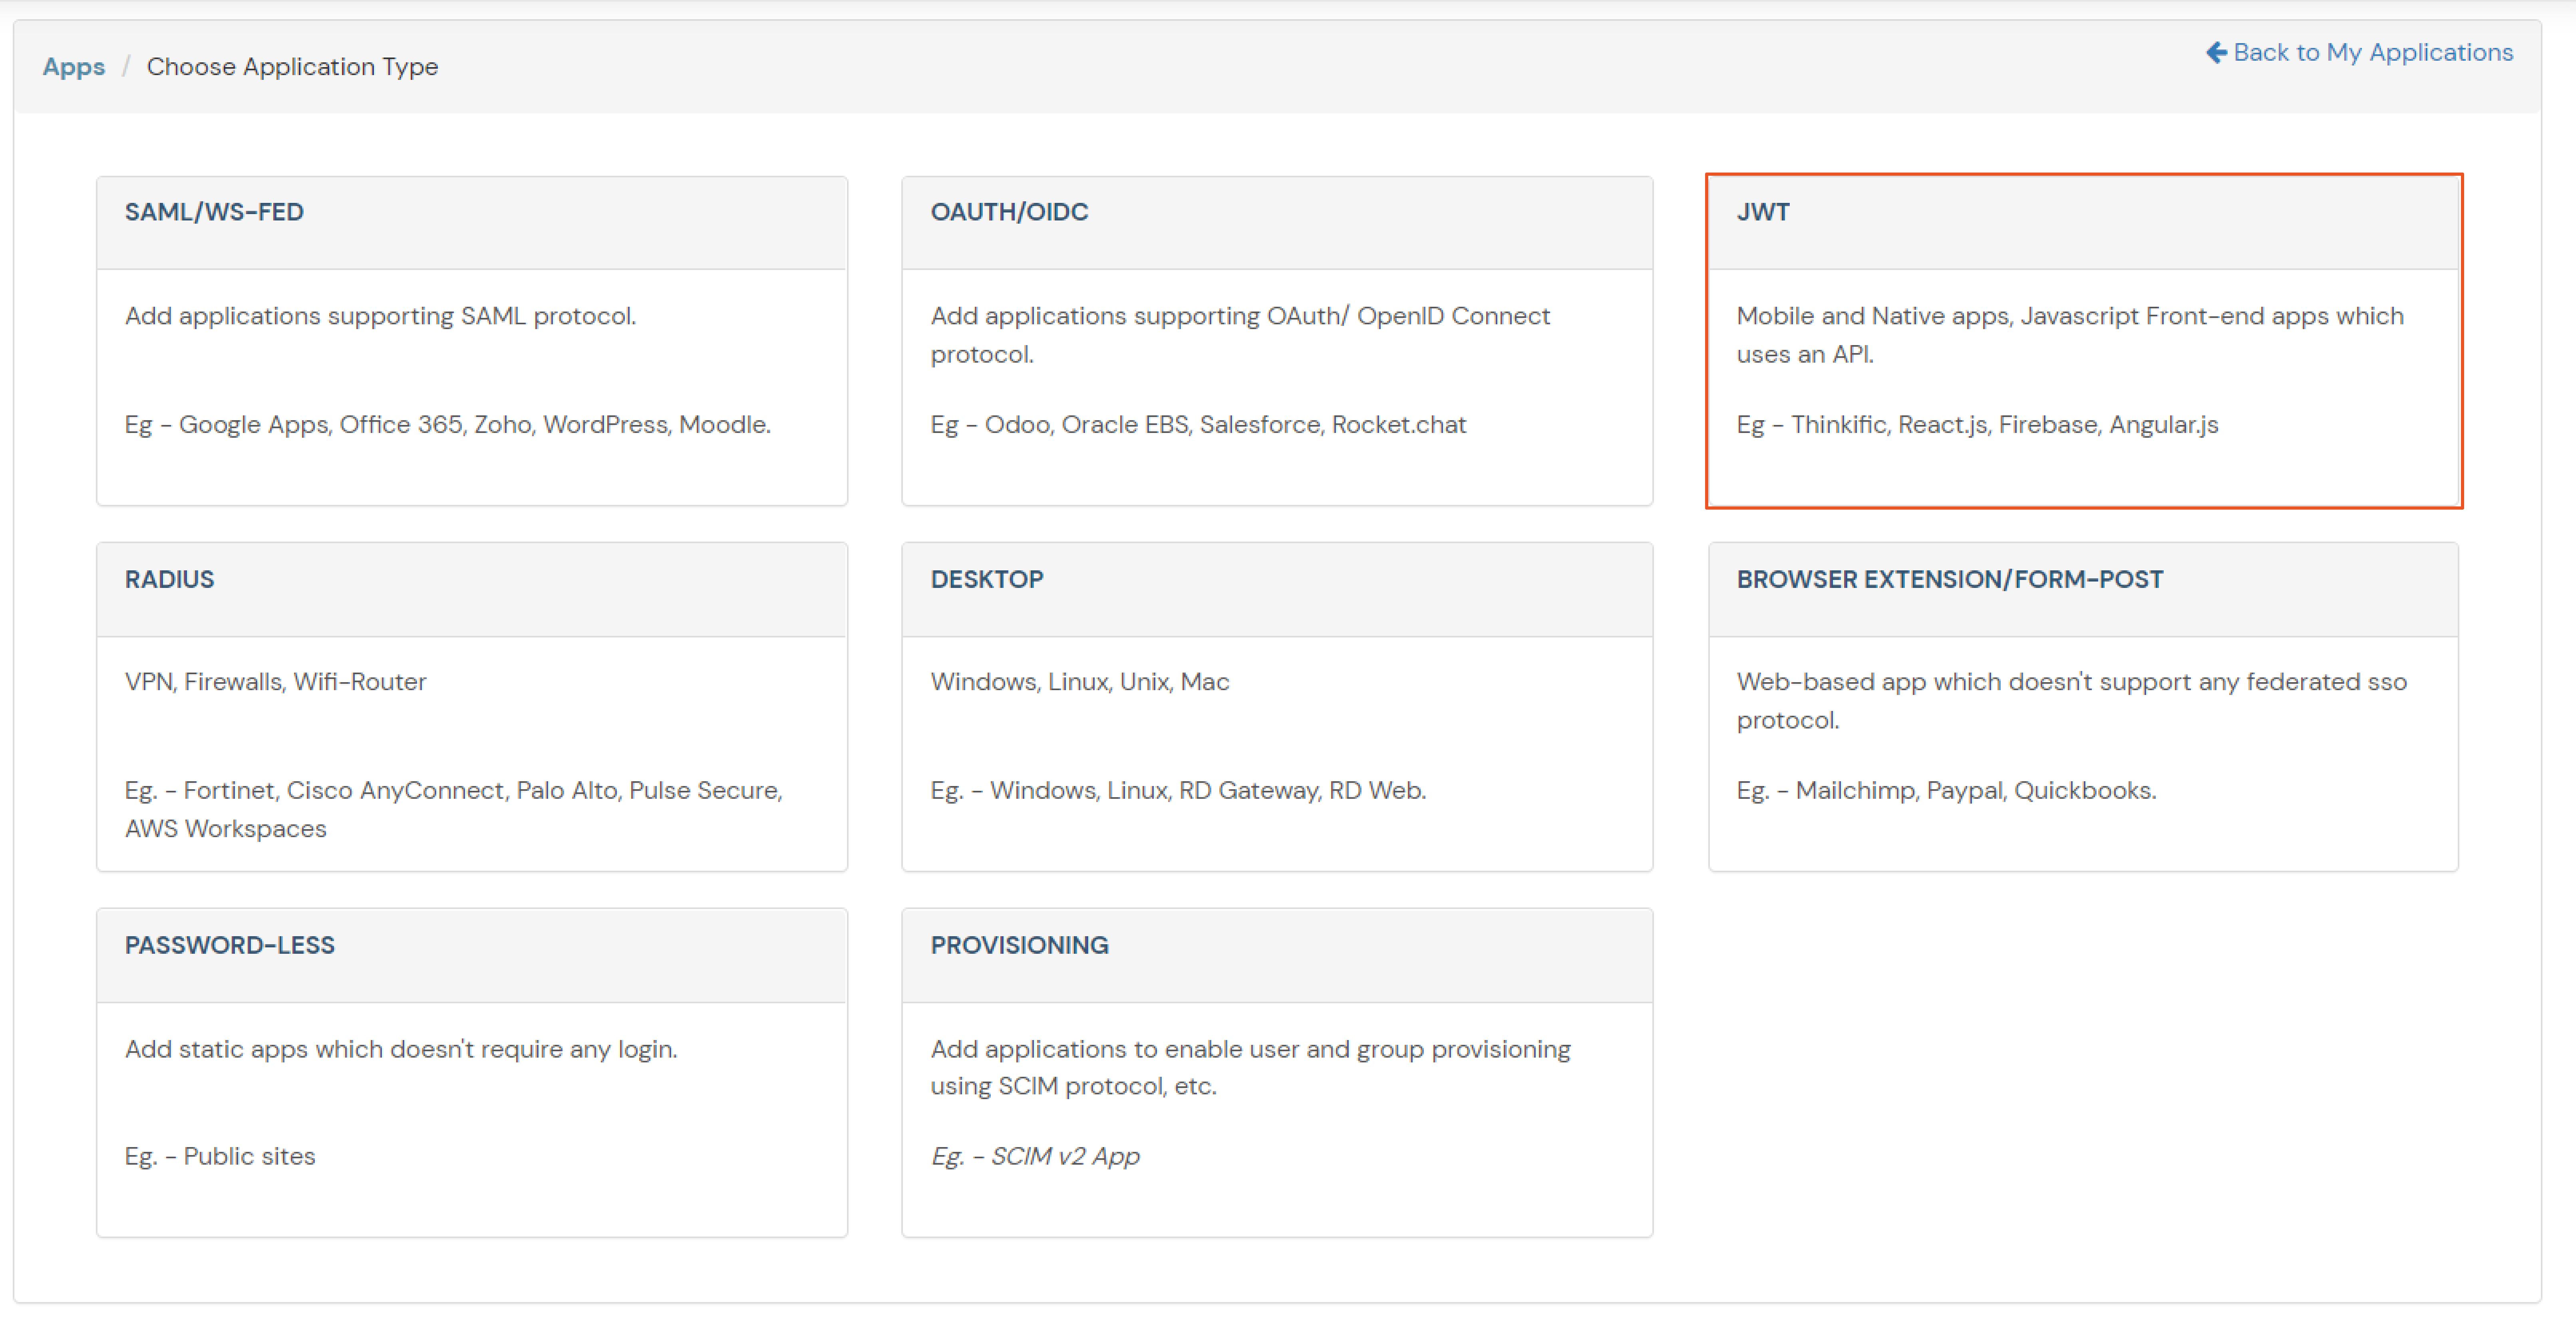
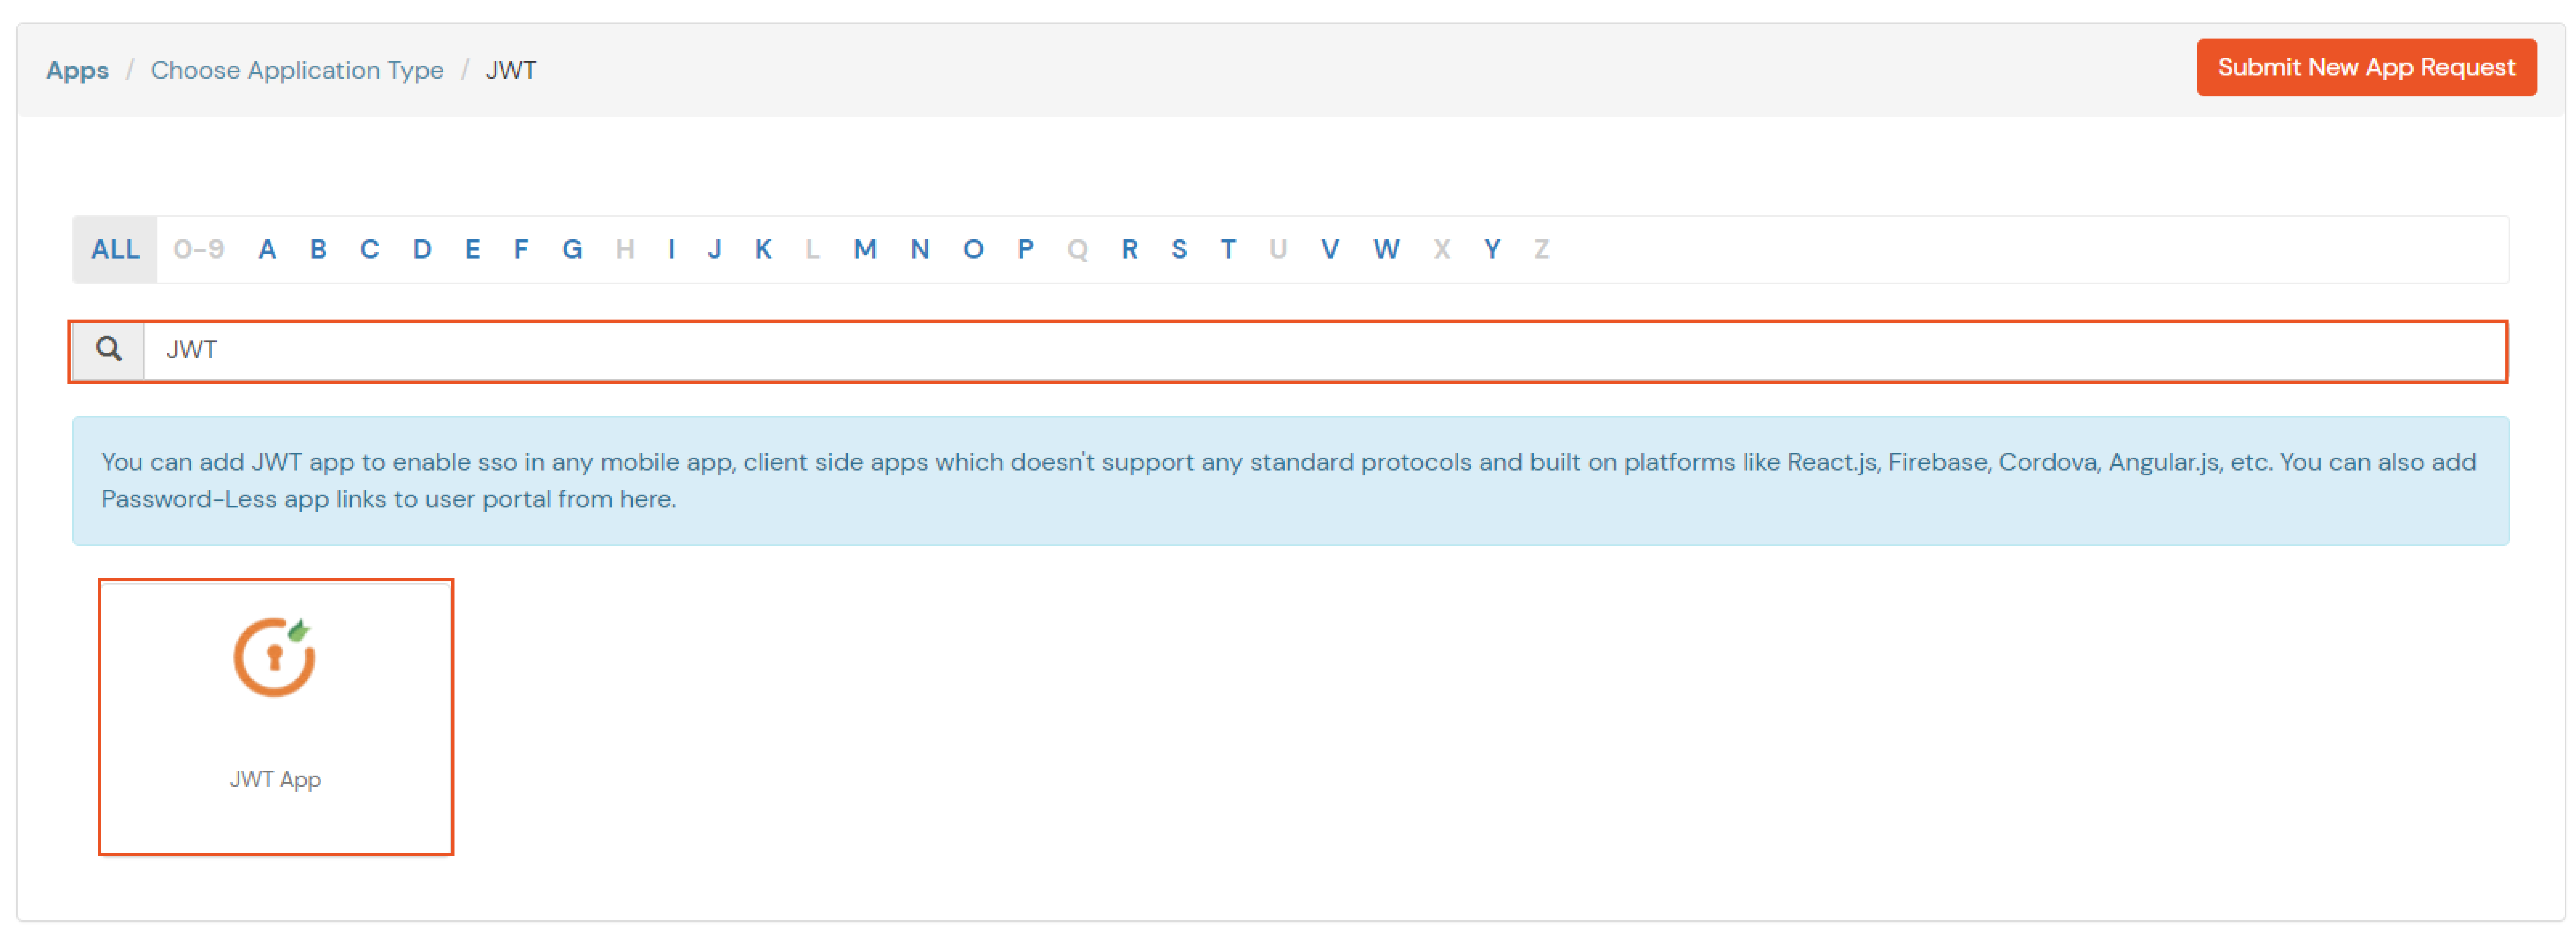
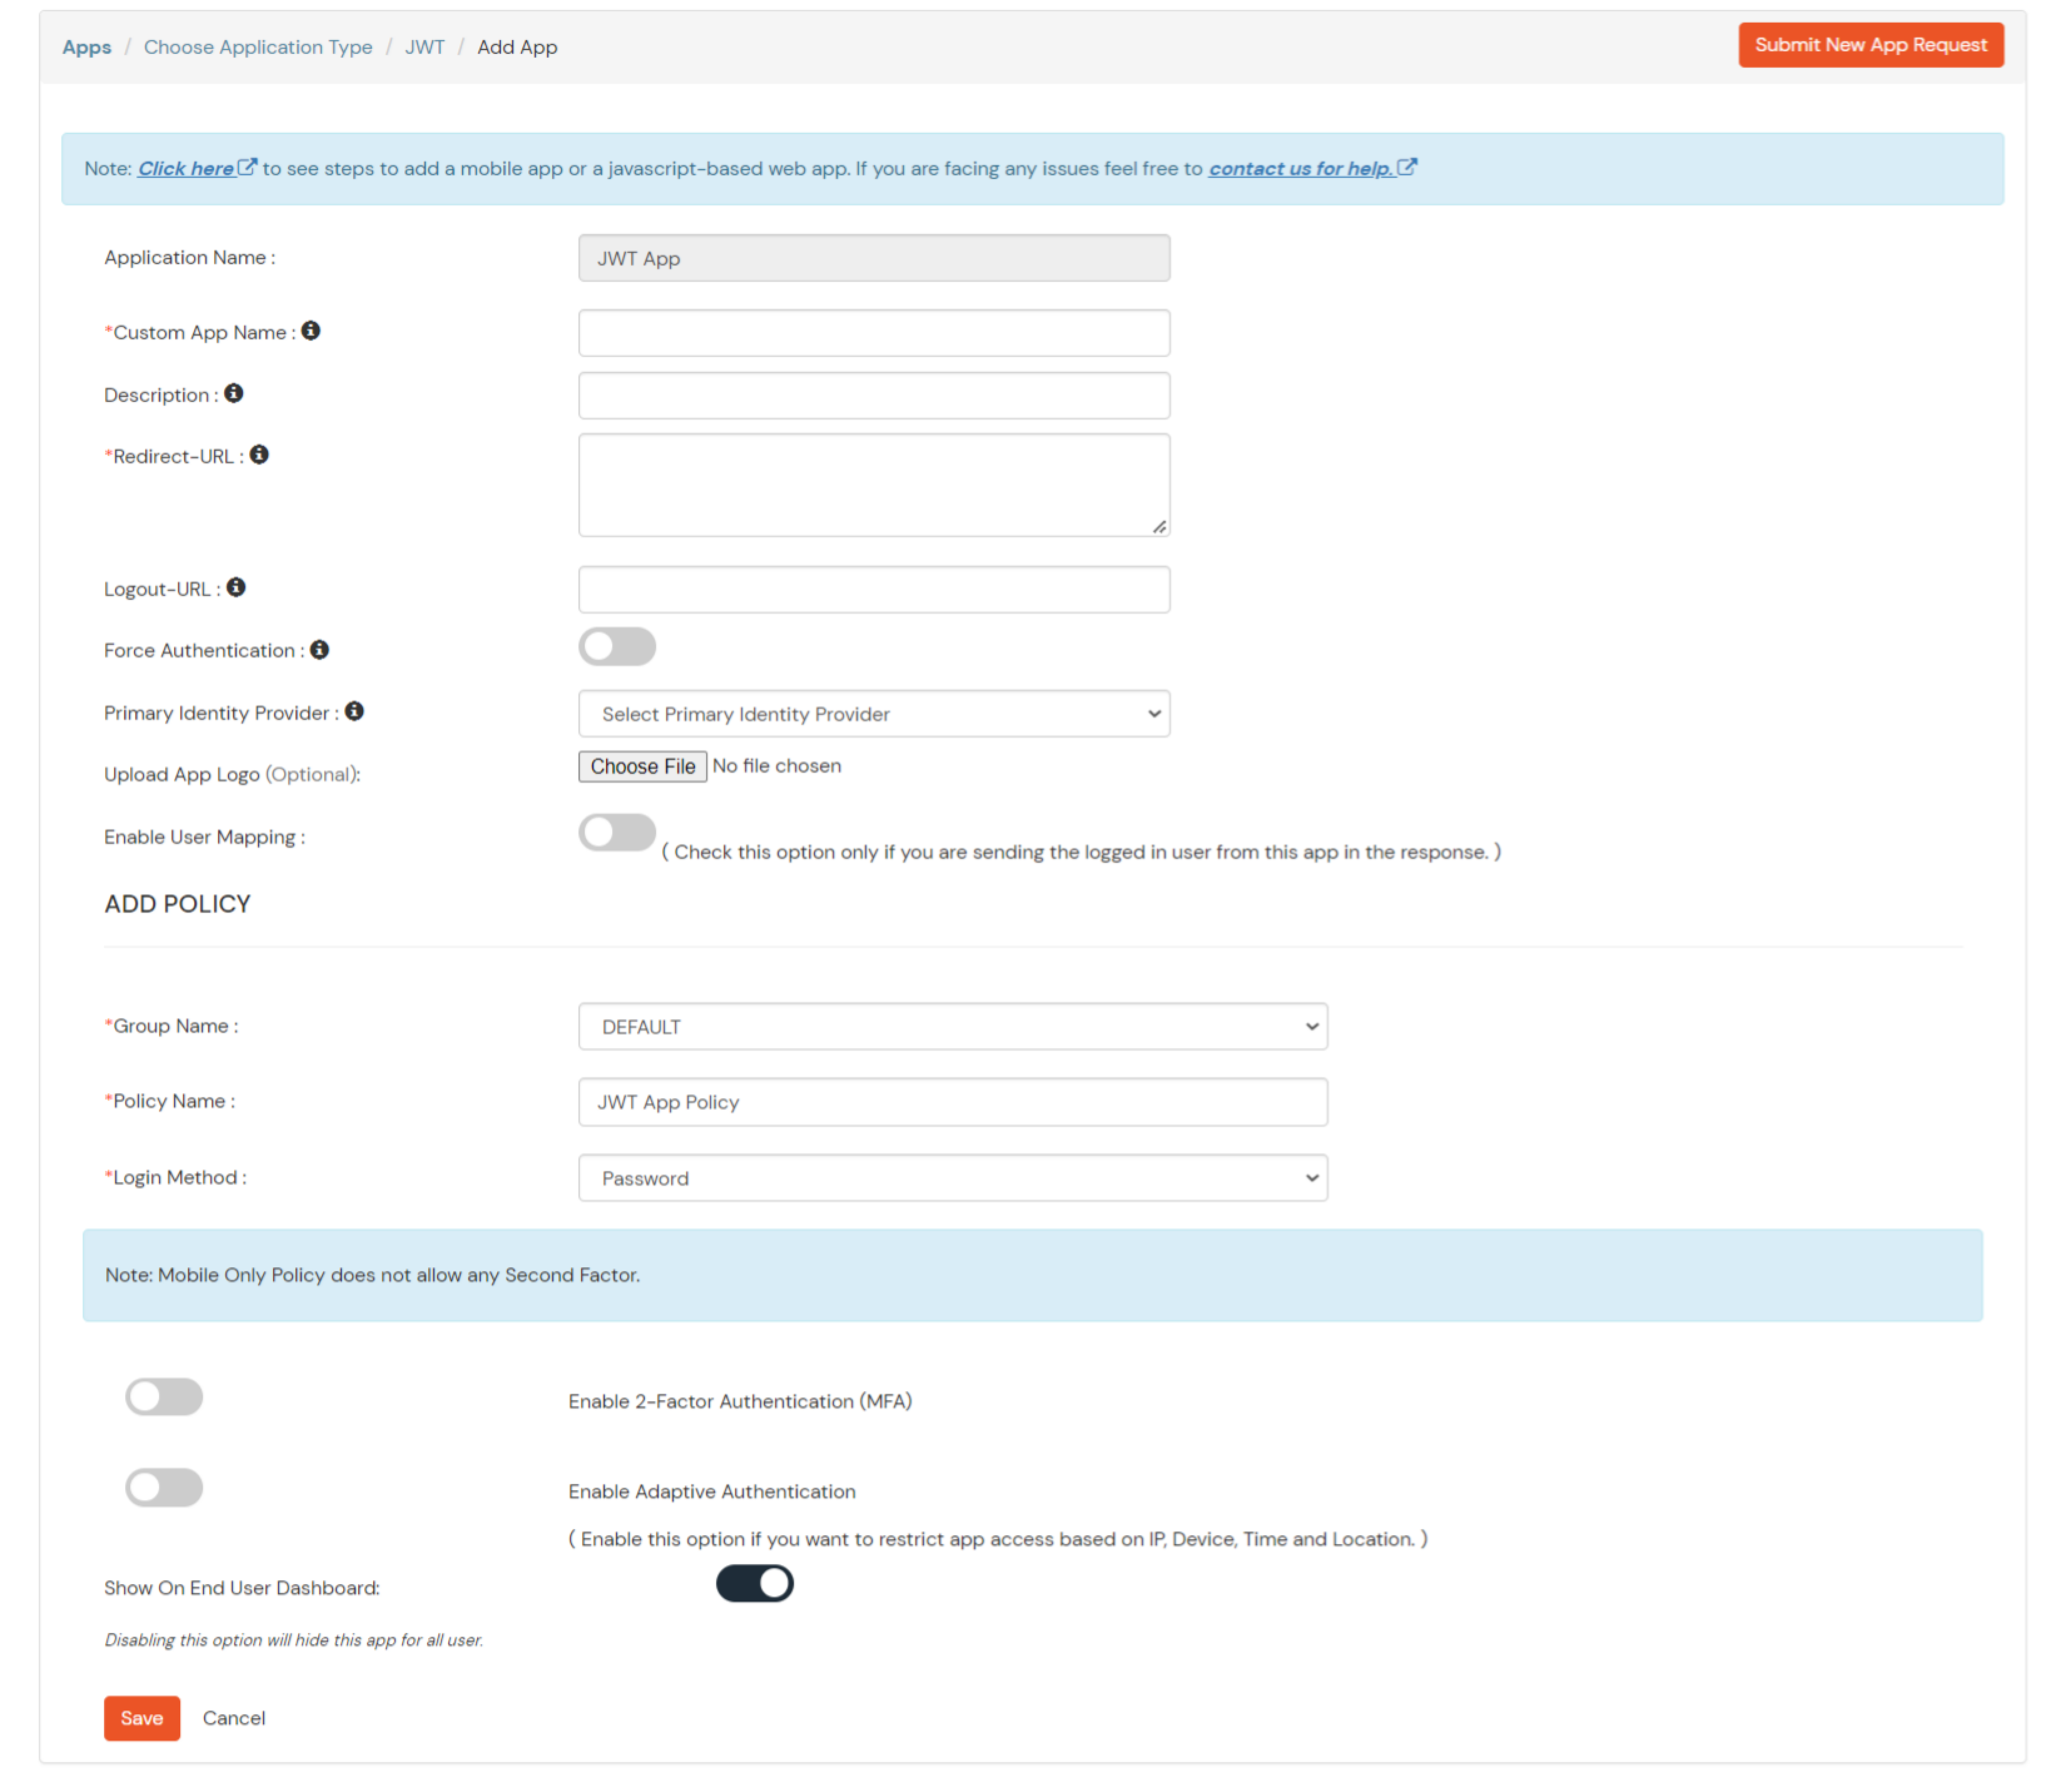
In case you are setting up SSO with Mobile Applications where you can't create an endpoint for Redirect or Callback URL, use below URL.
https://login.xecurify.com/moas/jwt/mobile

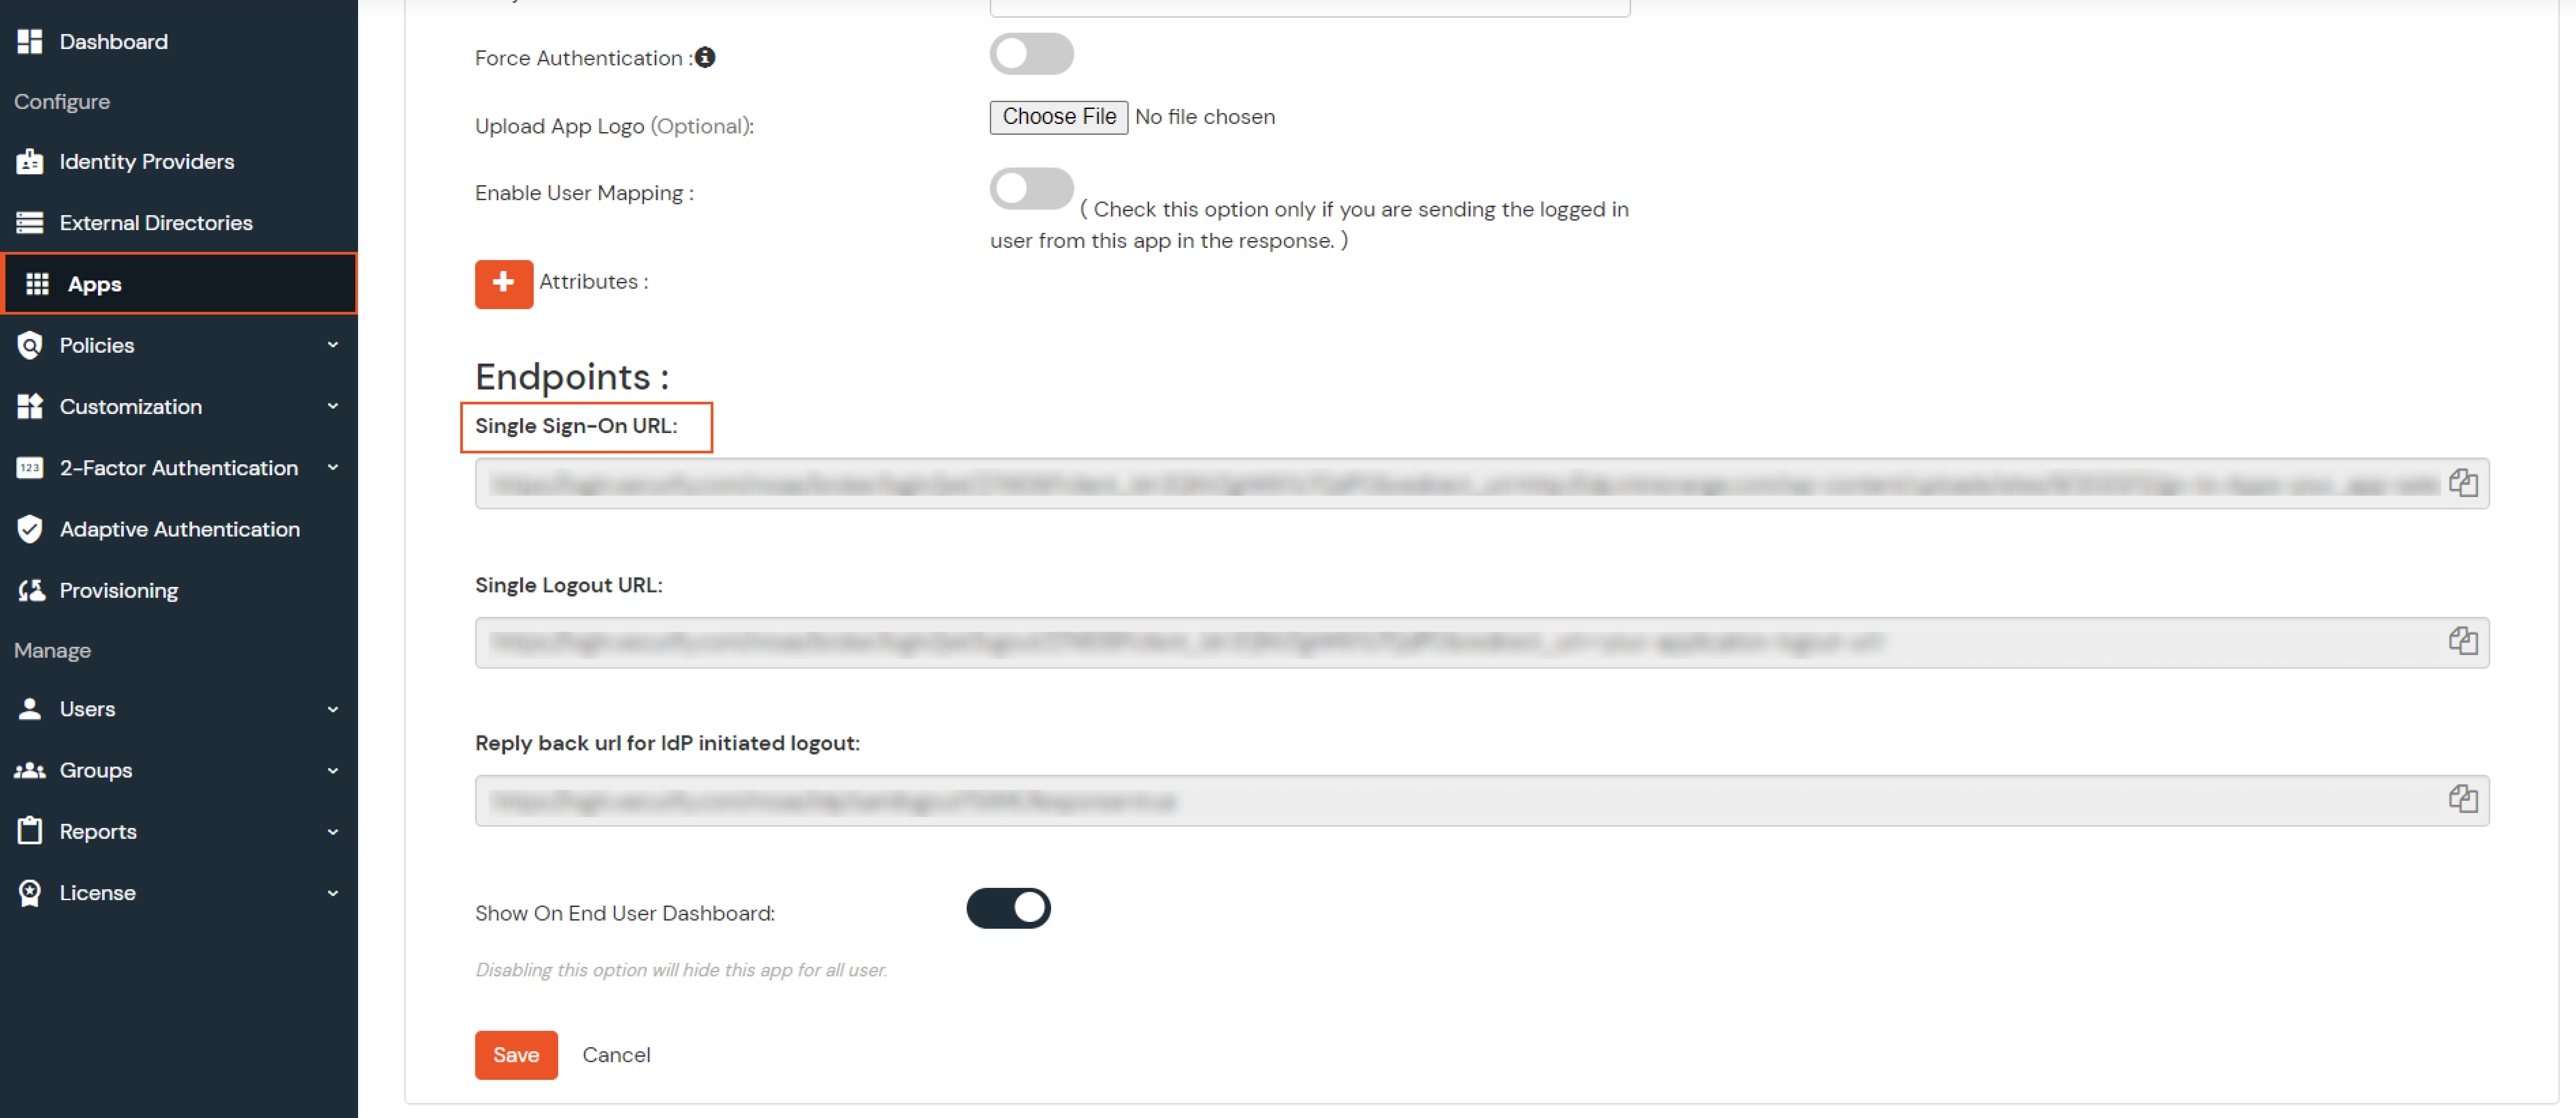

Few usecases where customers configure multiple IDPs -
| For Cloud IDP - | https://login.xecurify.com/moas/discovery?customerId=<customer_id> |
| For On-Premise IDP - | https://yourdomain.com/discovery?customerId=<customer_id> |
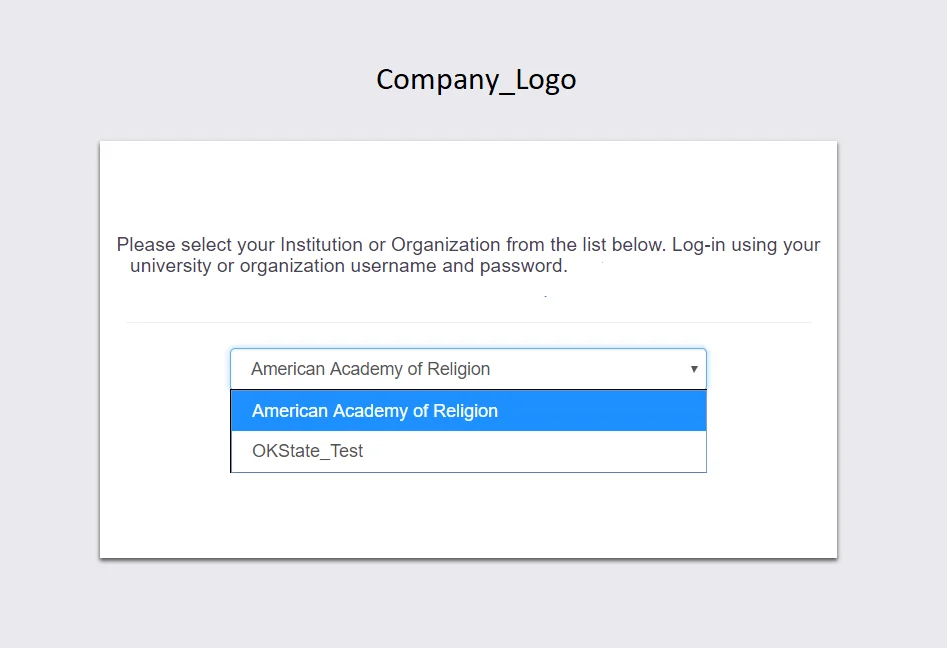
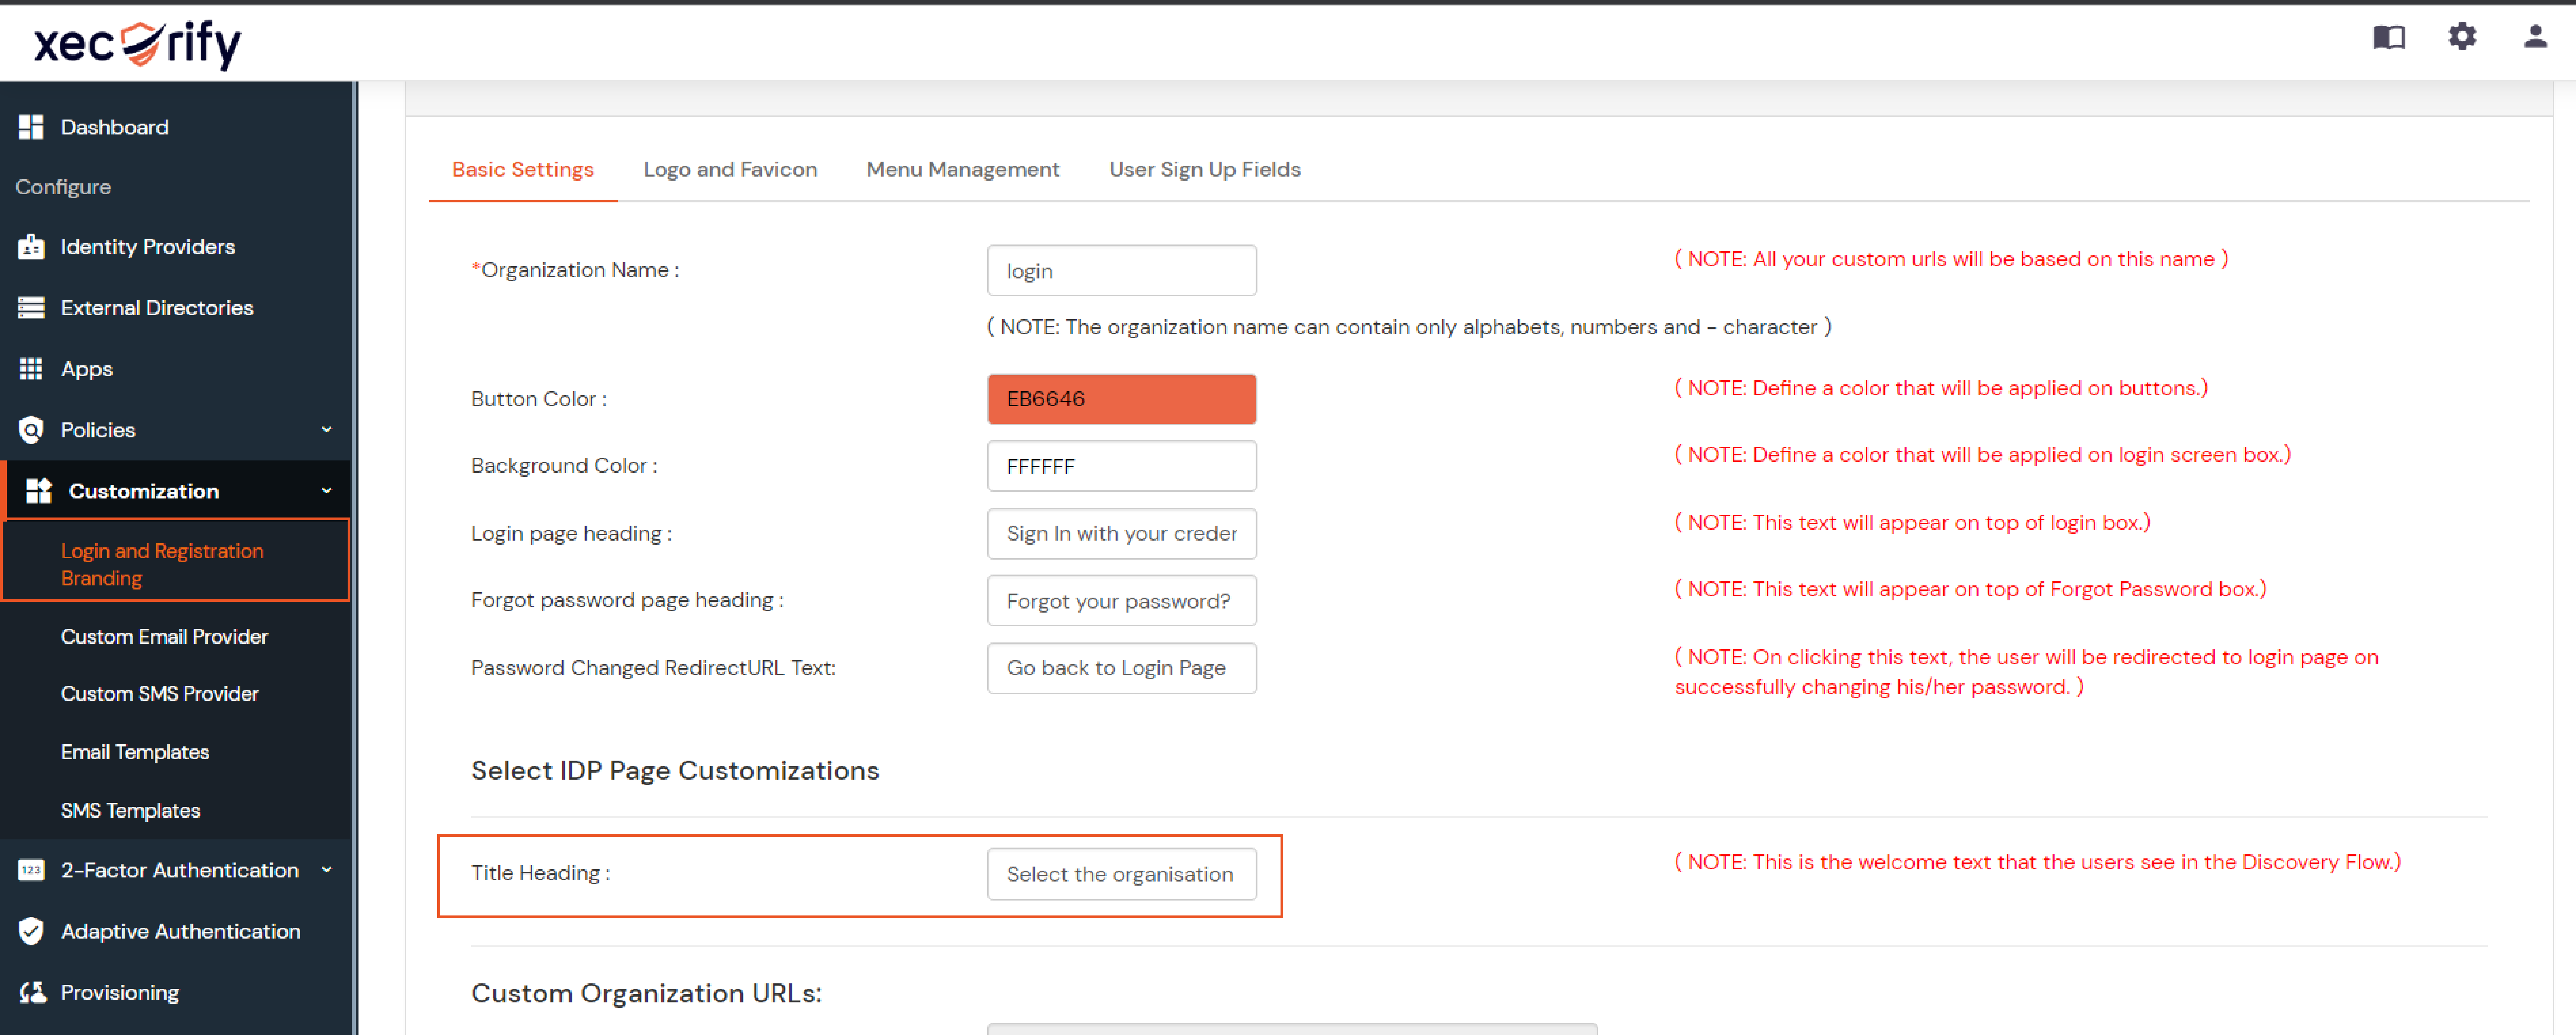
You can see the screenshot below of the IDP Selection Page with a list of IDPs.
Note: To view the IDP in drop-down list, go to Identity Providers tab > against your configured IDP > Select >Edit , here Enable the Show IdP to Users option.

Our Other Identity & Access Management Products