Configure Single Sign-On (SSO) for applications Using Google Workspace as an Identity Provider (IDP).
Configure Google WorkSpace as an Identity Provider (IdP) for Single Sign-On (SSO) into your applications, enabling users to authenticate themselves across multiple applications using their existing Google Workspace (GSuite) credentials without needing to sign in again.
In this setup, Google Workspace (GSuite) acts as the Identity Provider (IdP), miniOrange acts as a broker, and other applications act as Service Providers (SPs). This setup eliminates the need to manage different identities as all information is stored in a unified location - Google Workspace (GSuite), simplifying the integration process and enhancing overall security.
Additionally, miniOrange's Identity Brokering solution facilitates cross-protocol authentication, allowing the user to authenticate using Google Workspace SAML protocol and obtain access to the application, which supports SAML, OAuth and other protocols. This demonstrates how miniOrange Identity brokering enables users to authenticate across different protocols, improving the flexibility and interoperability of Single Sign-On (SSO) solutions.
Follow the easy steps given in this guide to login using Google Workspace as an Identity Provider.
Get Free Installation Help
miniOrange offers free help through a consultation call with our System Engineers to configure SSO for different apps using Google Workspace as an IDP in your environment with 30-day free trial.
For this, you need to just send us an email at idpsupport@xecurify.com to book a slot and we'll help you in no time.
1. Configure miniOrange as SP in Google Workspace
Mentioned below are steps to configure Google Workspace as IDP via SAML and OAuth configuration. Follow the steps accordingly based on your requirement (SAML or OAuth).
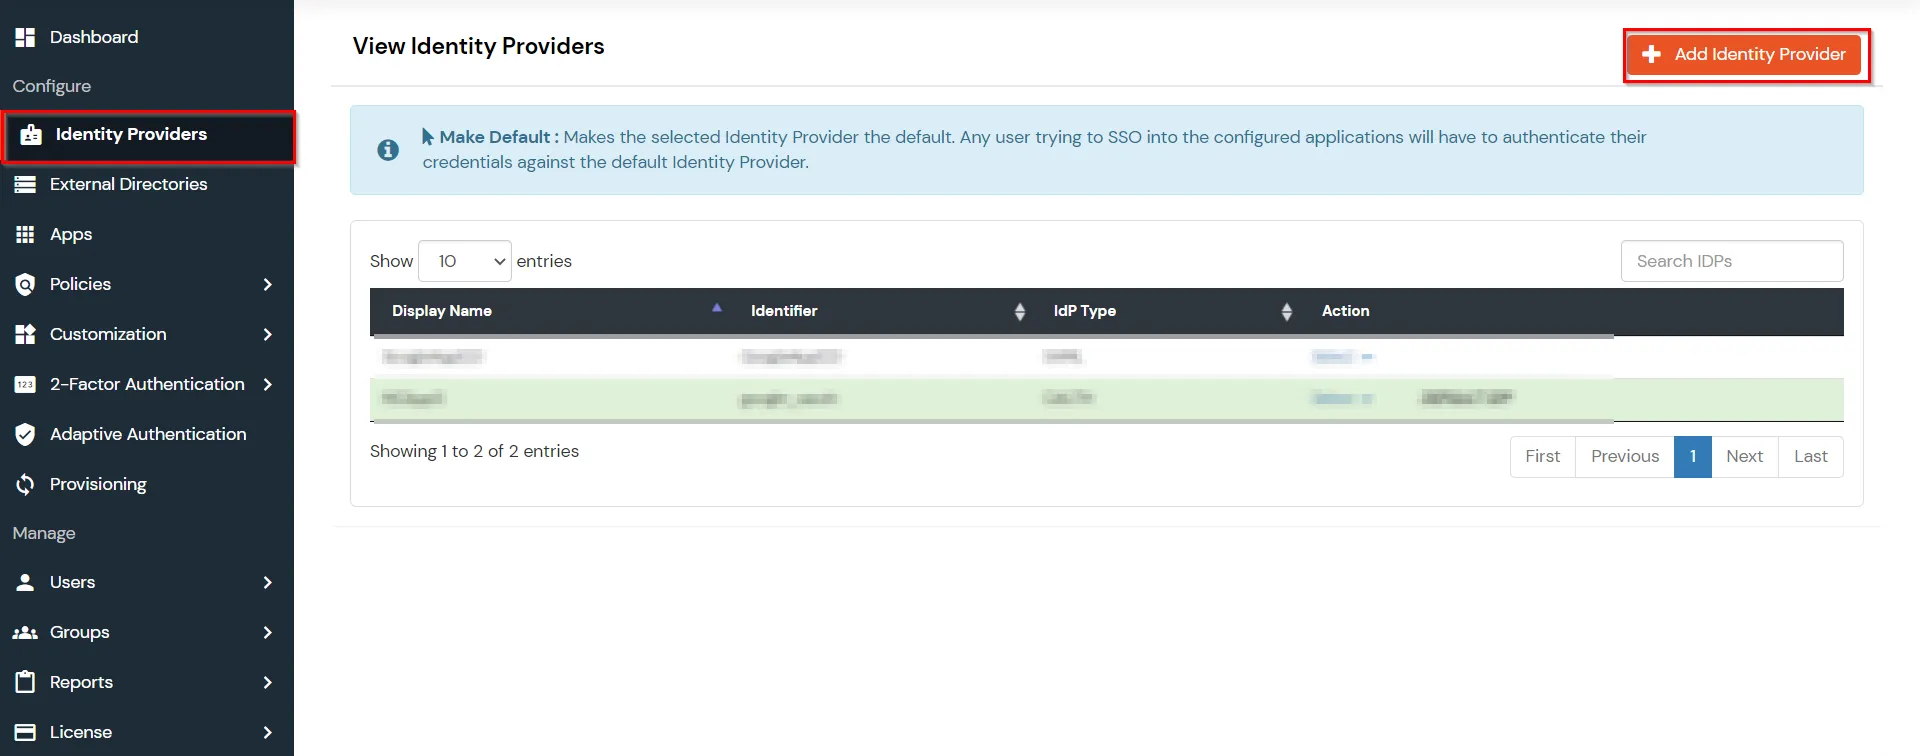
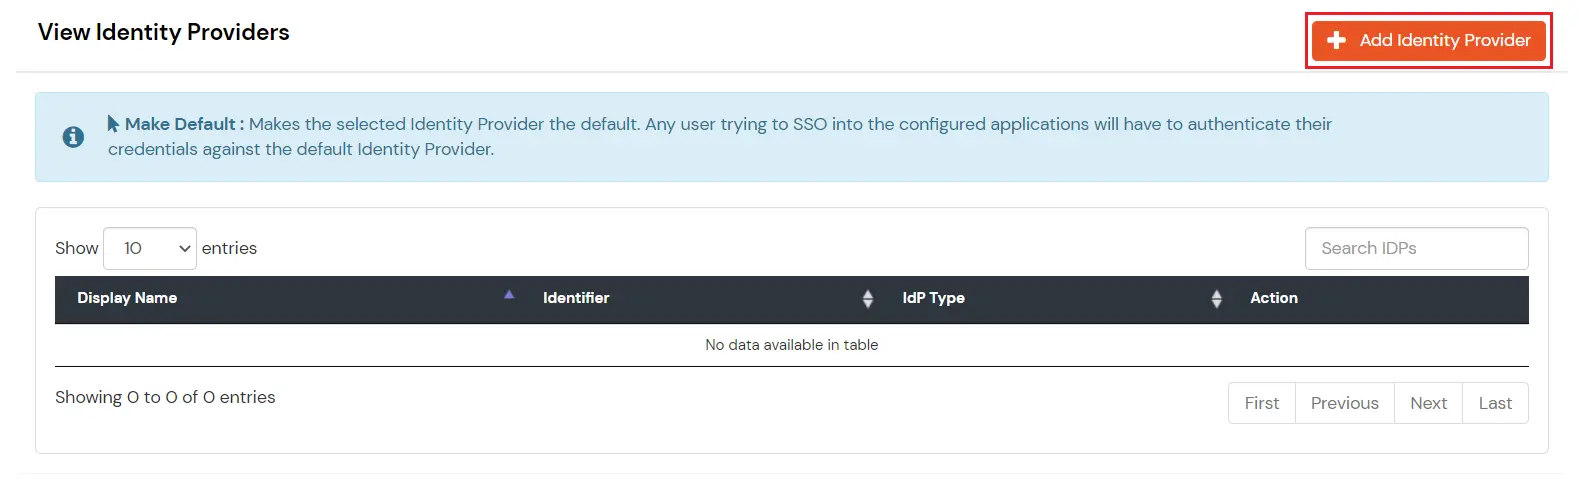
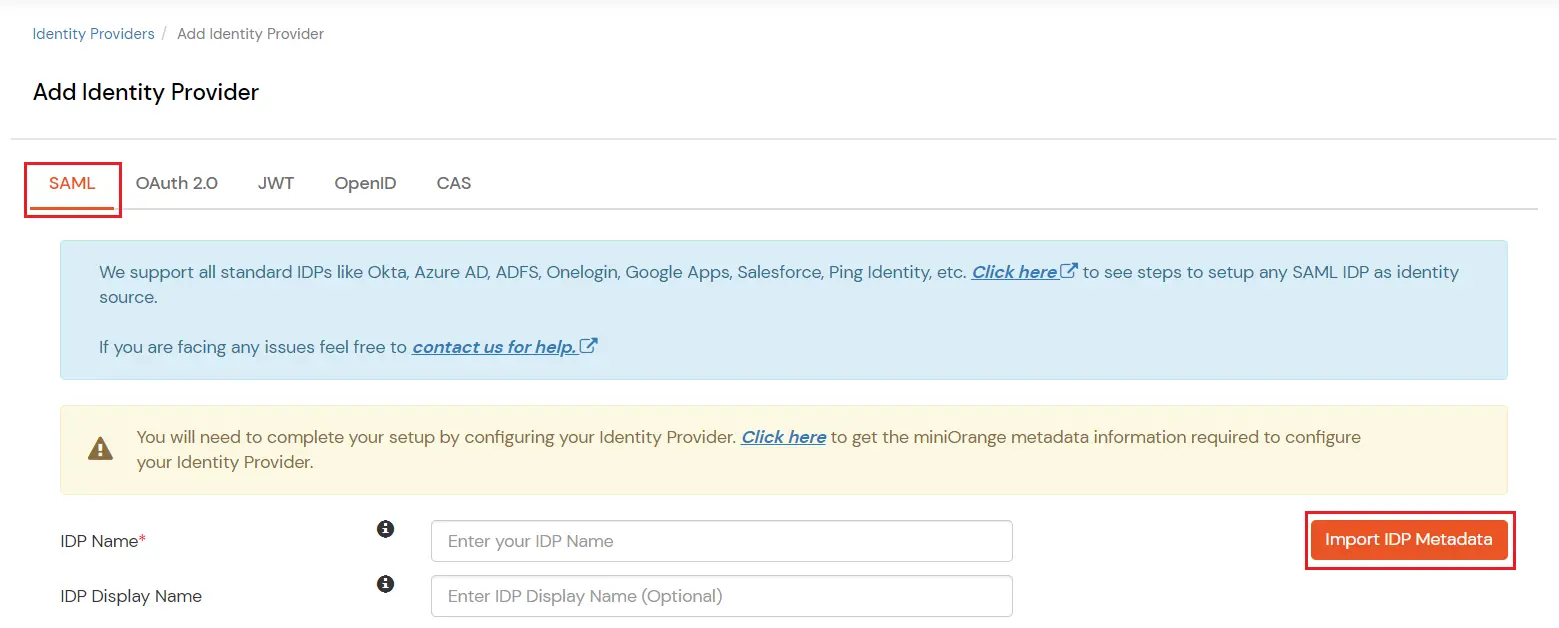
- Go to miniOrange Admin console and navigate to Identity Providers in the left navigation menu. Then, click on Add Identity Provider button.
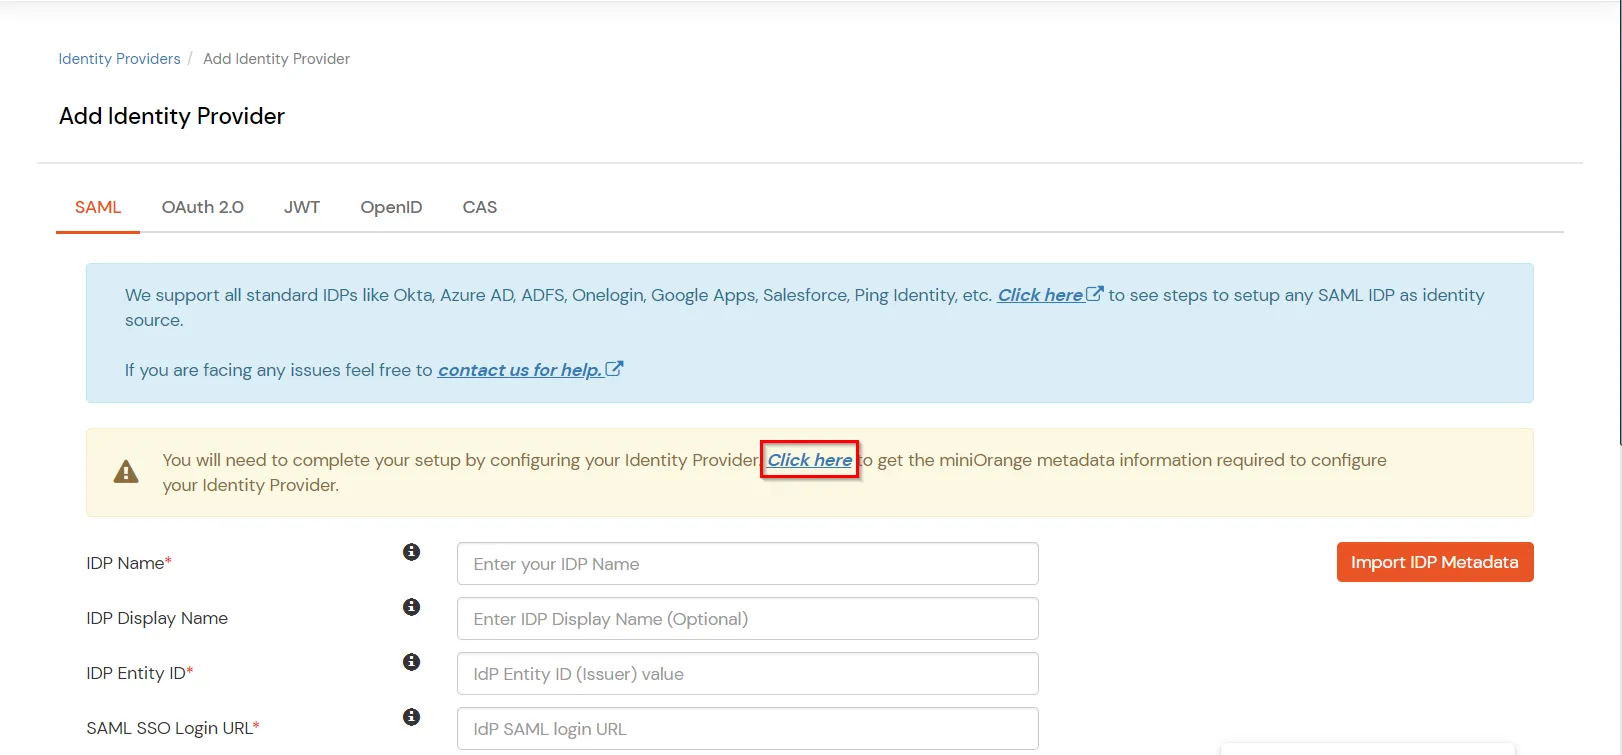
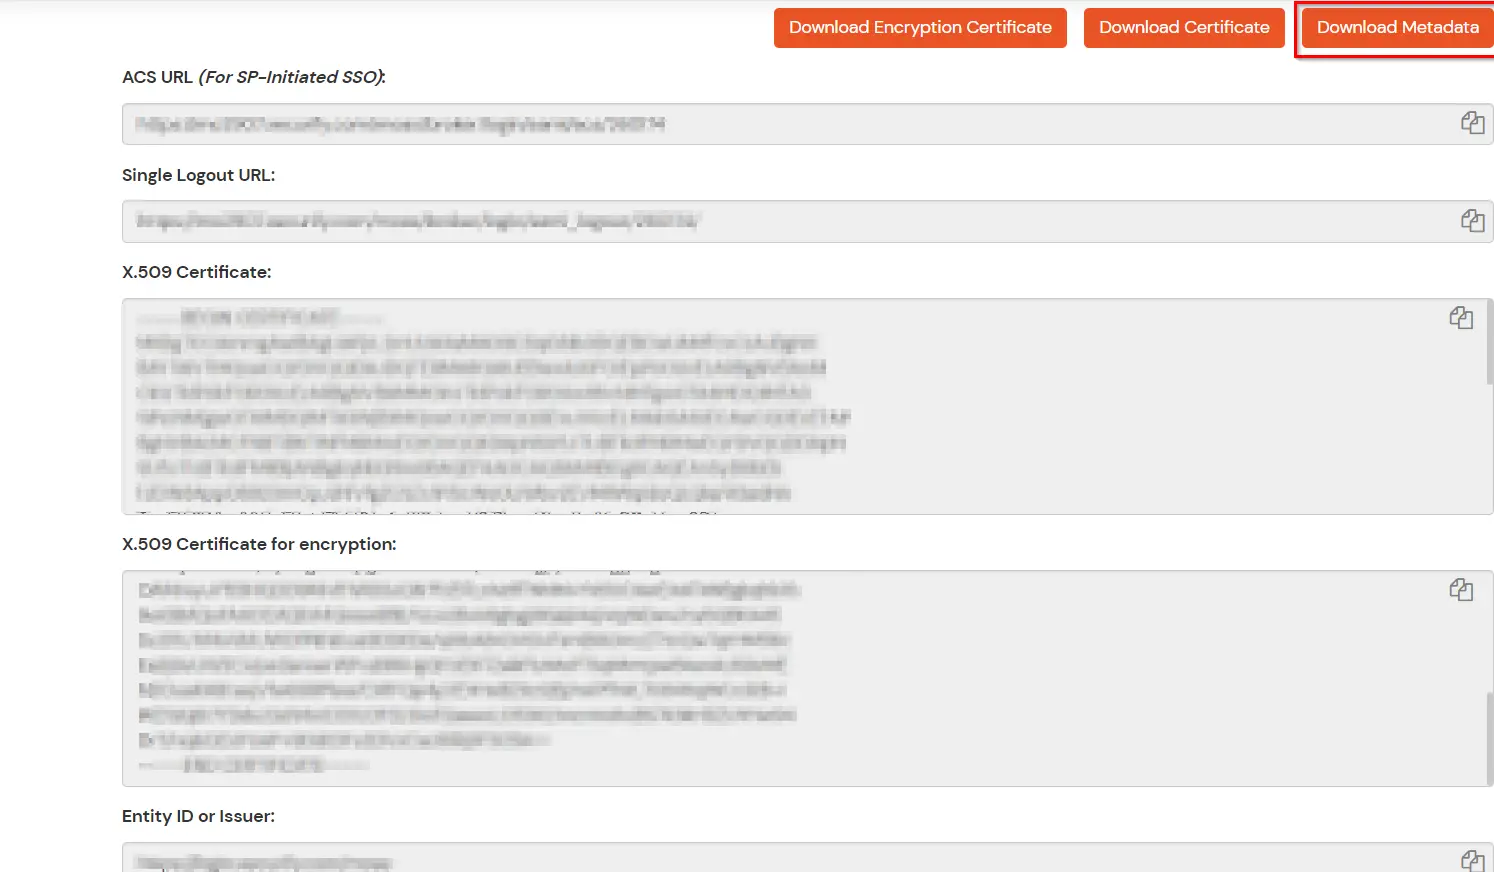
- Now click on the Click here link to get miniOrange metadata as shown in Screen below.
- For SP -INITIATED SSO section Select Show Metadata Details.
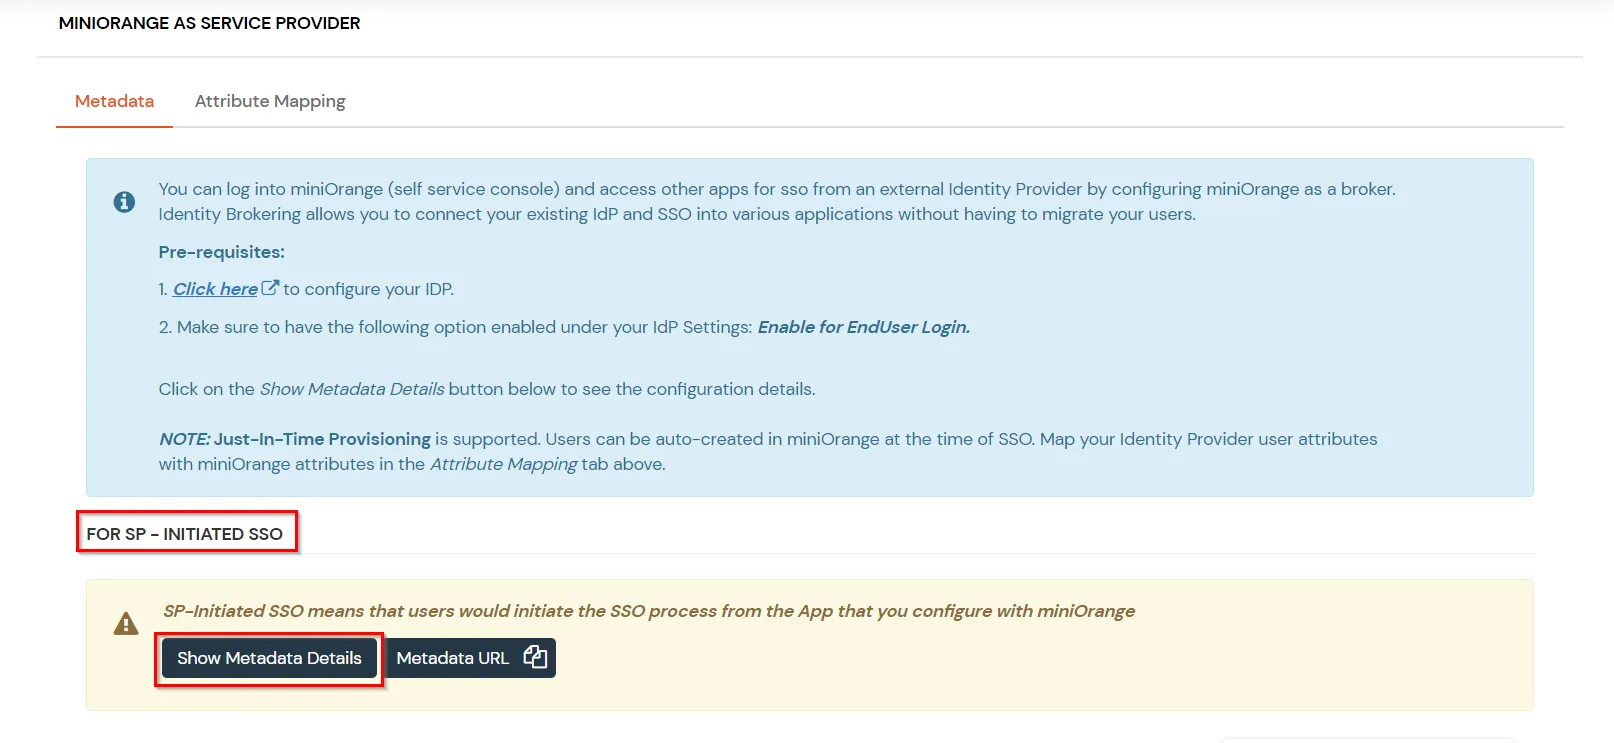
- Click on Download Metadata
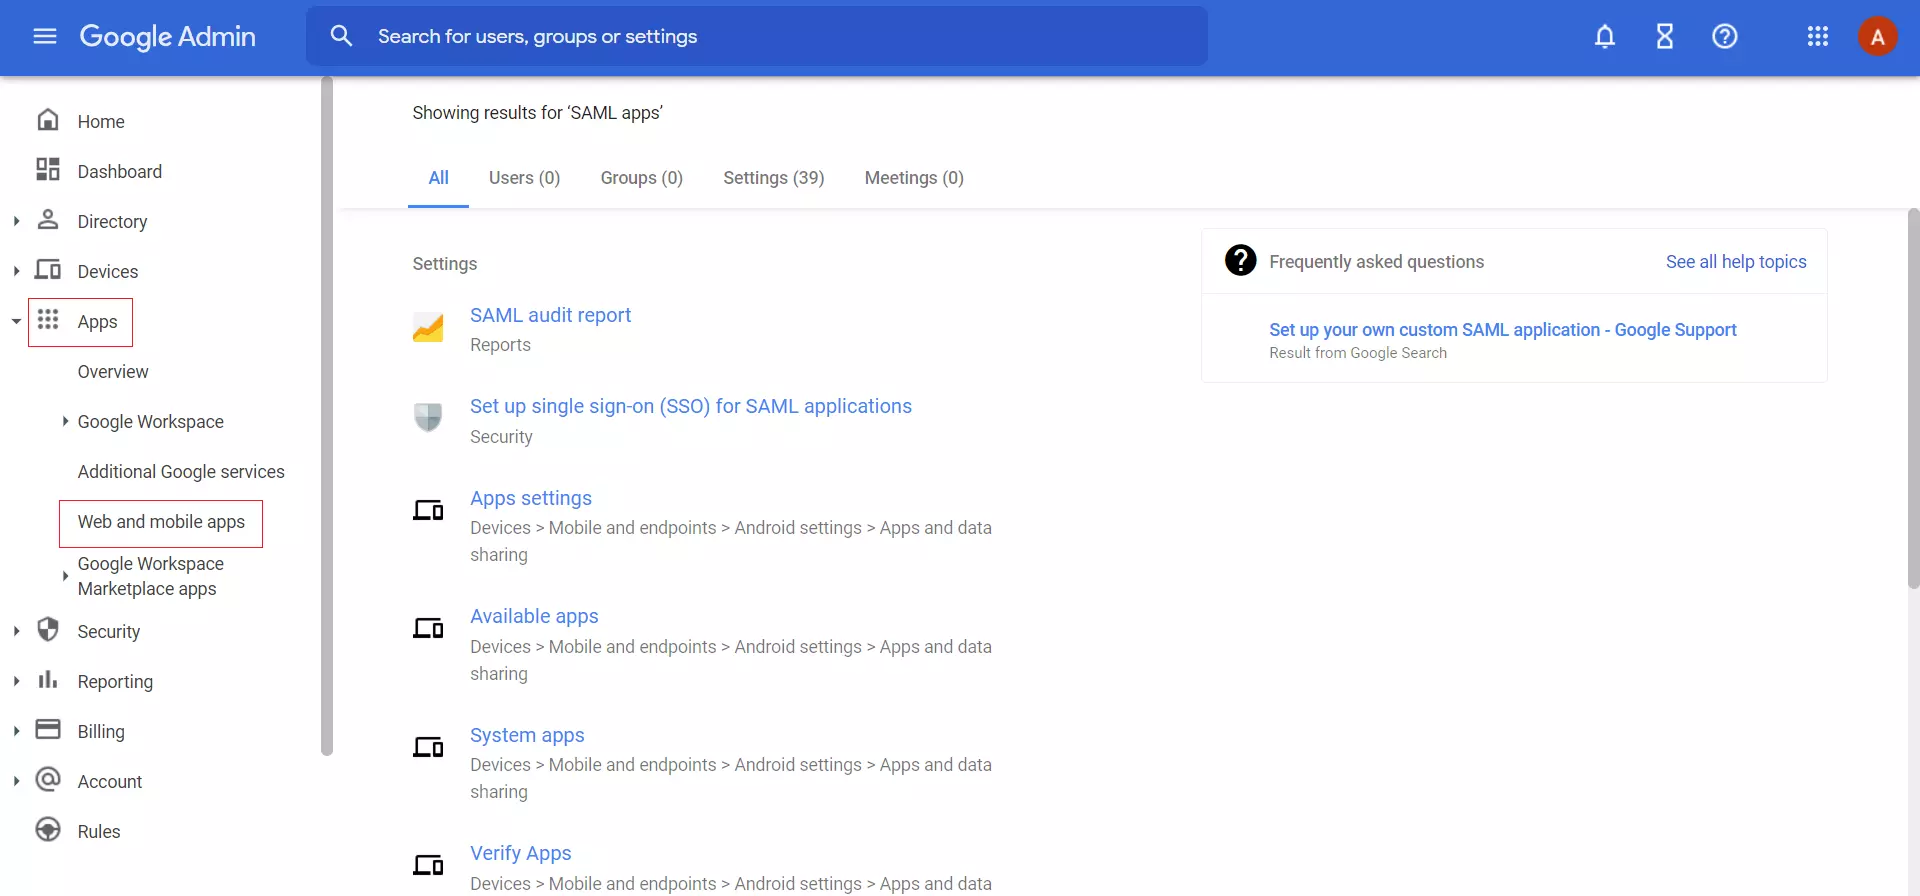
- Go to https://admin.google.com and login with your G Suite administrator account.
- Navigate to the Apps tab in the left menu and click on Web and mobile apps.
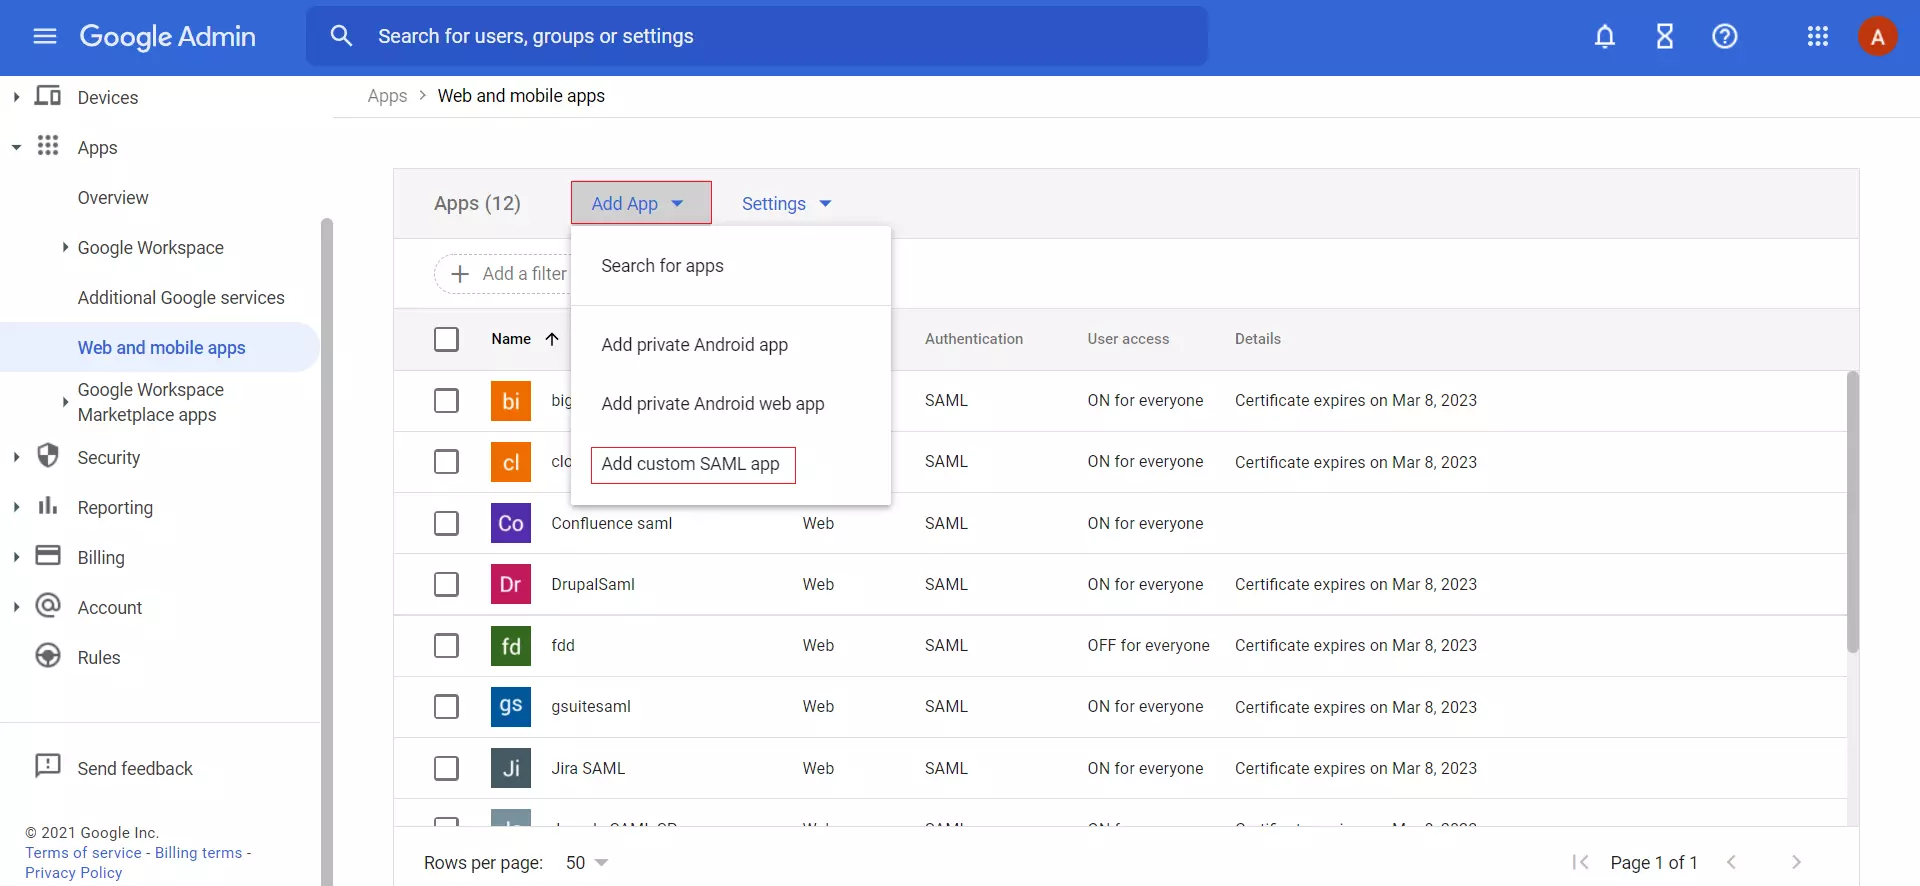
- Click on the Add App button, then in the dropdown select Add Custom SAML app tab to create a new saml app.
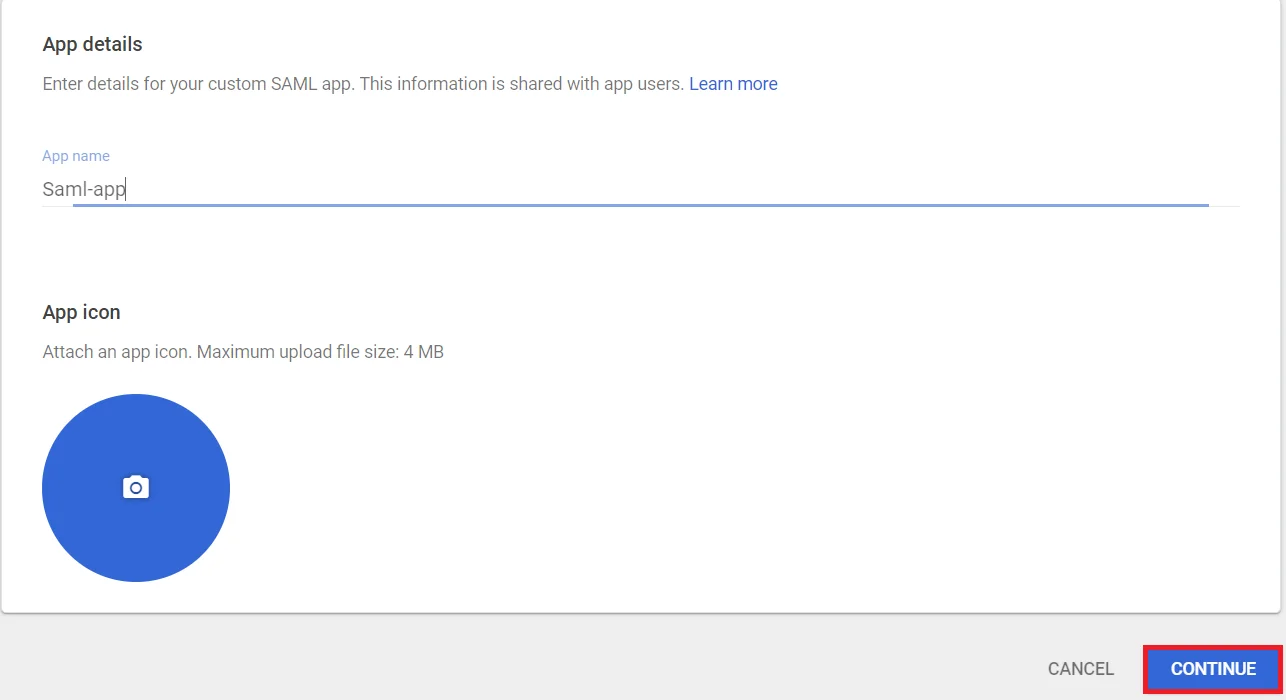
- Enter details for your custom SAML app and click on Continue button.
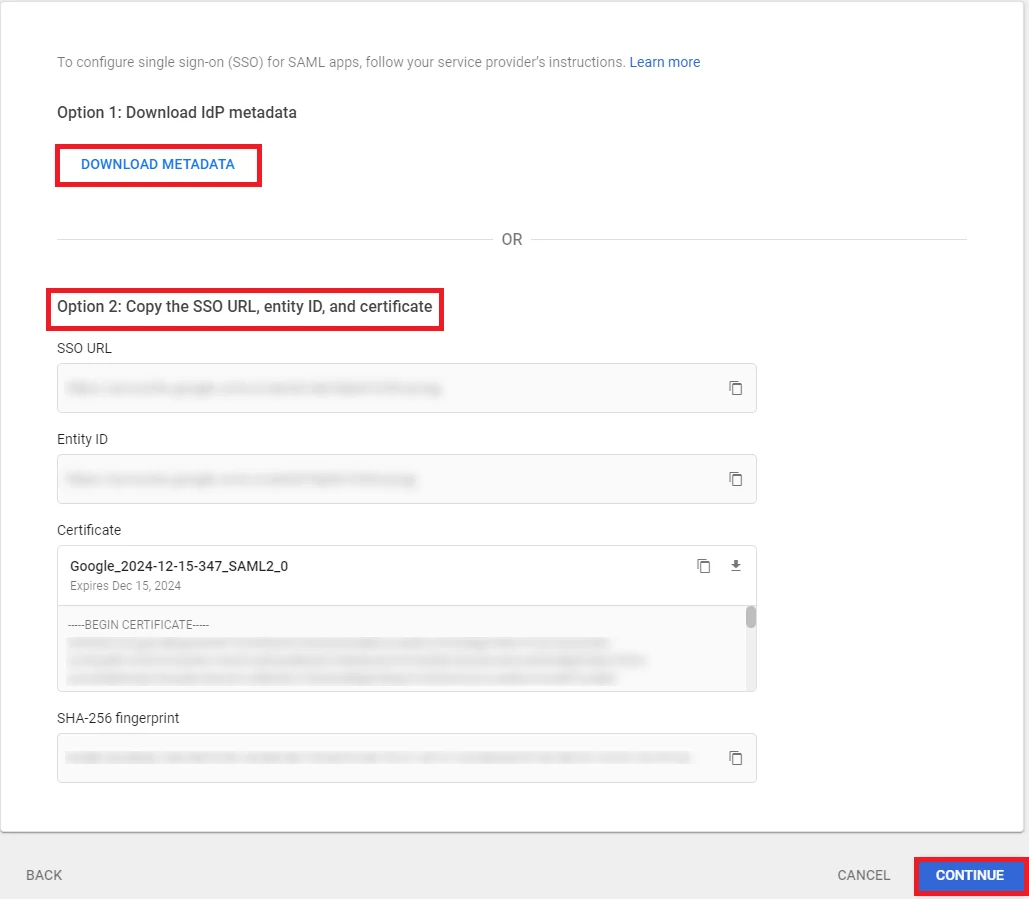
- Click on Download Metadata button. This will be used for configuring your Service Provider in miniOrange (Step 1.).
- You can also copy G Suite details like SSO URL, entity ID and Certificate to configure the Service Provider manually and then click on Continue button.
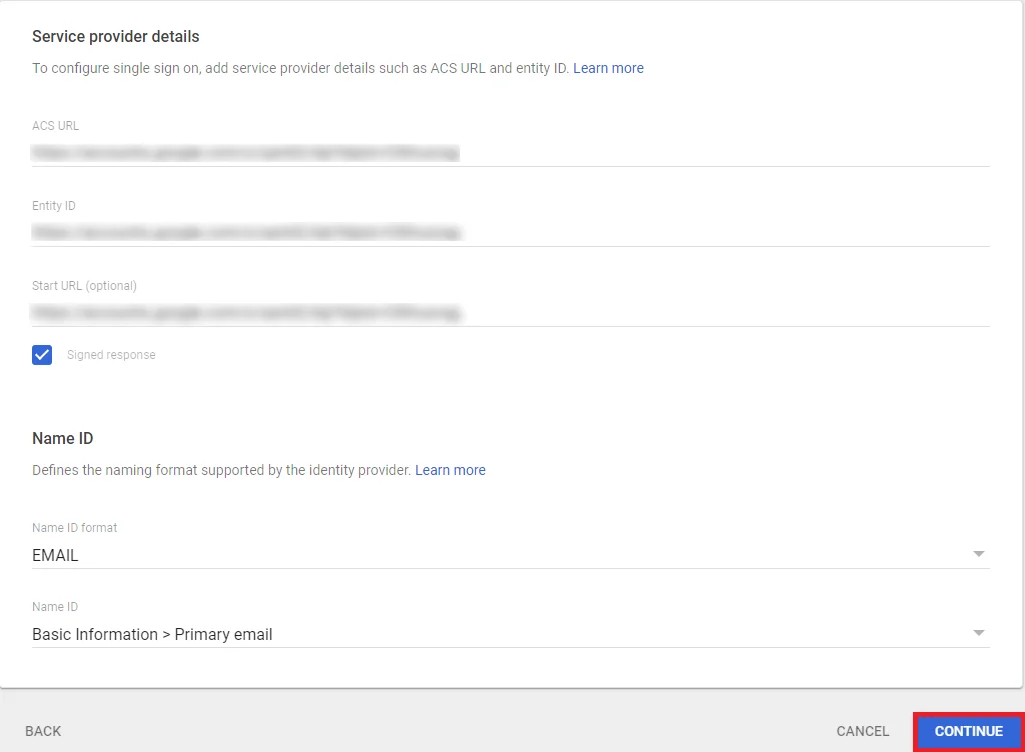
- Click on Continue button.
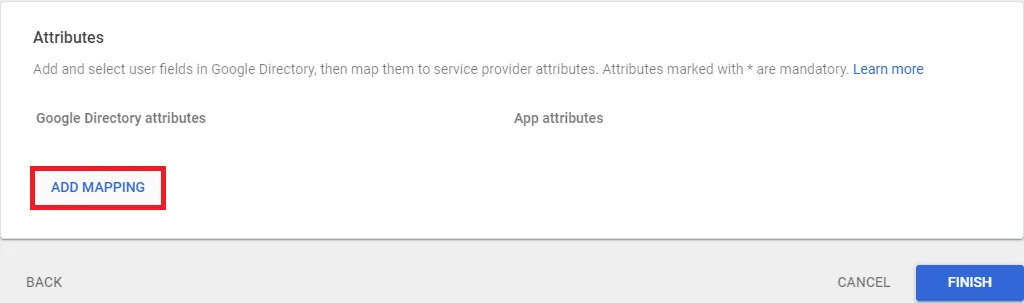
- Click on Add Mapping button.
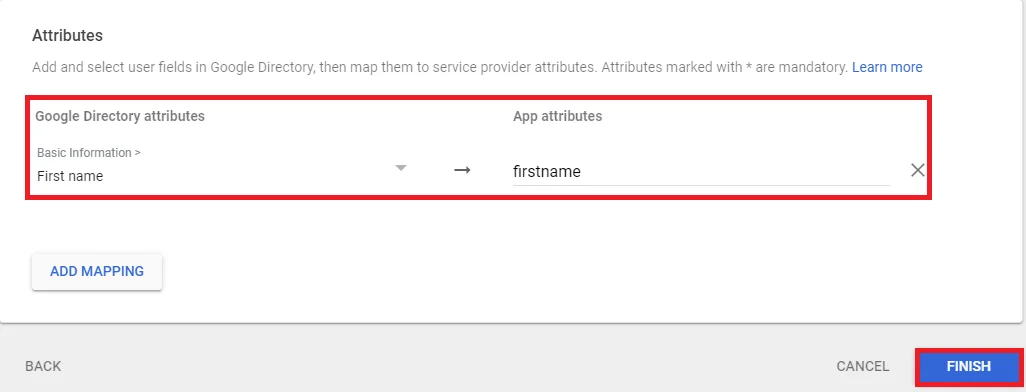
- Add and select user fields in Google Directory, then map them to Service Provider attributes and Click on Finish button.
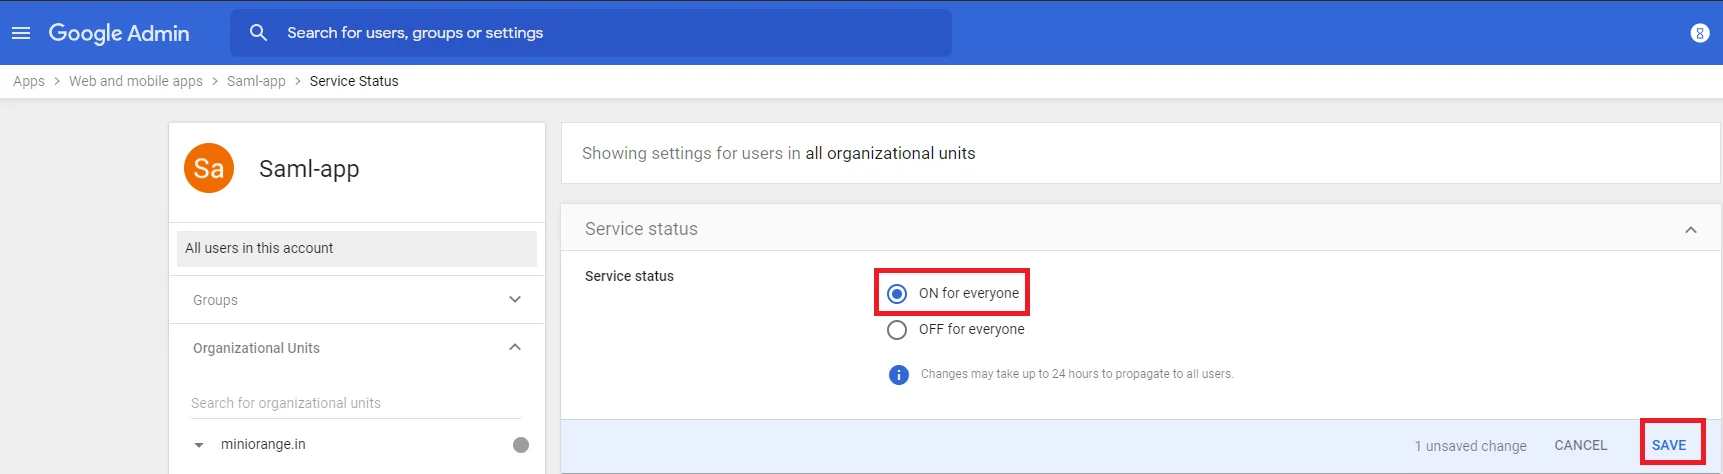
Select ON for everyone to activate SSO.
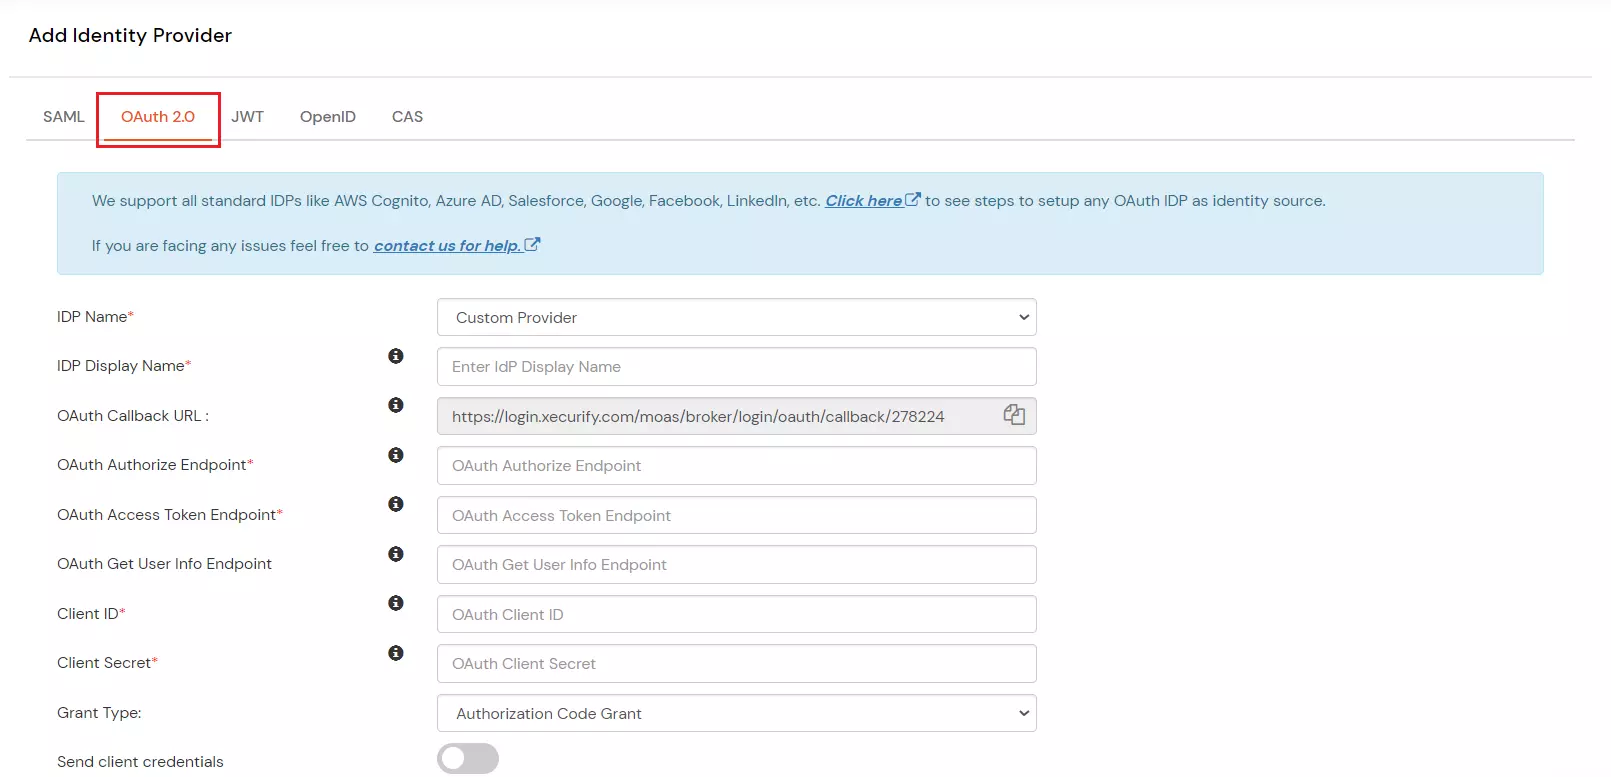
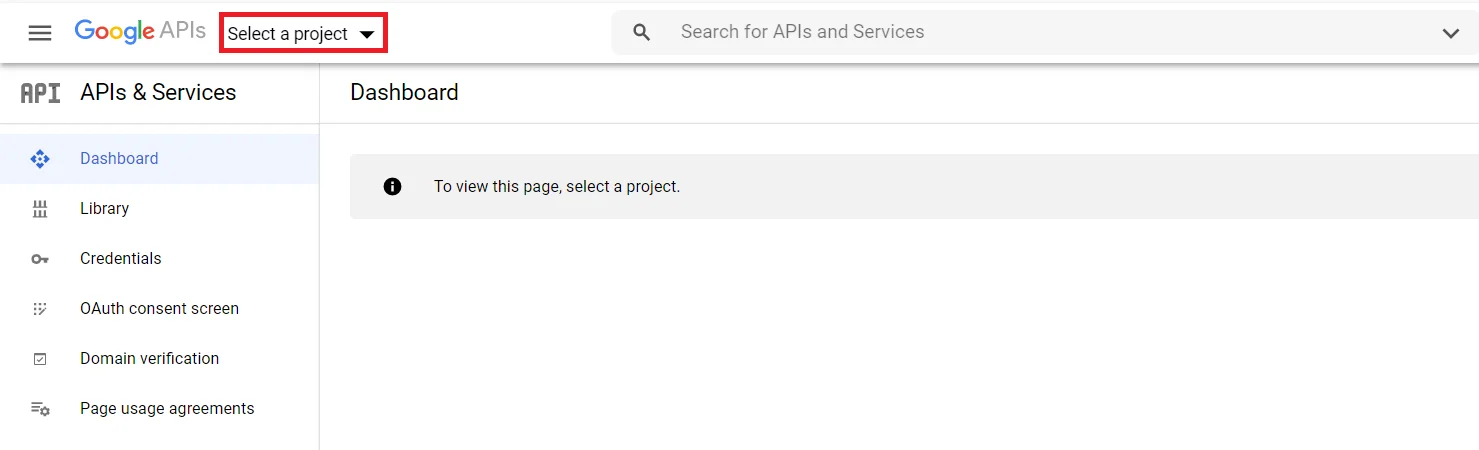
- Go to https://console.developers.google.com/ and sign up/login.
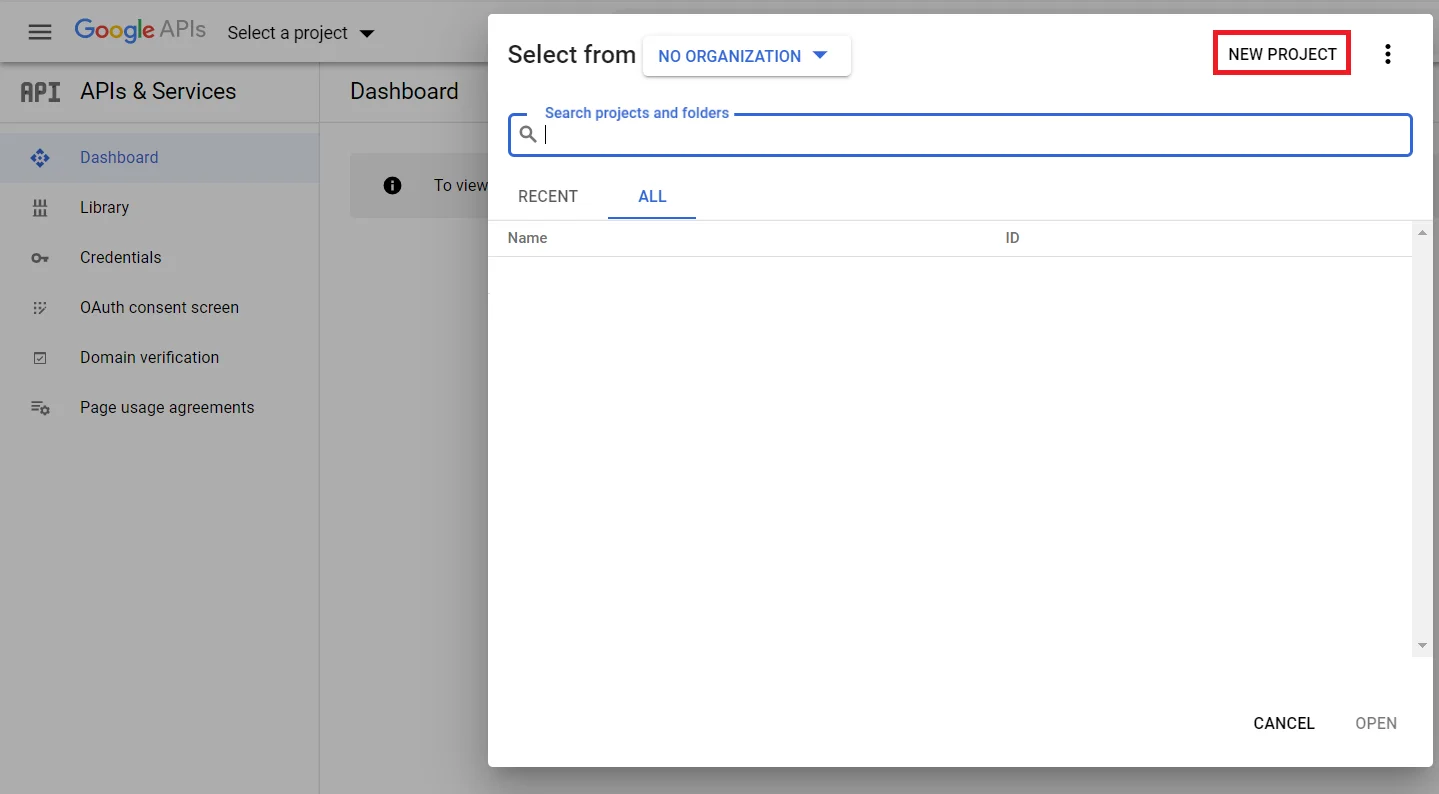
- Click on Select Project to create a new Google Apps Project,you will see a popup with the list of all your projects.
- You can click on the New project button to create new project.
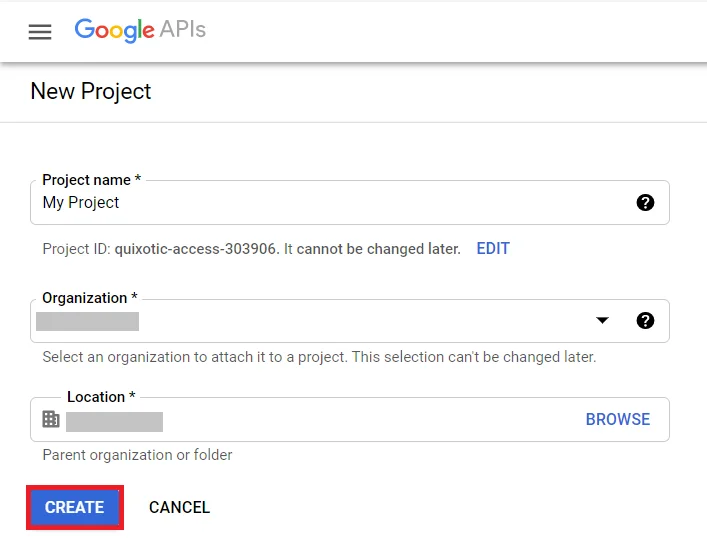
- Enter your Project name under the Project Name field and click on Create.
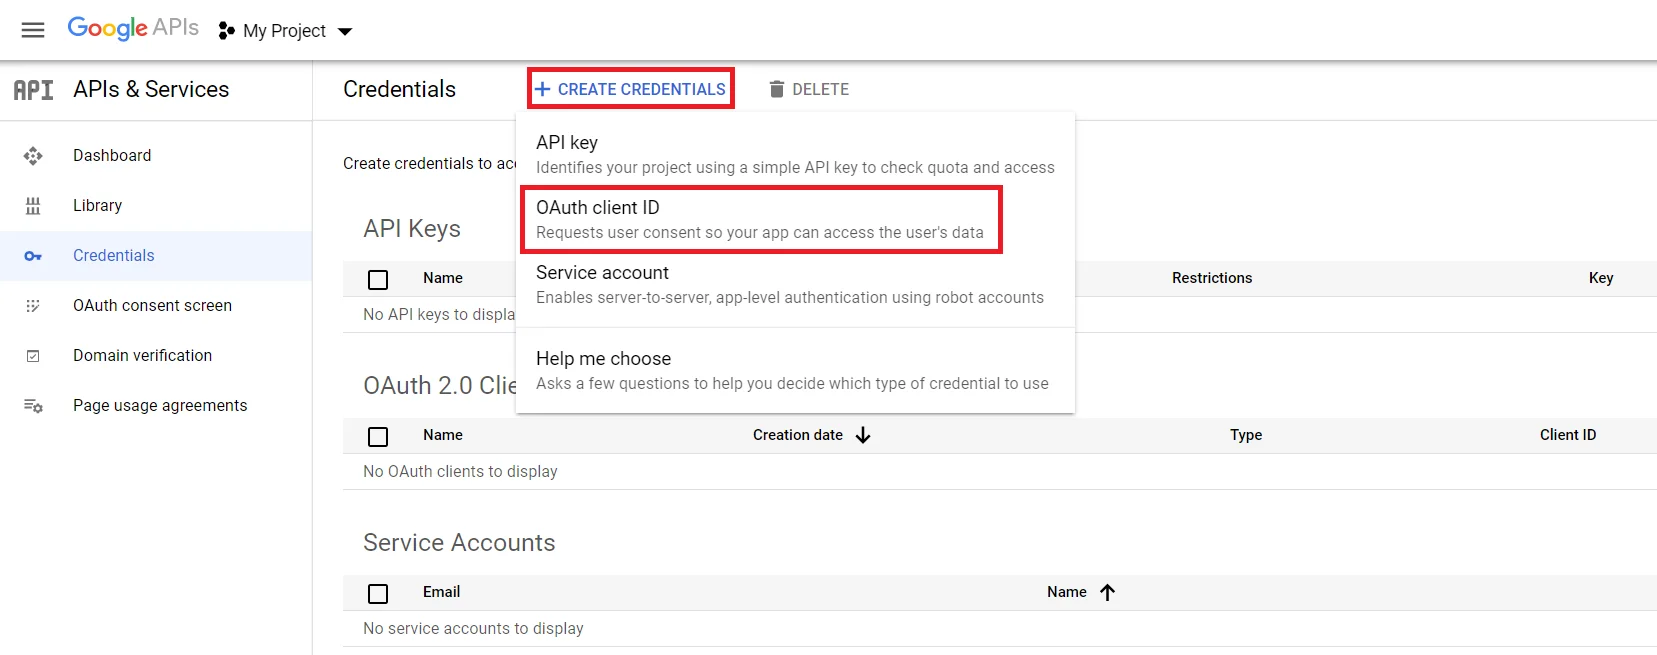
- Go to Navigation MenuAPIsServicesCredentials.

- Click on Create Credentials button and then select OAuth Client ID from the options provided.
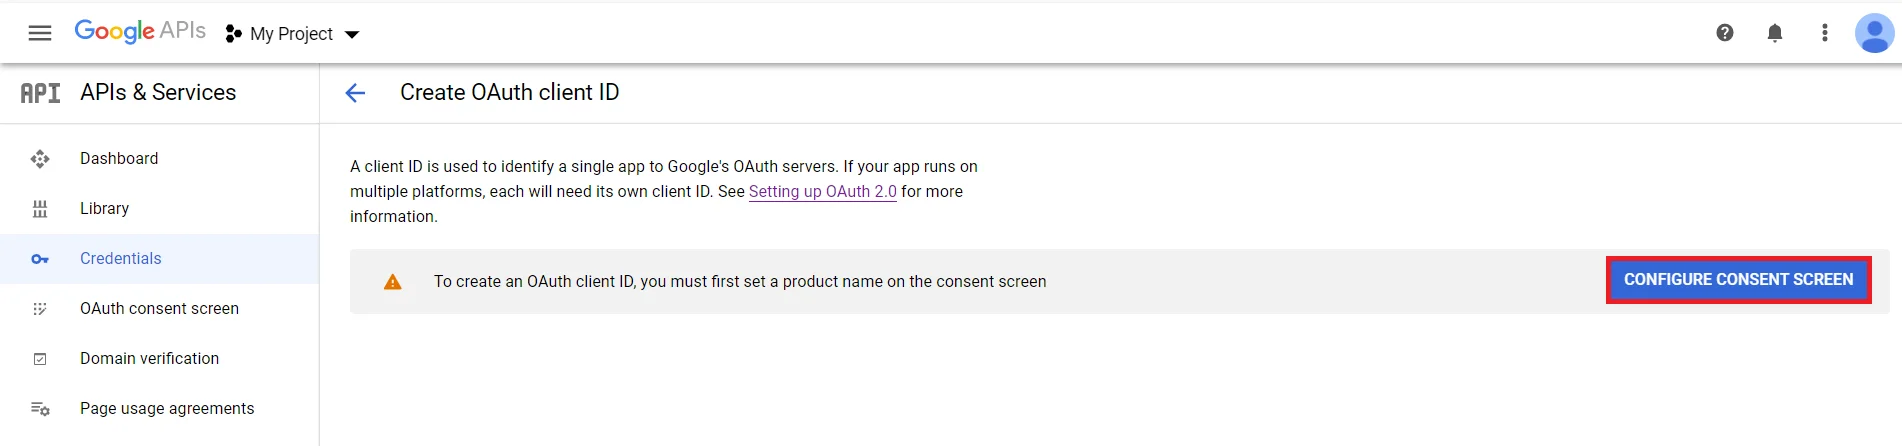
- In case you are facing some warning saying that in order to create an OAuth Client ID, you must set a product name on consent screen (as shown in below image). Click on the Configure consent screen button.
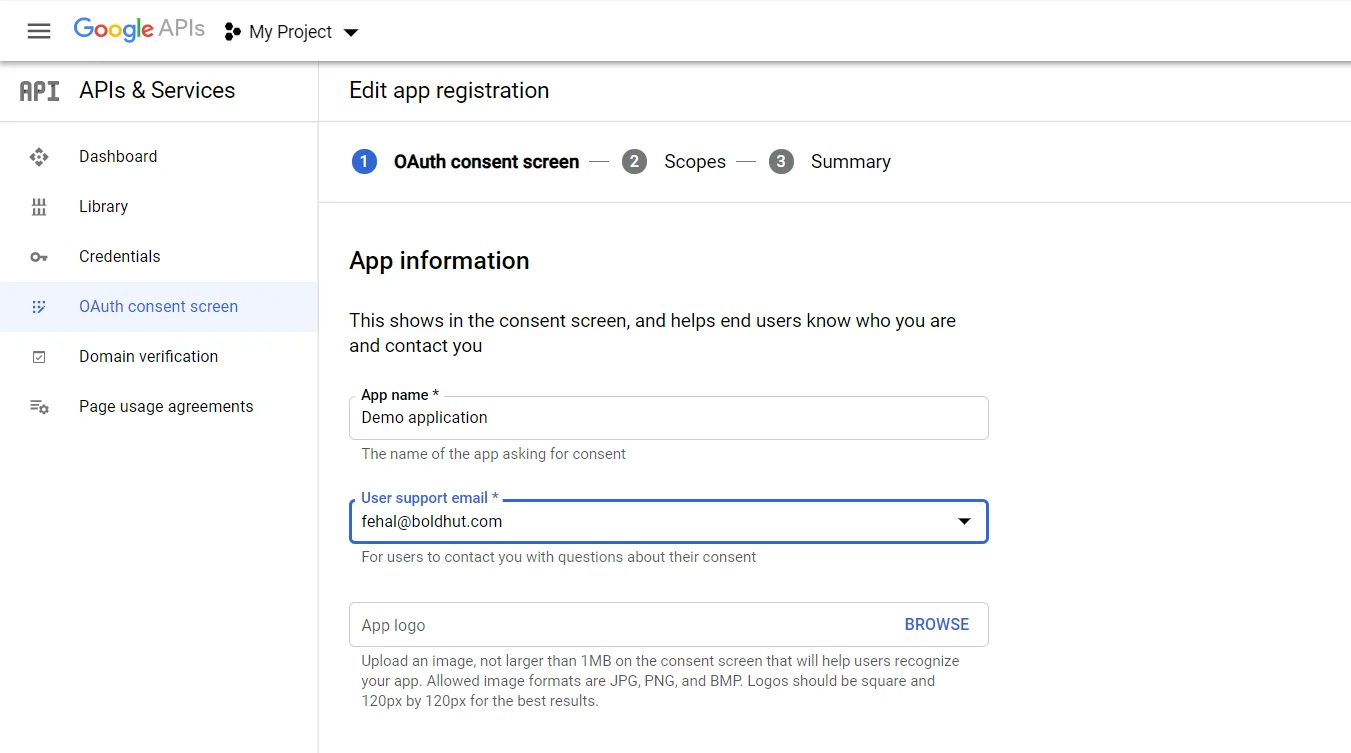
- Enter the required details such as App Name, User Support Email. and click on Save and Continue button.
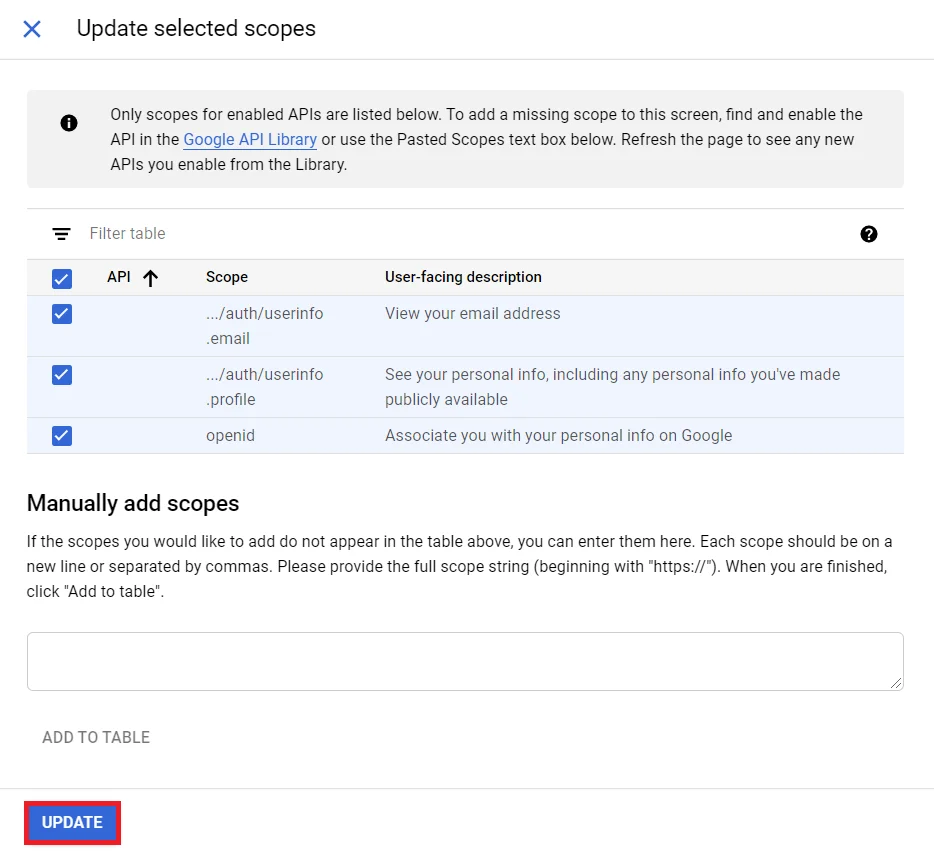
- Now for configuring scopes, click on Add or Remove the Scopes button.

- Now, Select the Scopes to allow your project to access specific types of private user data from their Google Account and click on Save and Continue button.
- Go to the Credentials tab and click on Create Credentials button. Select Web Application from dropdown list to create new application.

- Enter the name you want for your Client ID under the name field and enter the Redirect/Callback URL that we saved in the Step 1 and click on the Create button.
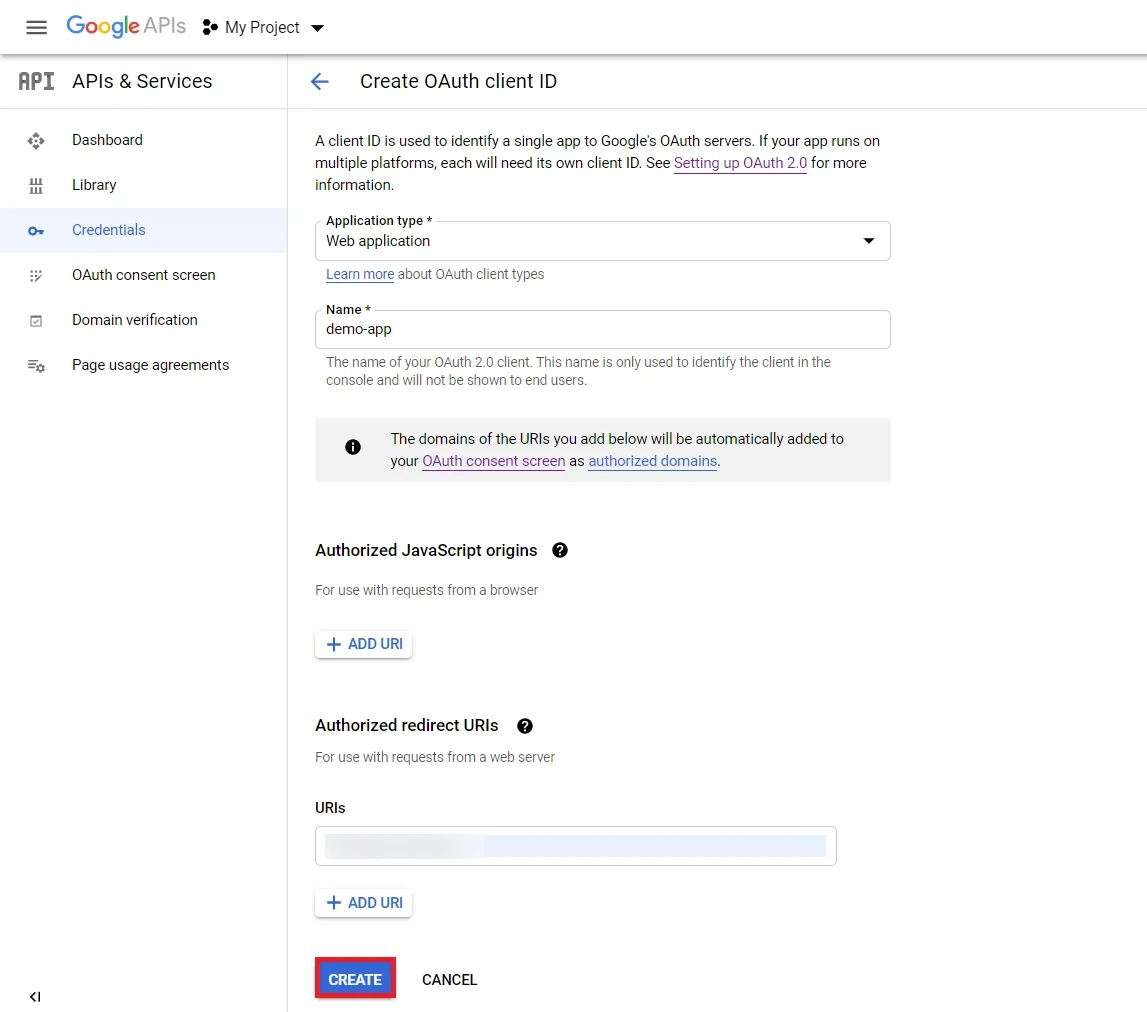
- You will see a popup with the Client ID and Client Secret Copy your Client ID and Client Secret.
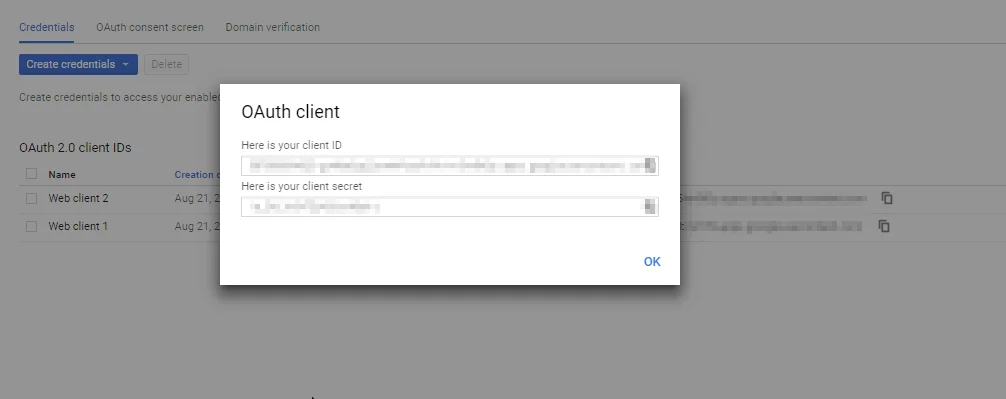
- You have successfully completed your Google App OAuth Server side configurations.
2. Configure Google Workspace as an Identity Provider in miniOrange
- Go to miniOrange Admin Console .
- From the left navigation bar select Identity Provider.
- Click on Add Identity Provider button.
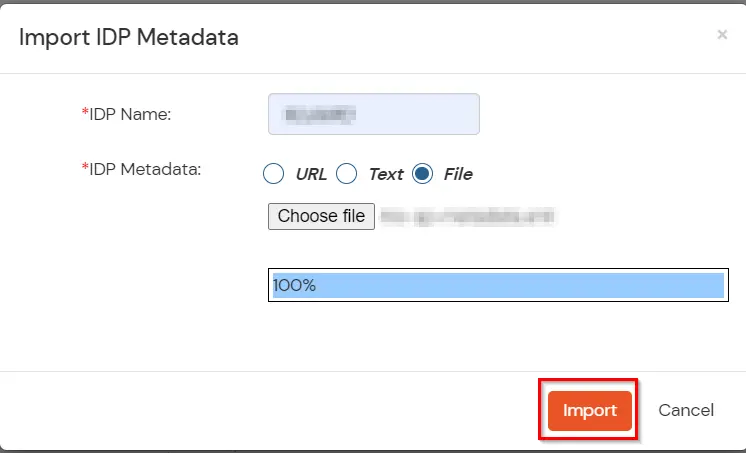
- Select SAML. Click on Import IDP metadata.
- Choose an appropriate IDP name. Enter the URL which you have saved in the previous step from Google Workspace.
- Click on Import.
- As shown in the below screen the IDP Entity ID, SAML SSO Login URL and x.509 Certificate will be filled from the Metadata file we just imported.
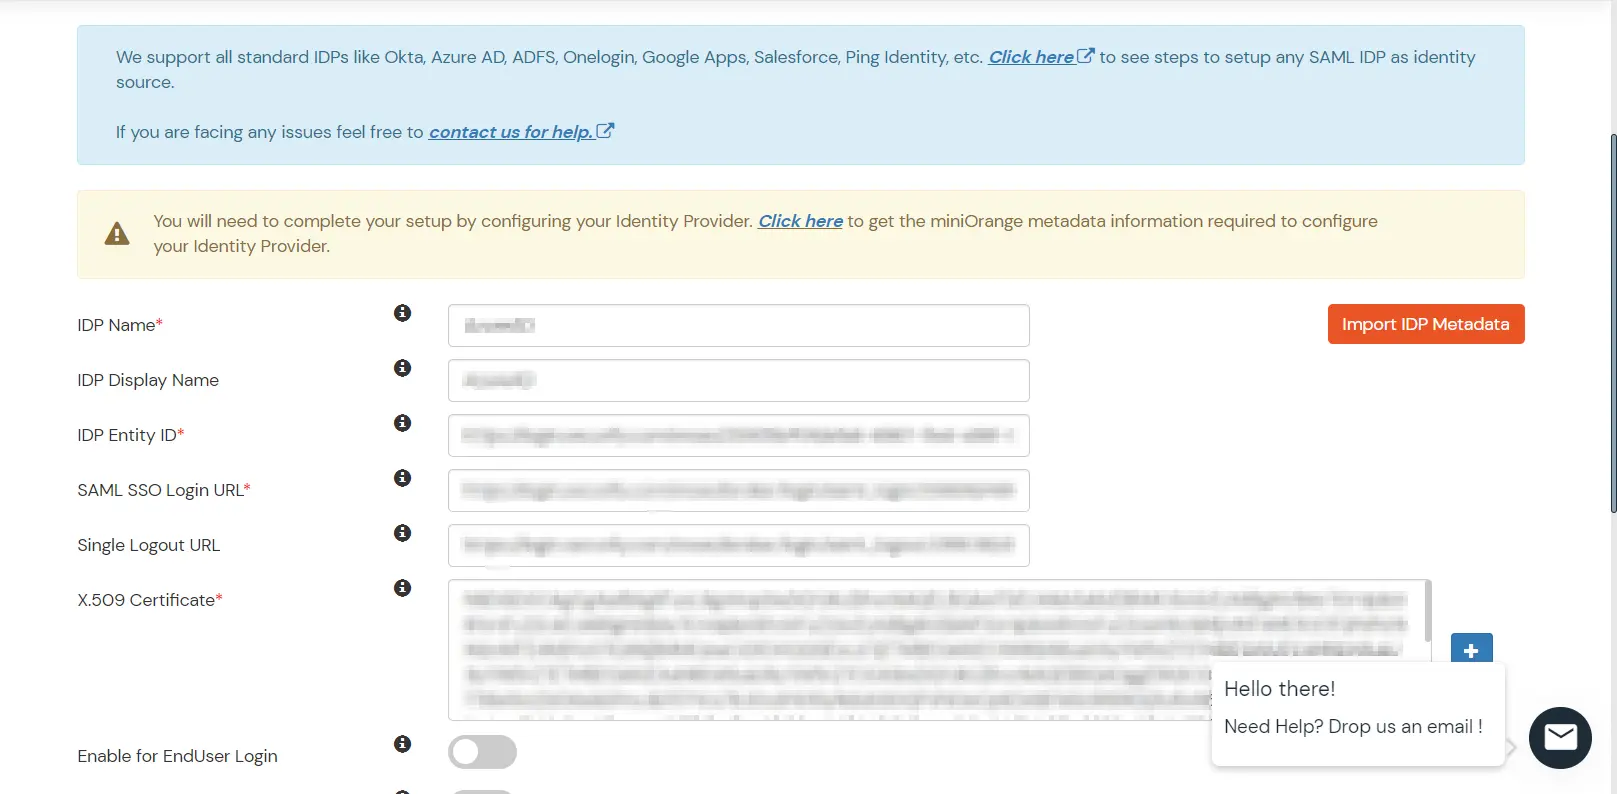
- Click Save
Test Connection
- Go to Identity Providers tab.
- Click on Select>>Test Connection option against the Identity Provider you configured.
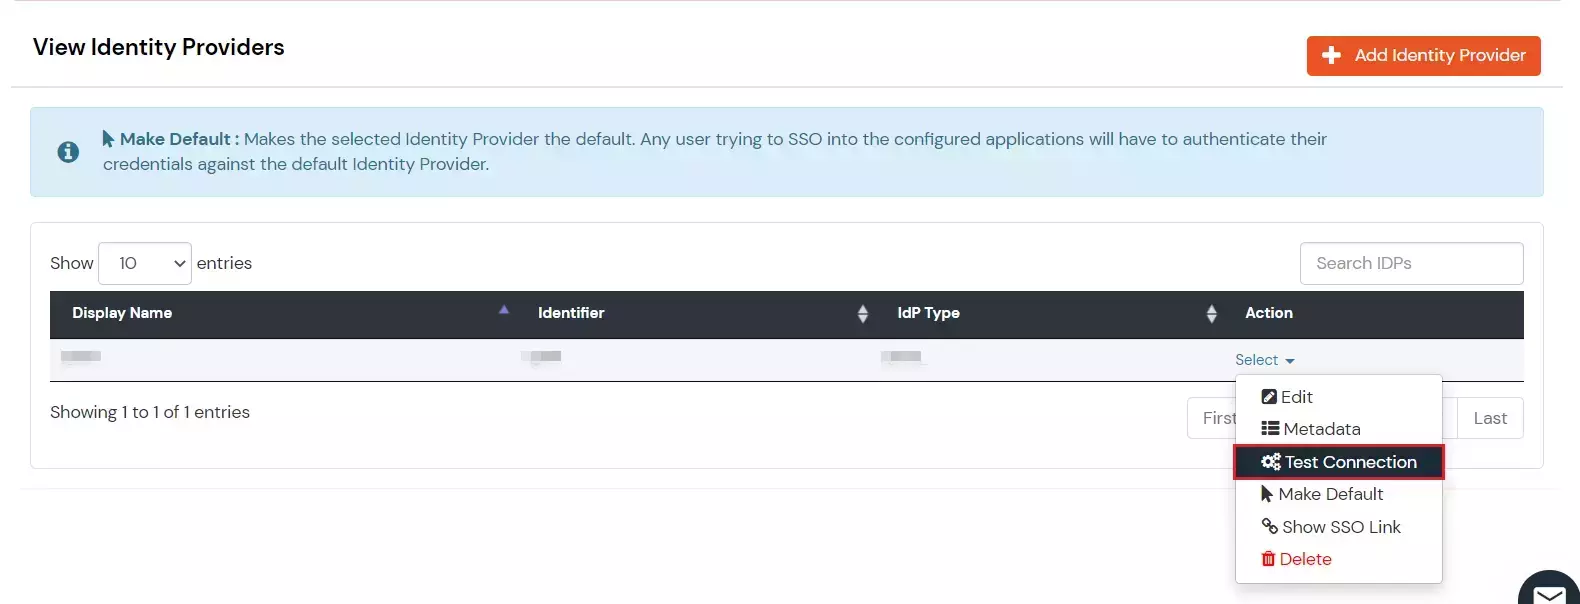
- On entering valid Google Workspace credentials you will see a pop-up window which is shown in the below screen.
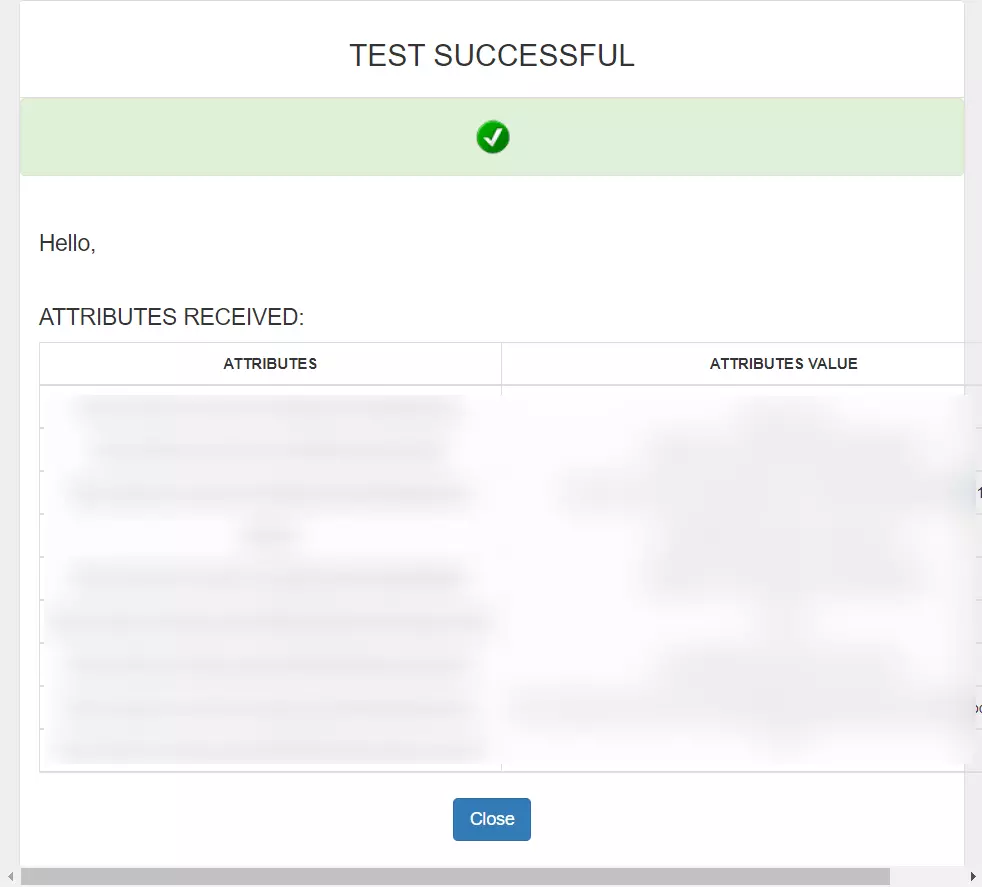
- Hence your configuration of OneLogin as an Identity Provider in miniOrange is successfully completed.
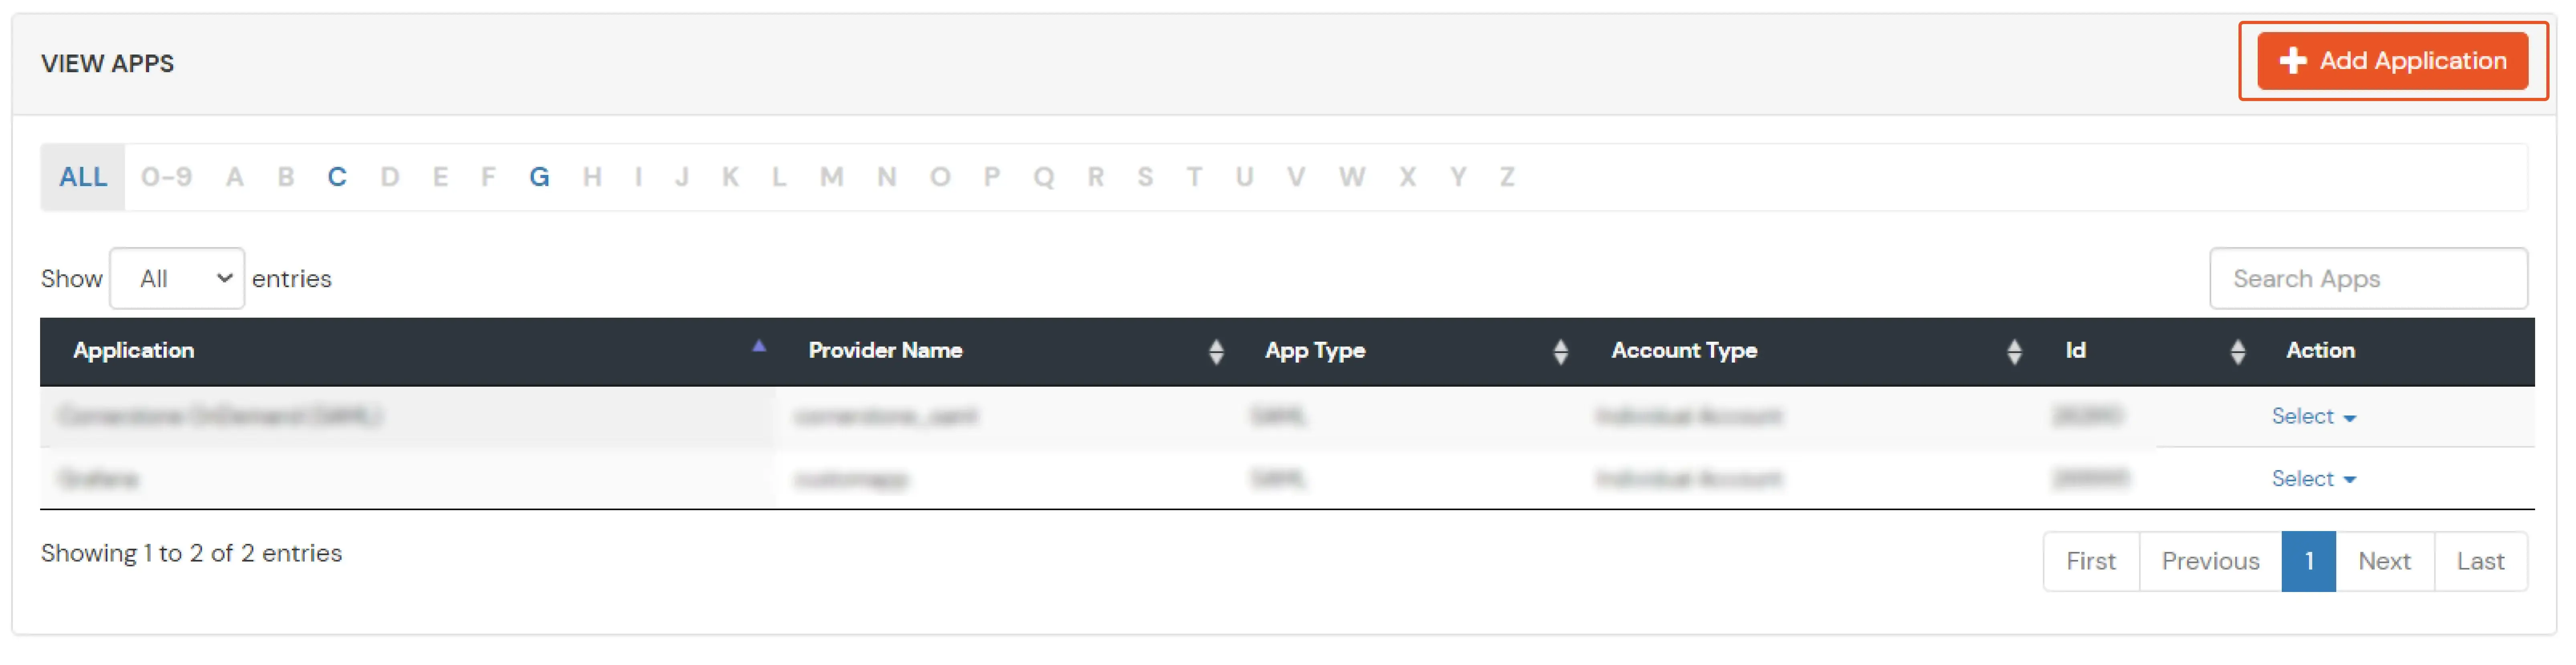
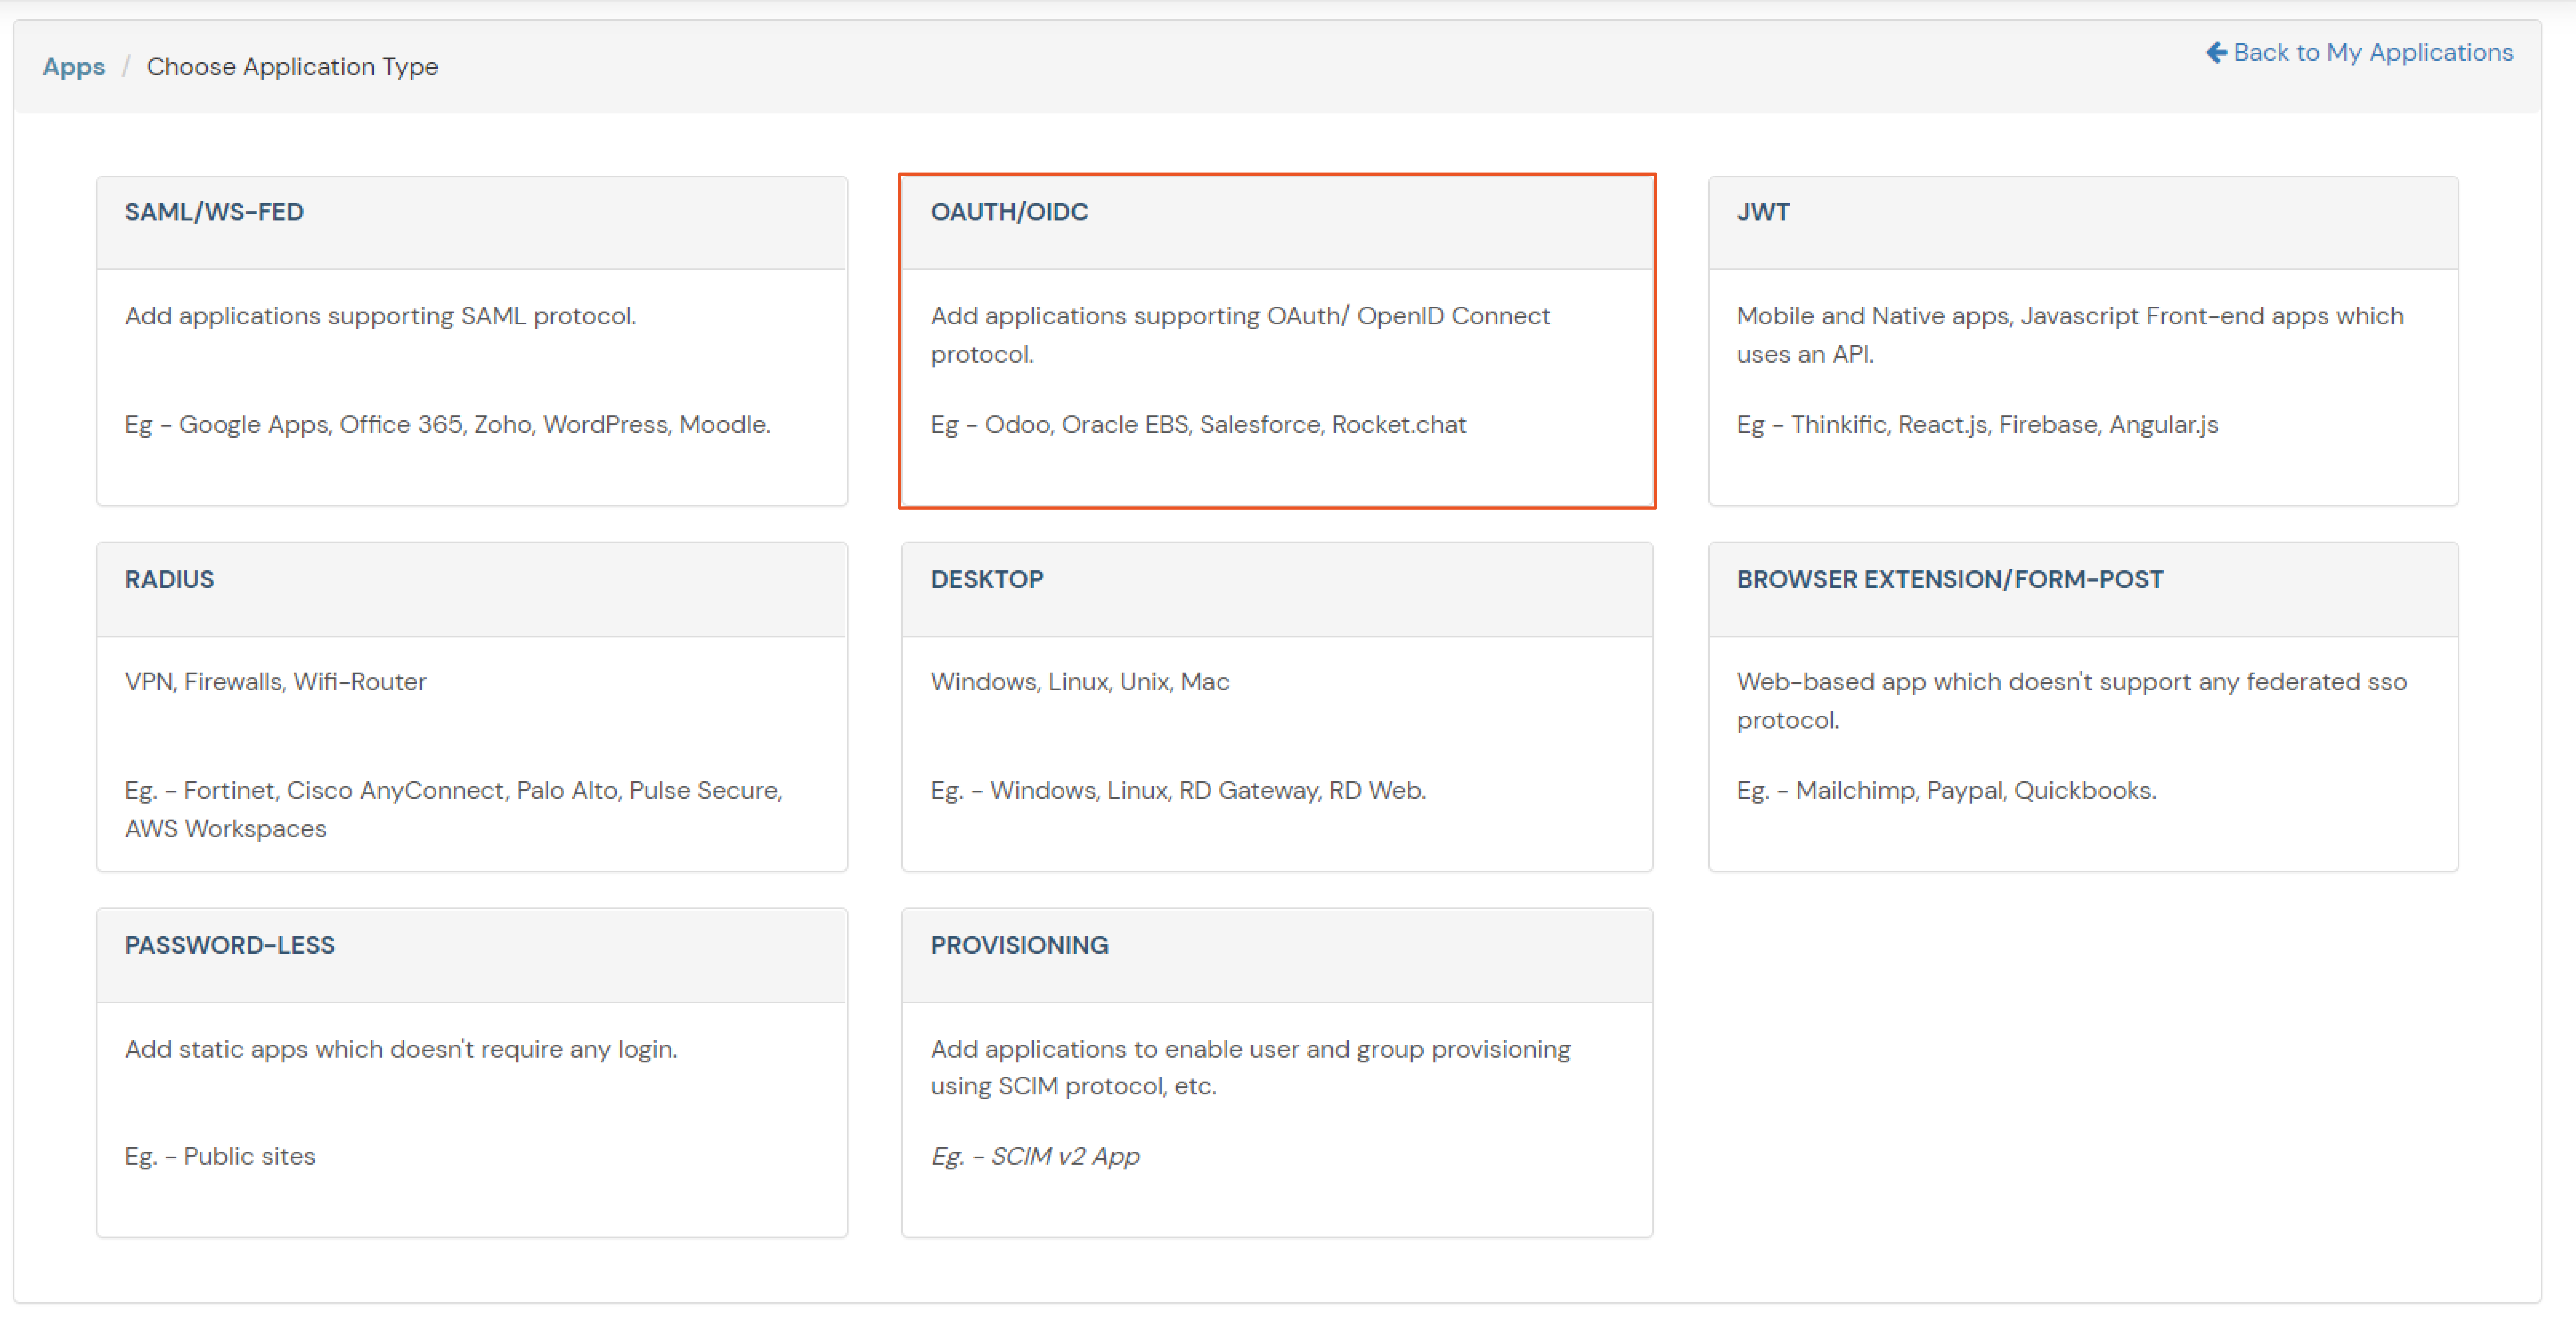
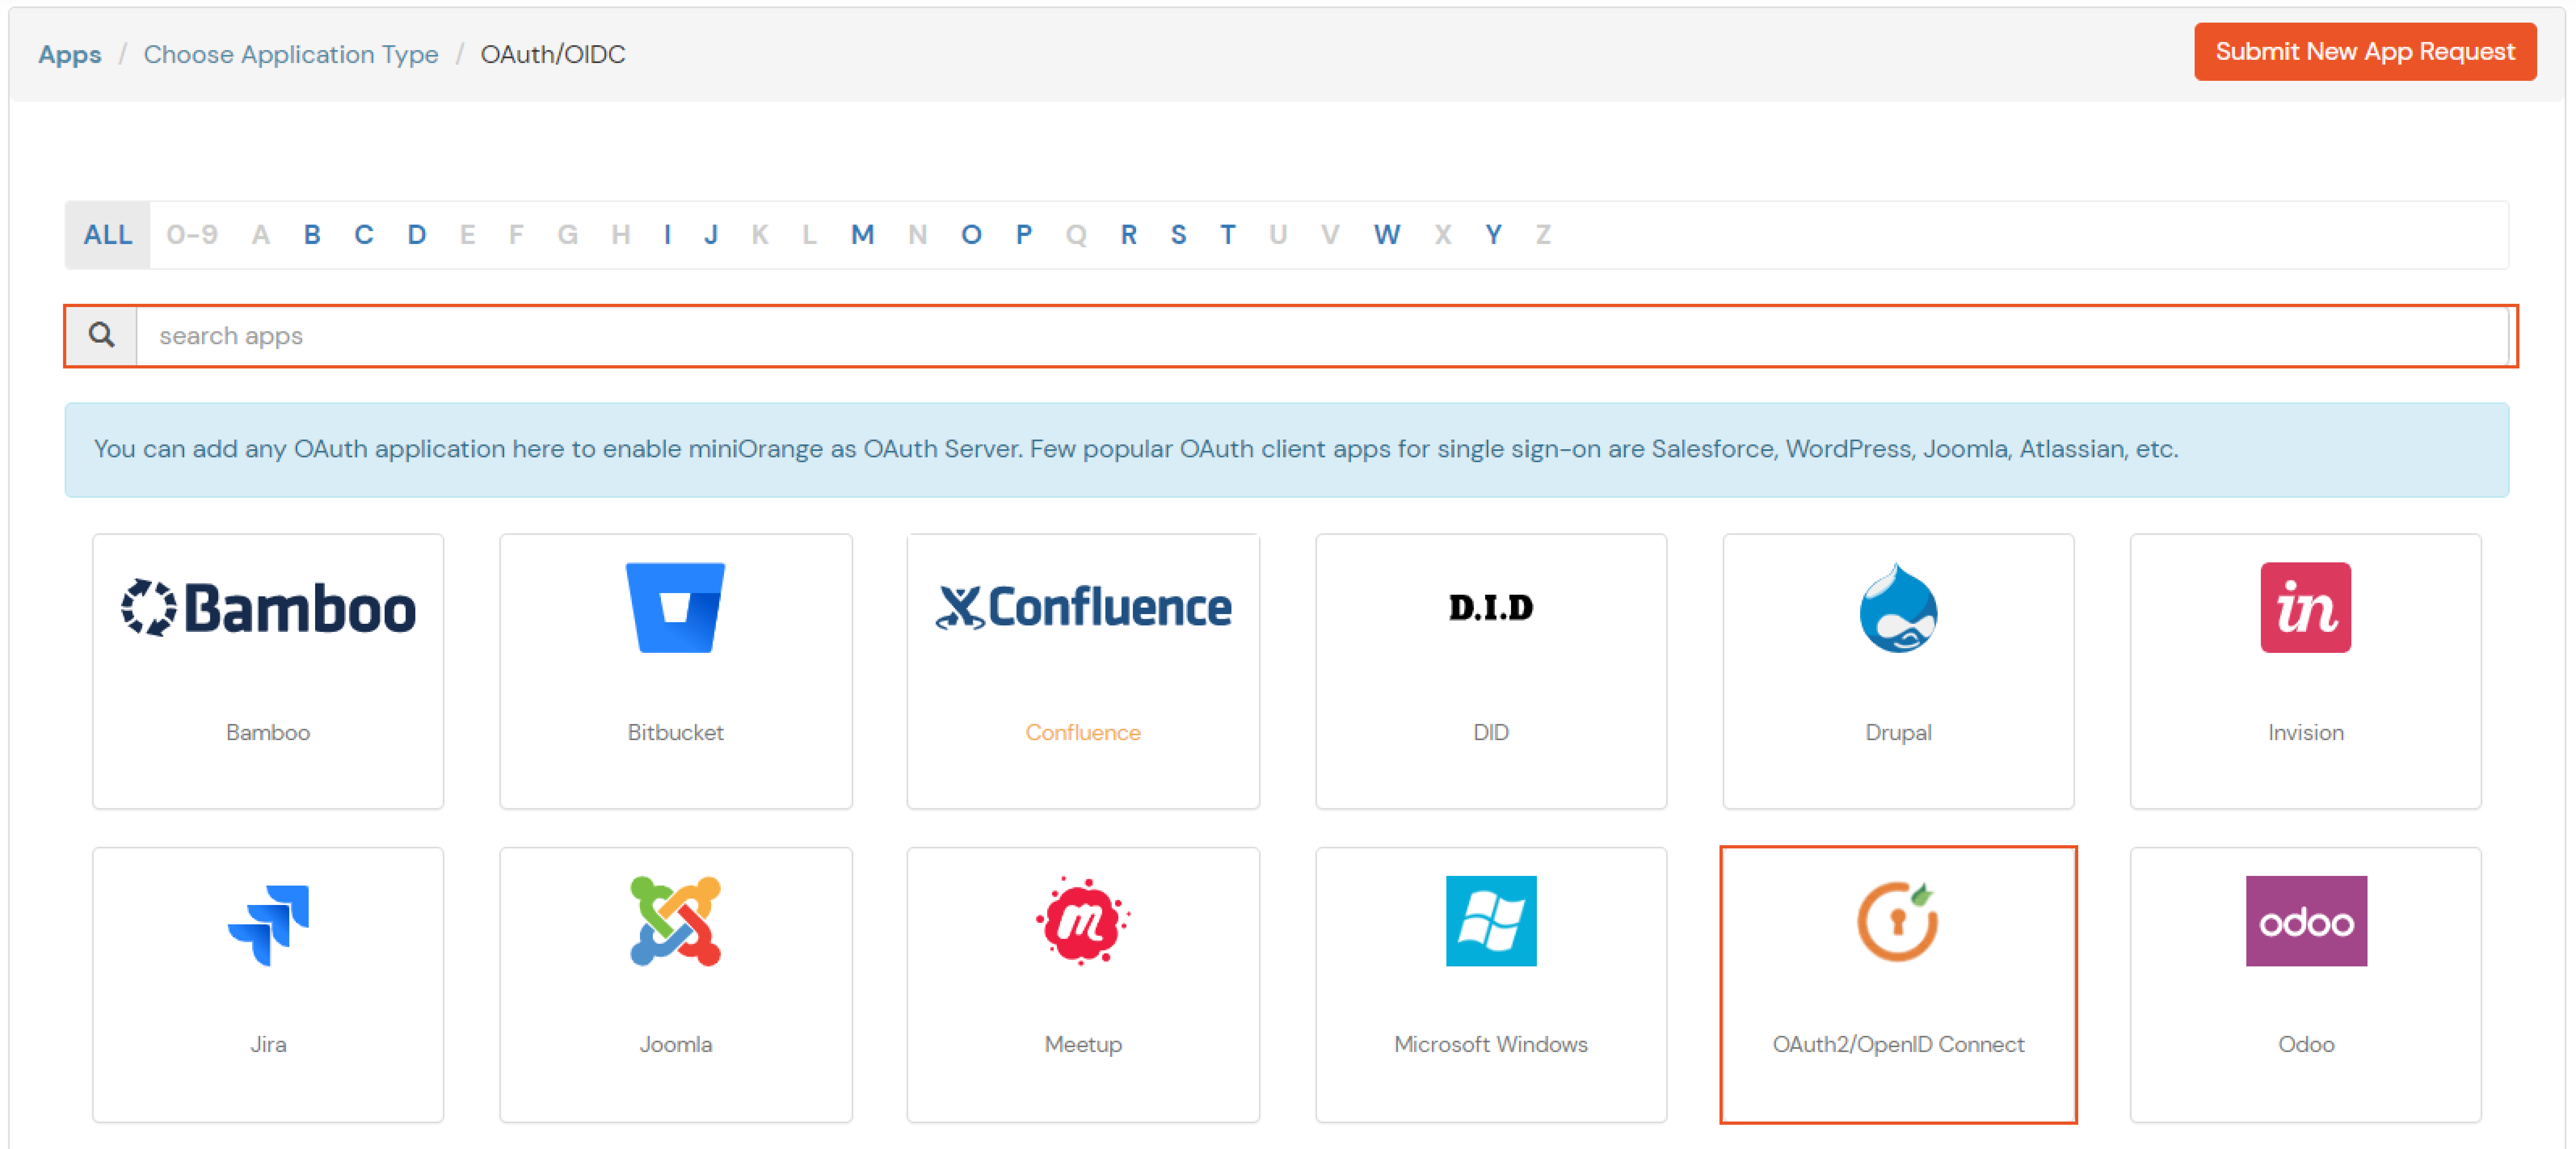
3. Configure your app in miniOrange
Note:
If you have already configured your application in miniOrange you can skip the following steps.
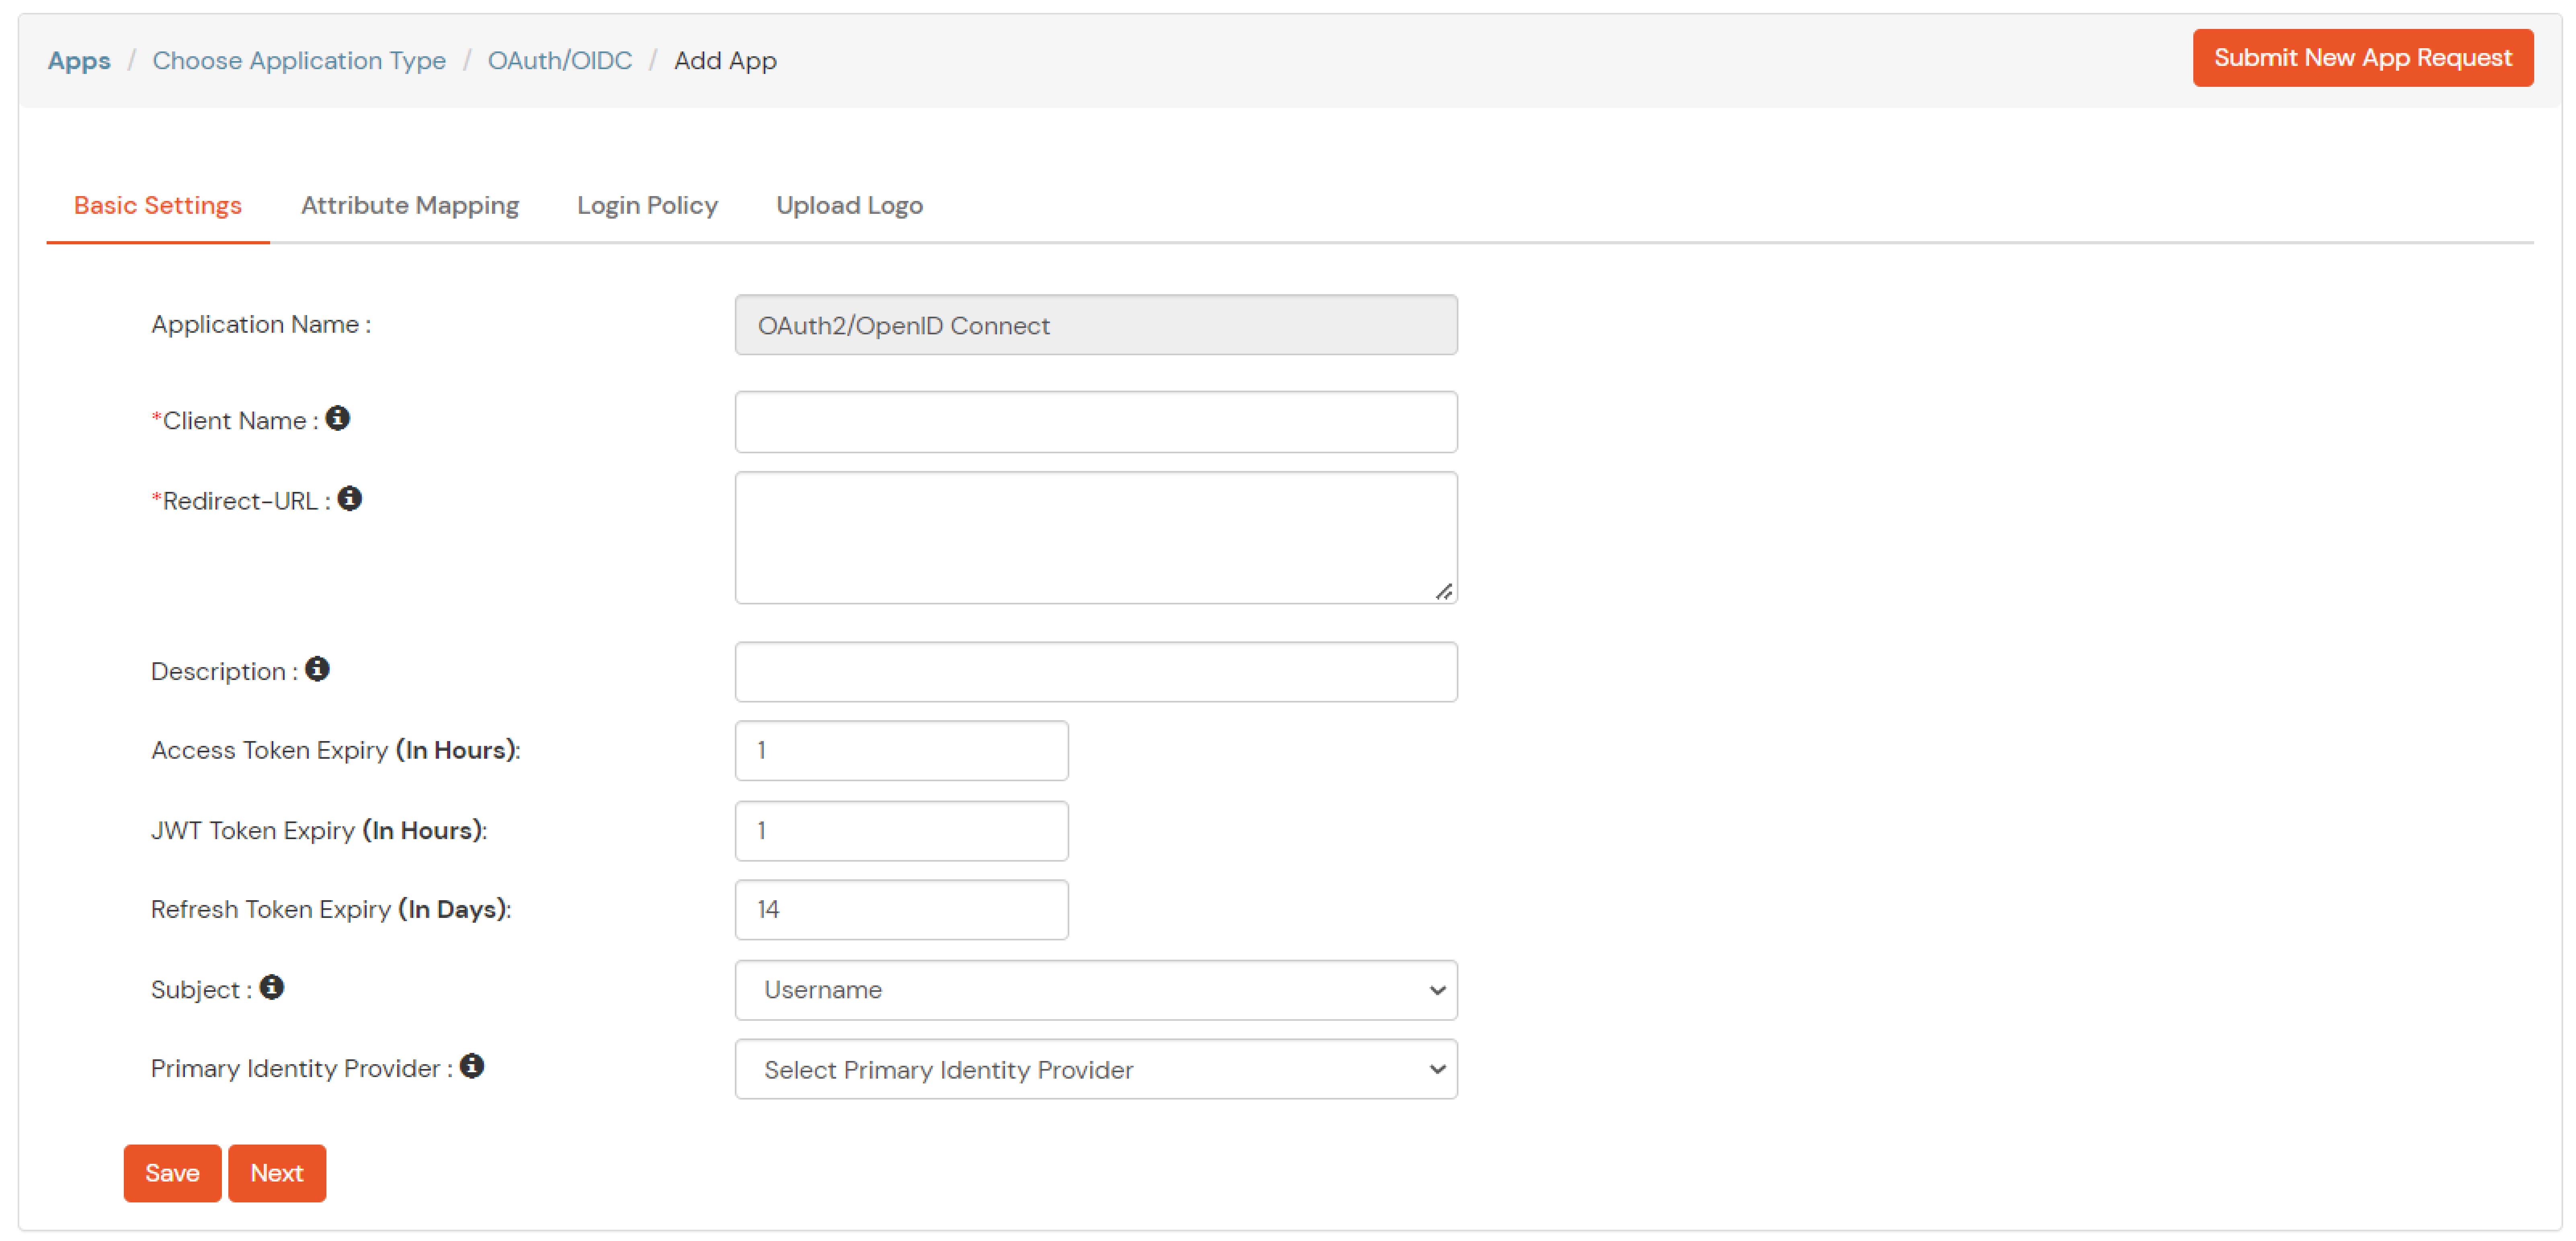
- Click on Create App under SAML.
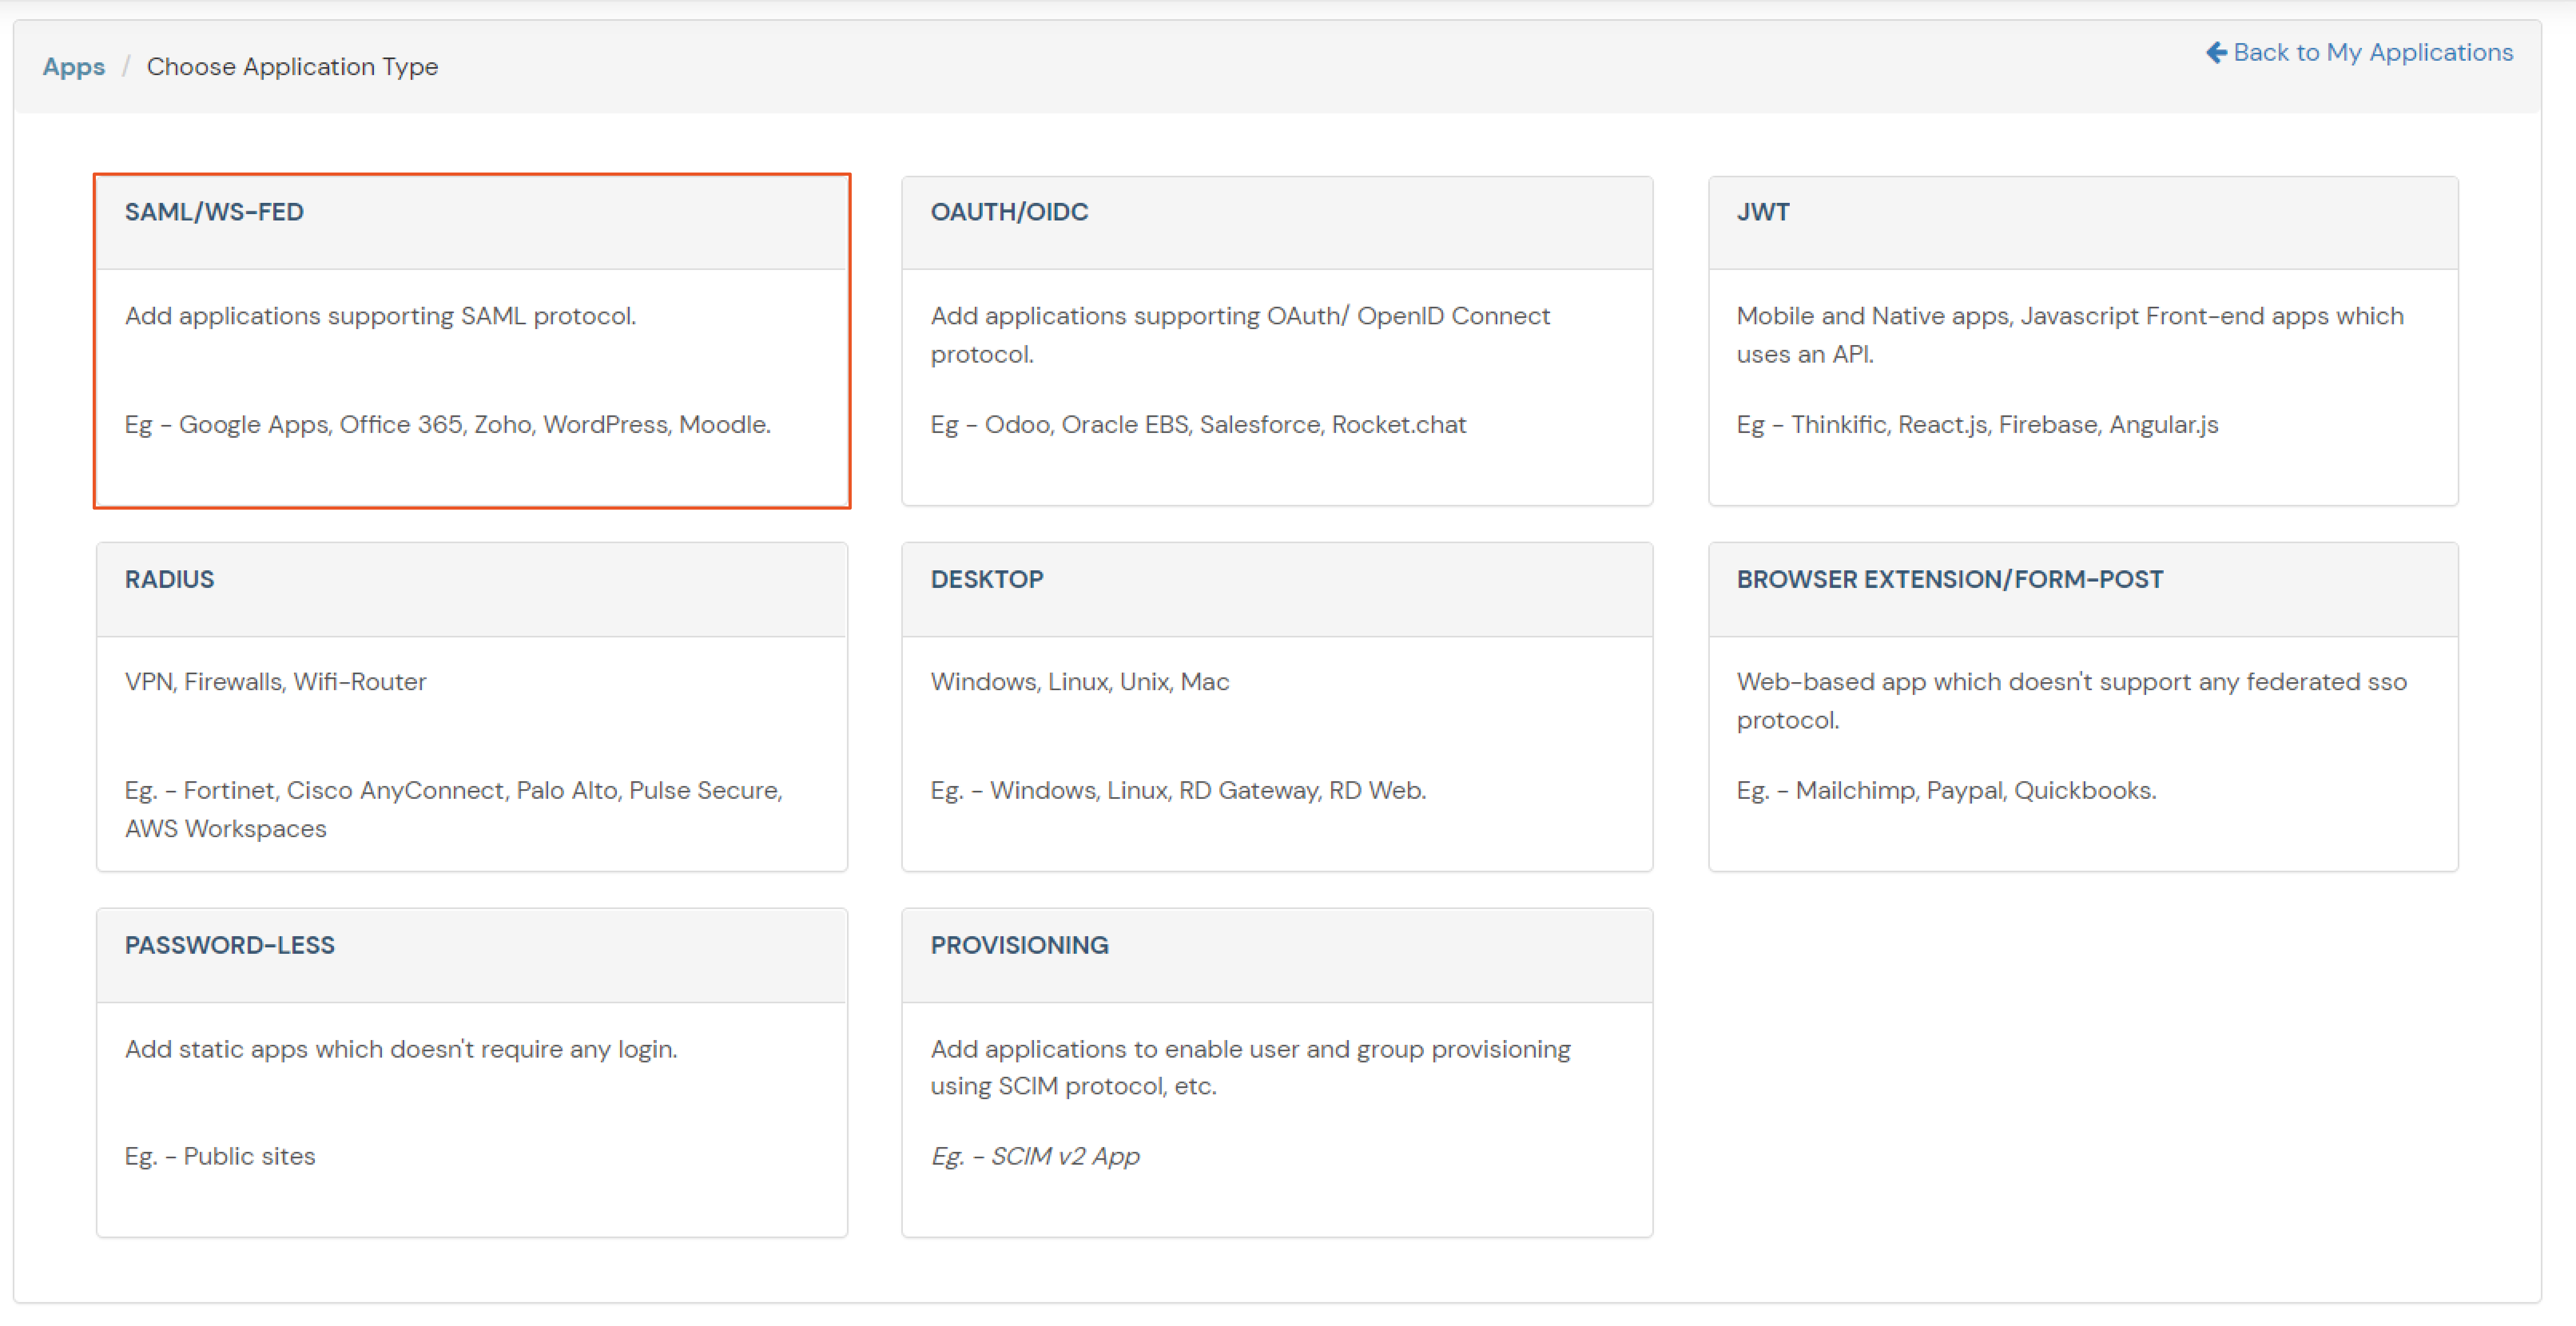
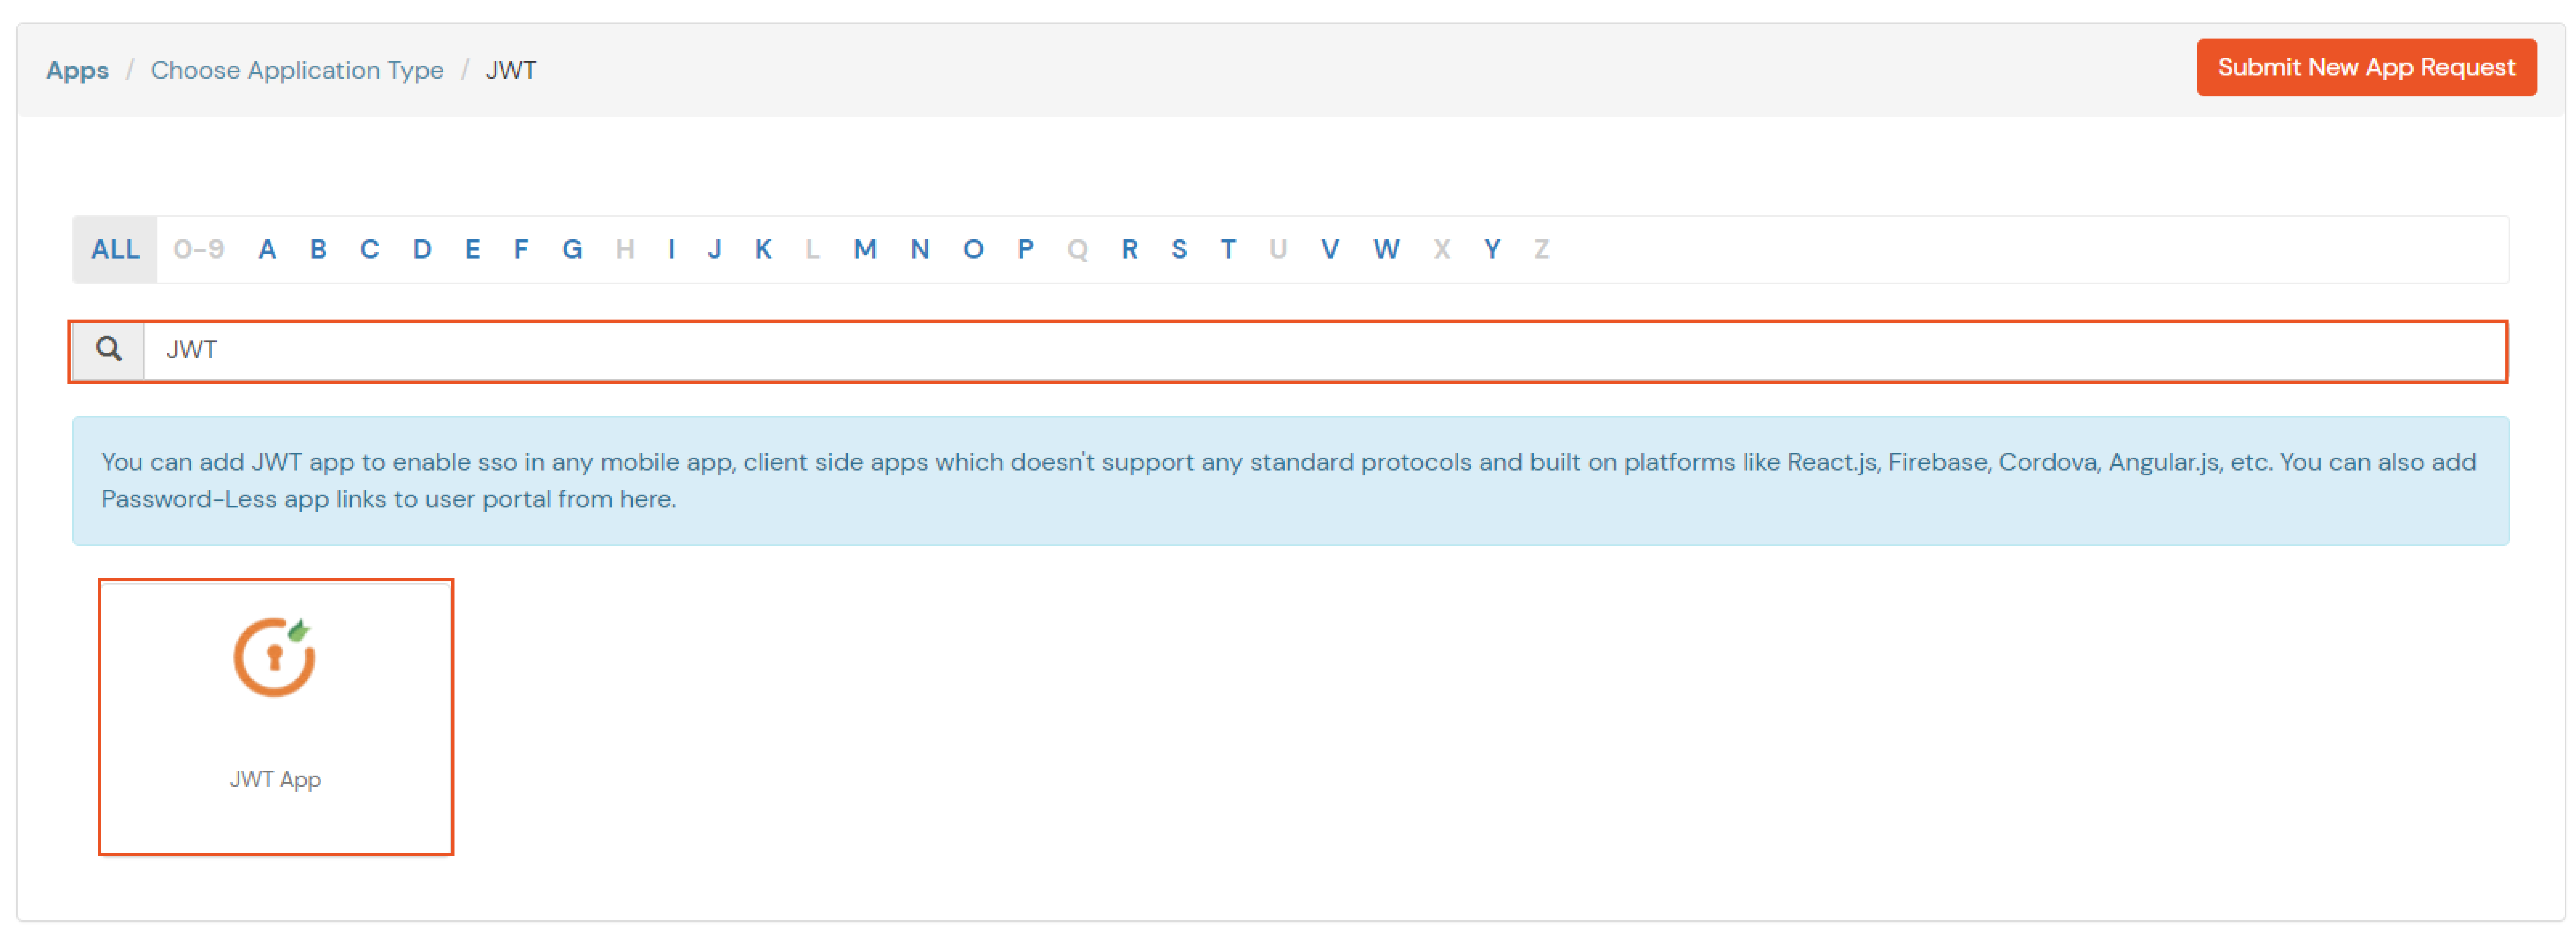
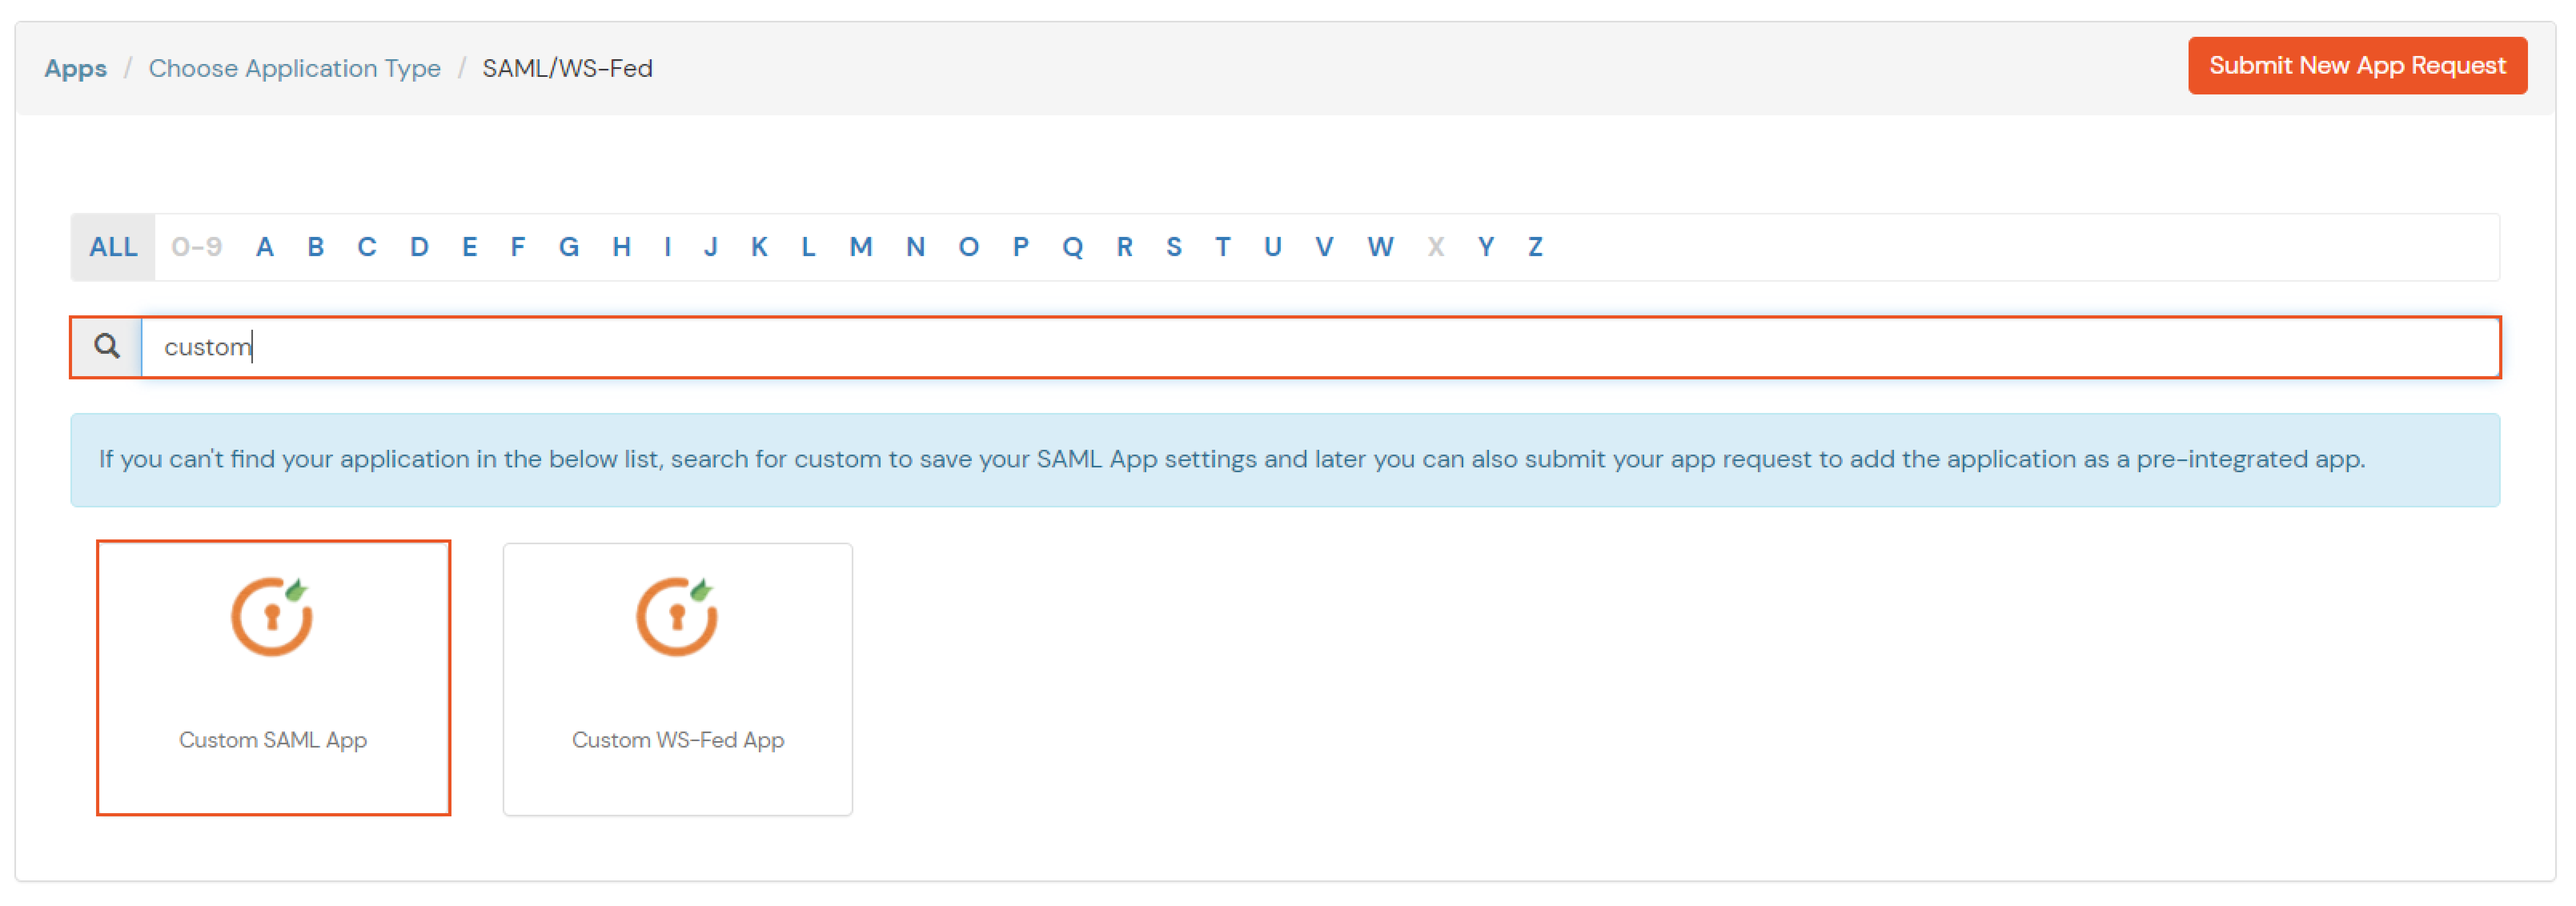
- Search for your Application. In case you do not find your app, search for Custom SAML App.
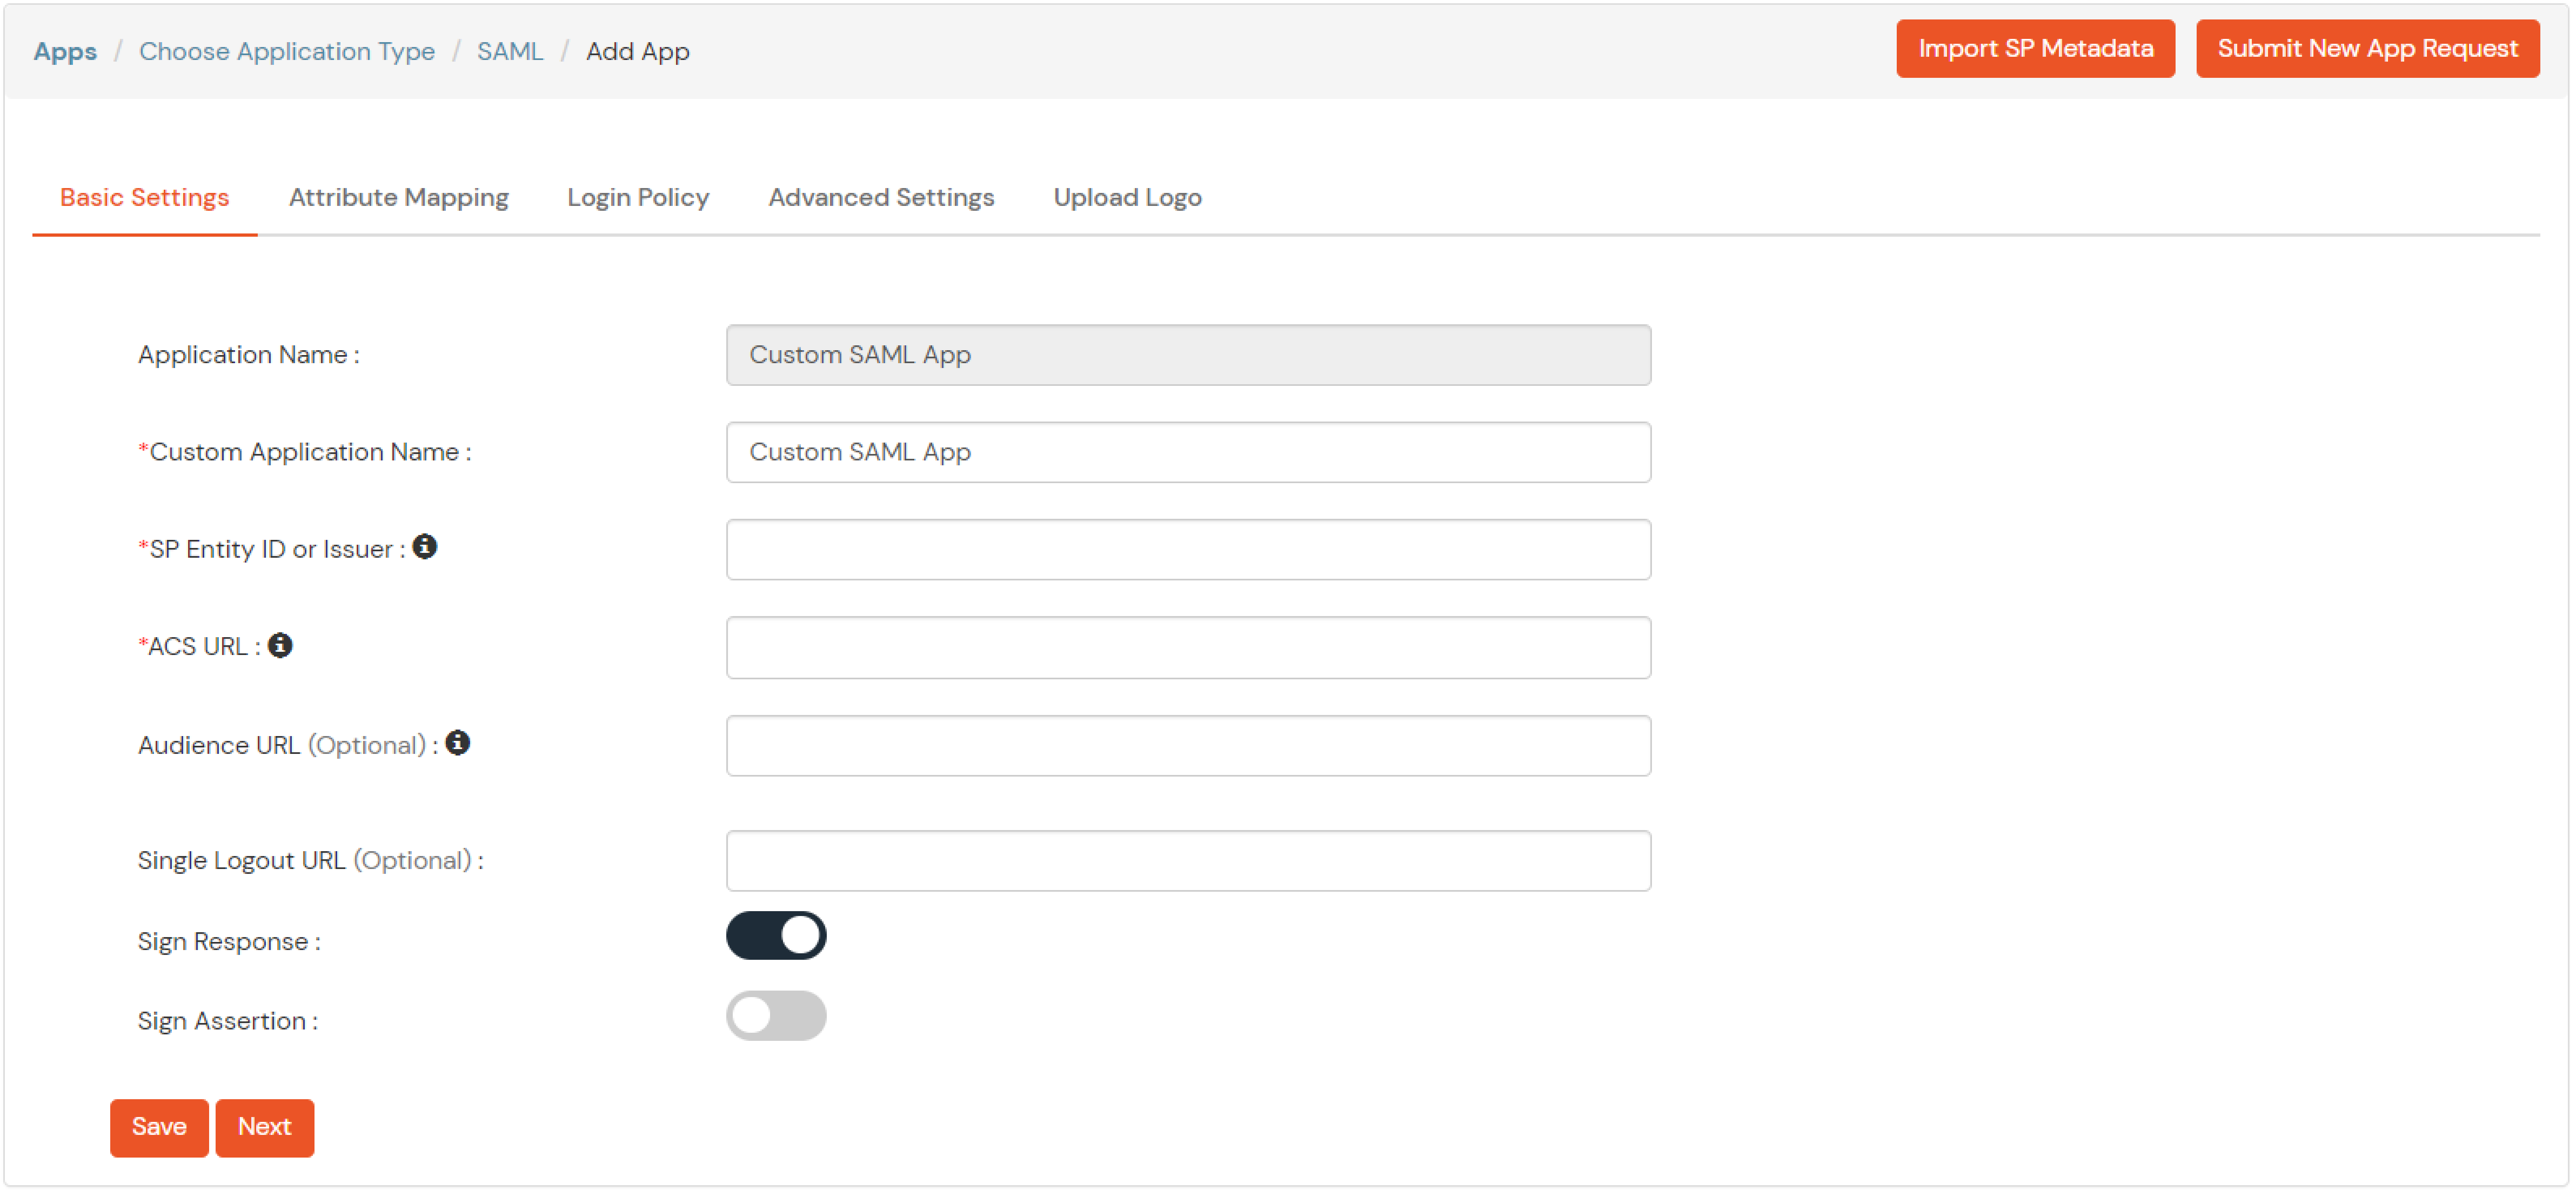
- Get the ACS URL and SP Entity ID from your application.
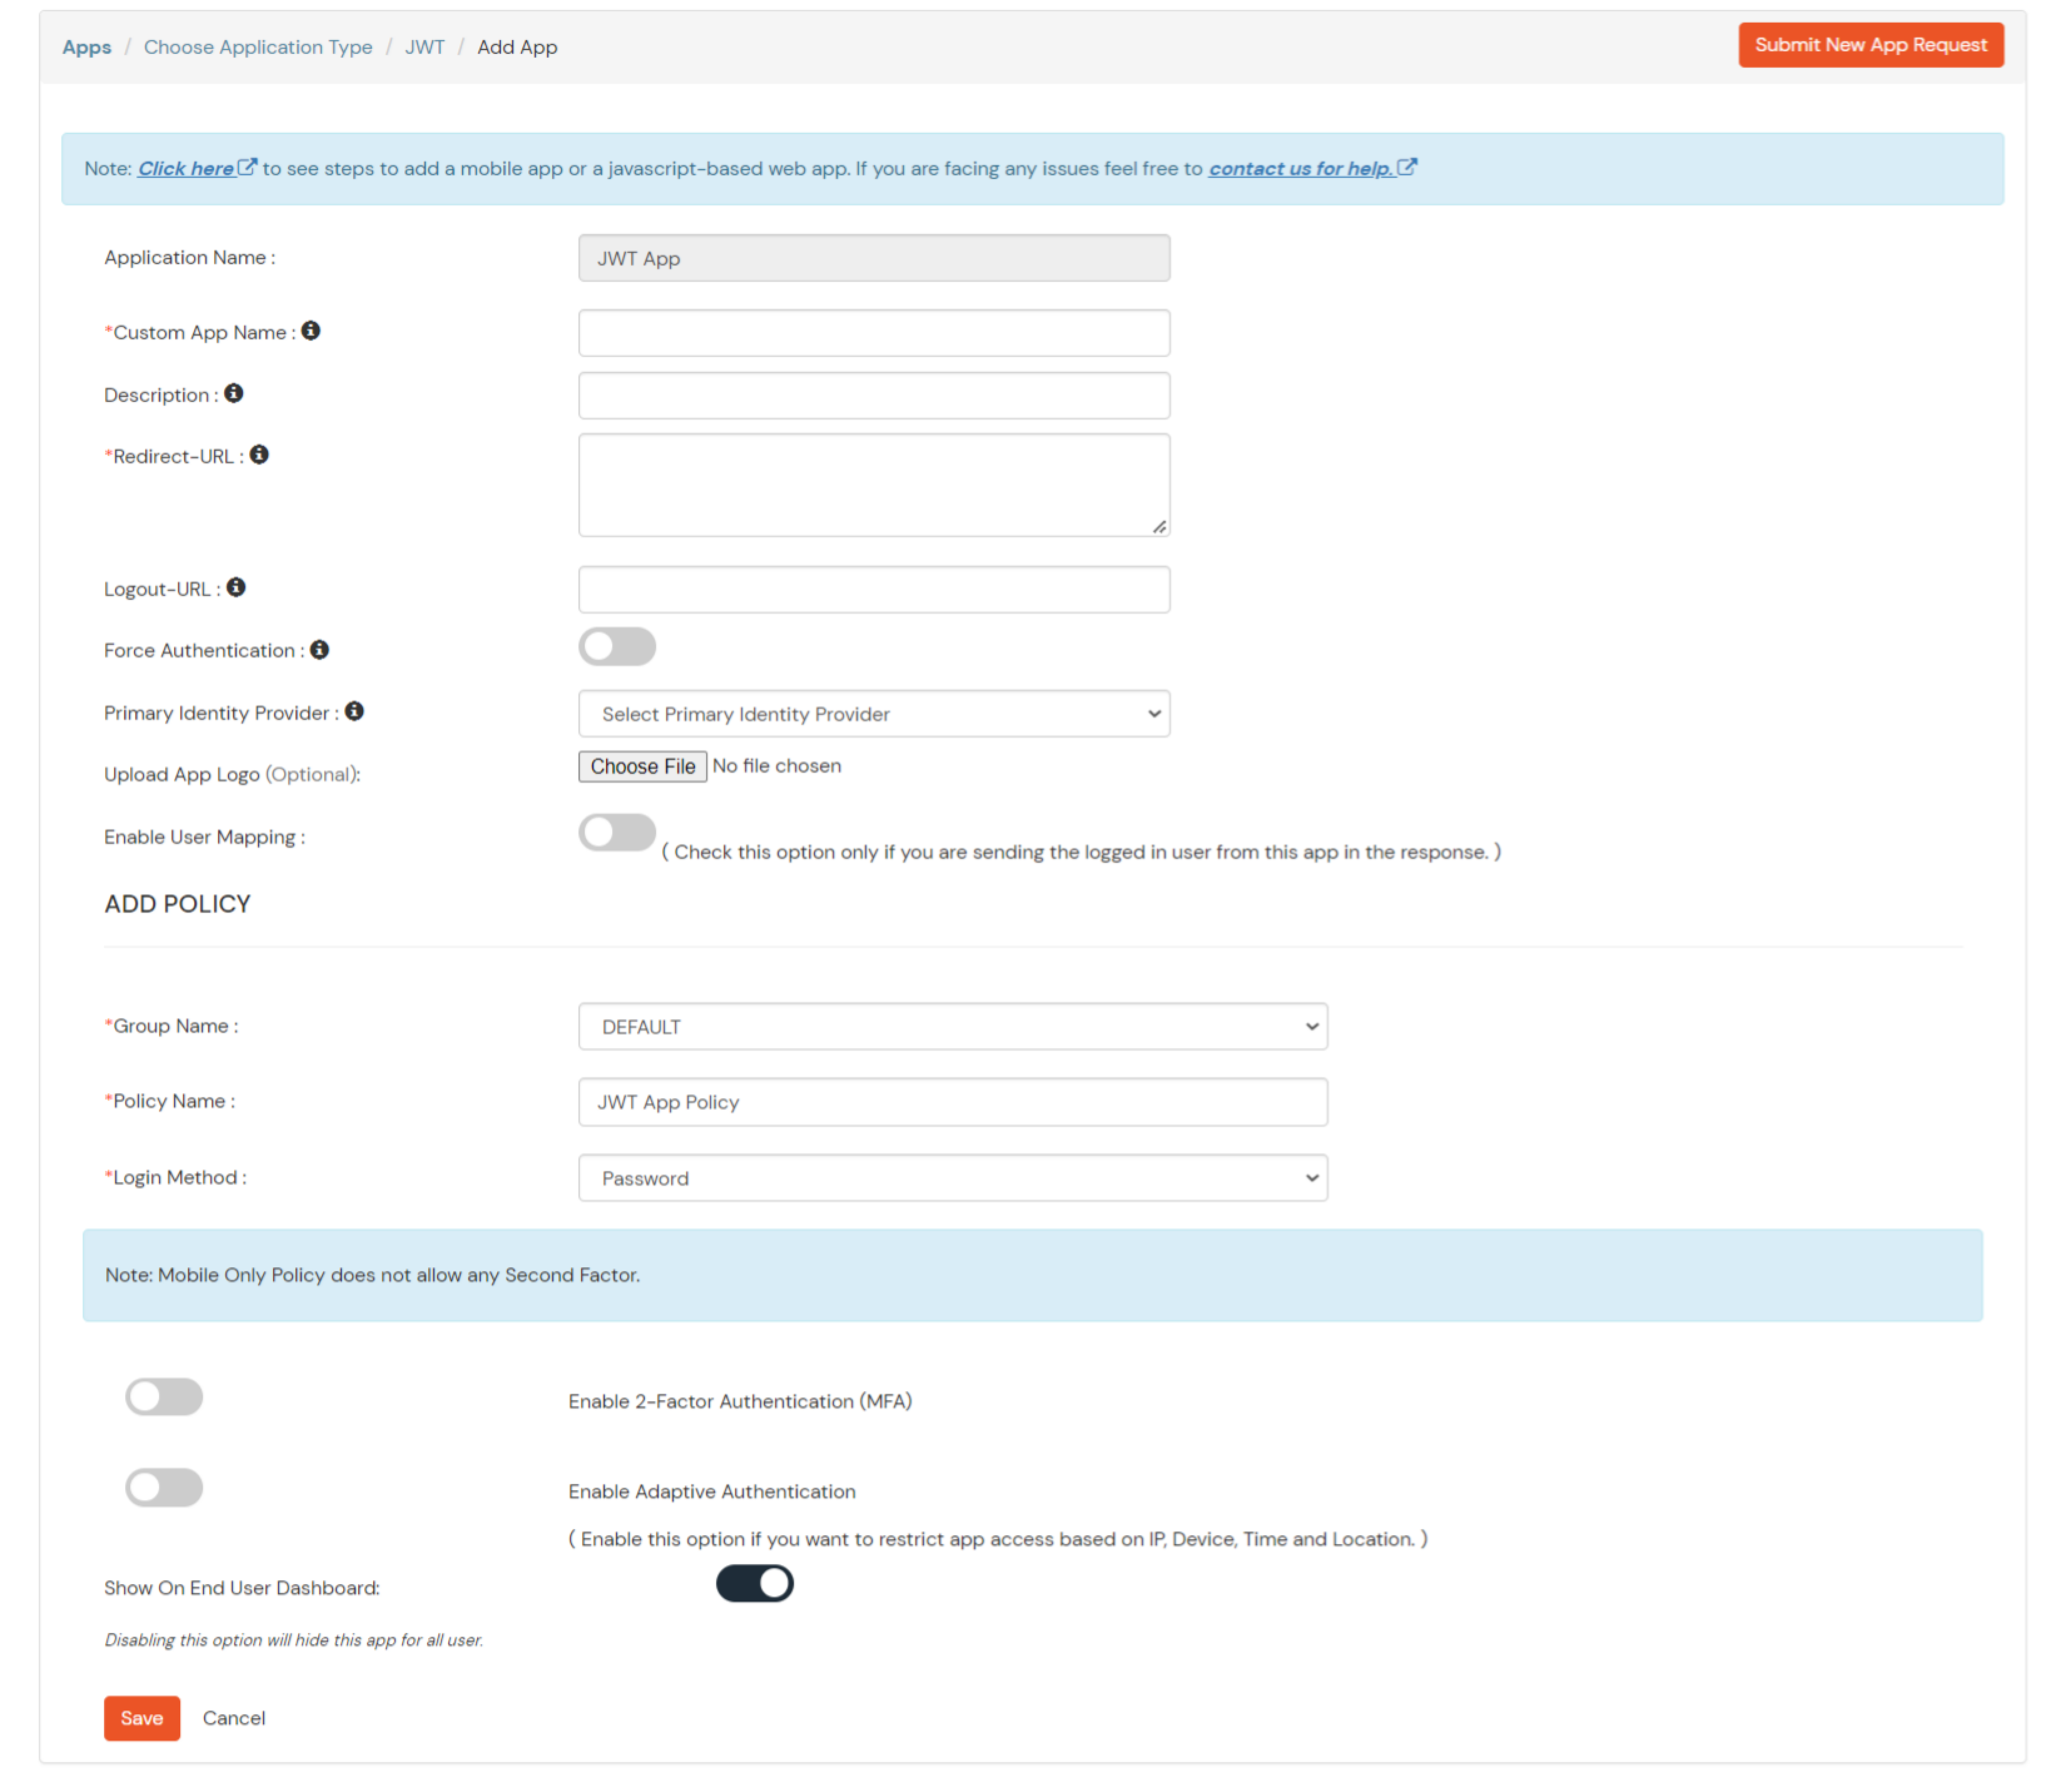
- Enter the following values OR click on Import SP Metadata:
| Service Provider Name |
Choose appropriate name according to your choice |
| SP Entity ID or Issuer |
Your Application Entity ID |
| ACS URL X.509 Certificate (optional) |
Your Application Assertion Consumer Service URL |
| NameID format |
Select urn:oasis:names:tc:SAML:1.1:nameid-format:emailAddress |
| Response Signed |
Unchecked |
| Assertion Signed |
Checked |
| Encrypted Assertion |
Unchecked |
| Group policy |
Default |
| Login Method |
Password |
- Click on Save to configure your application.
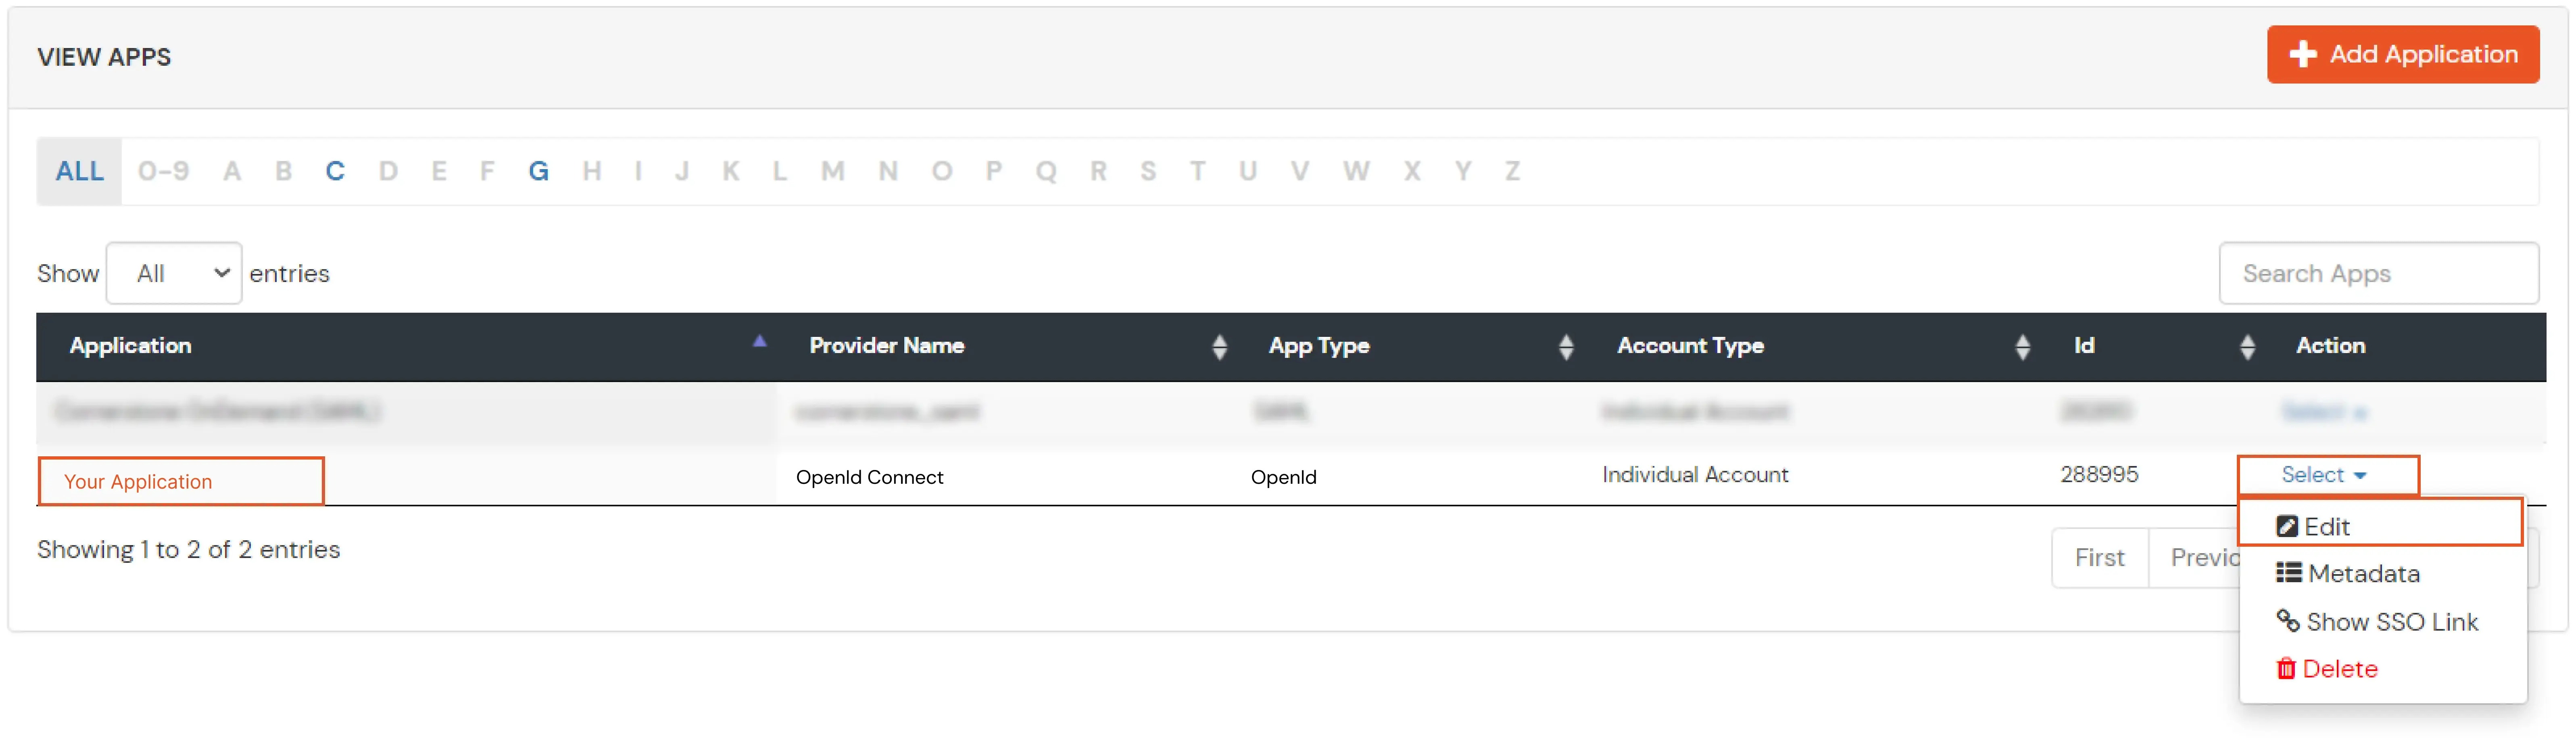
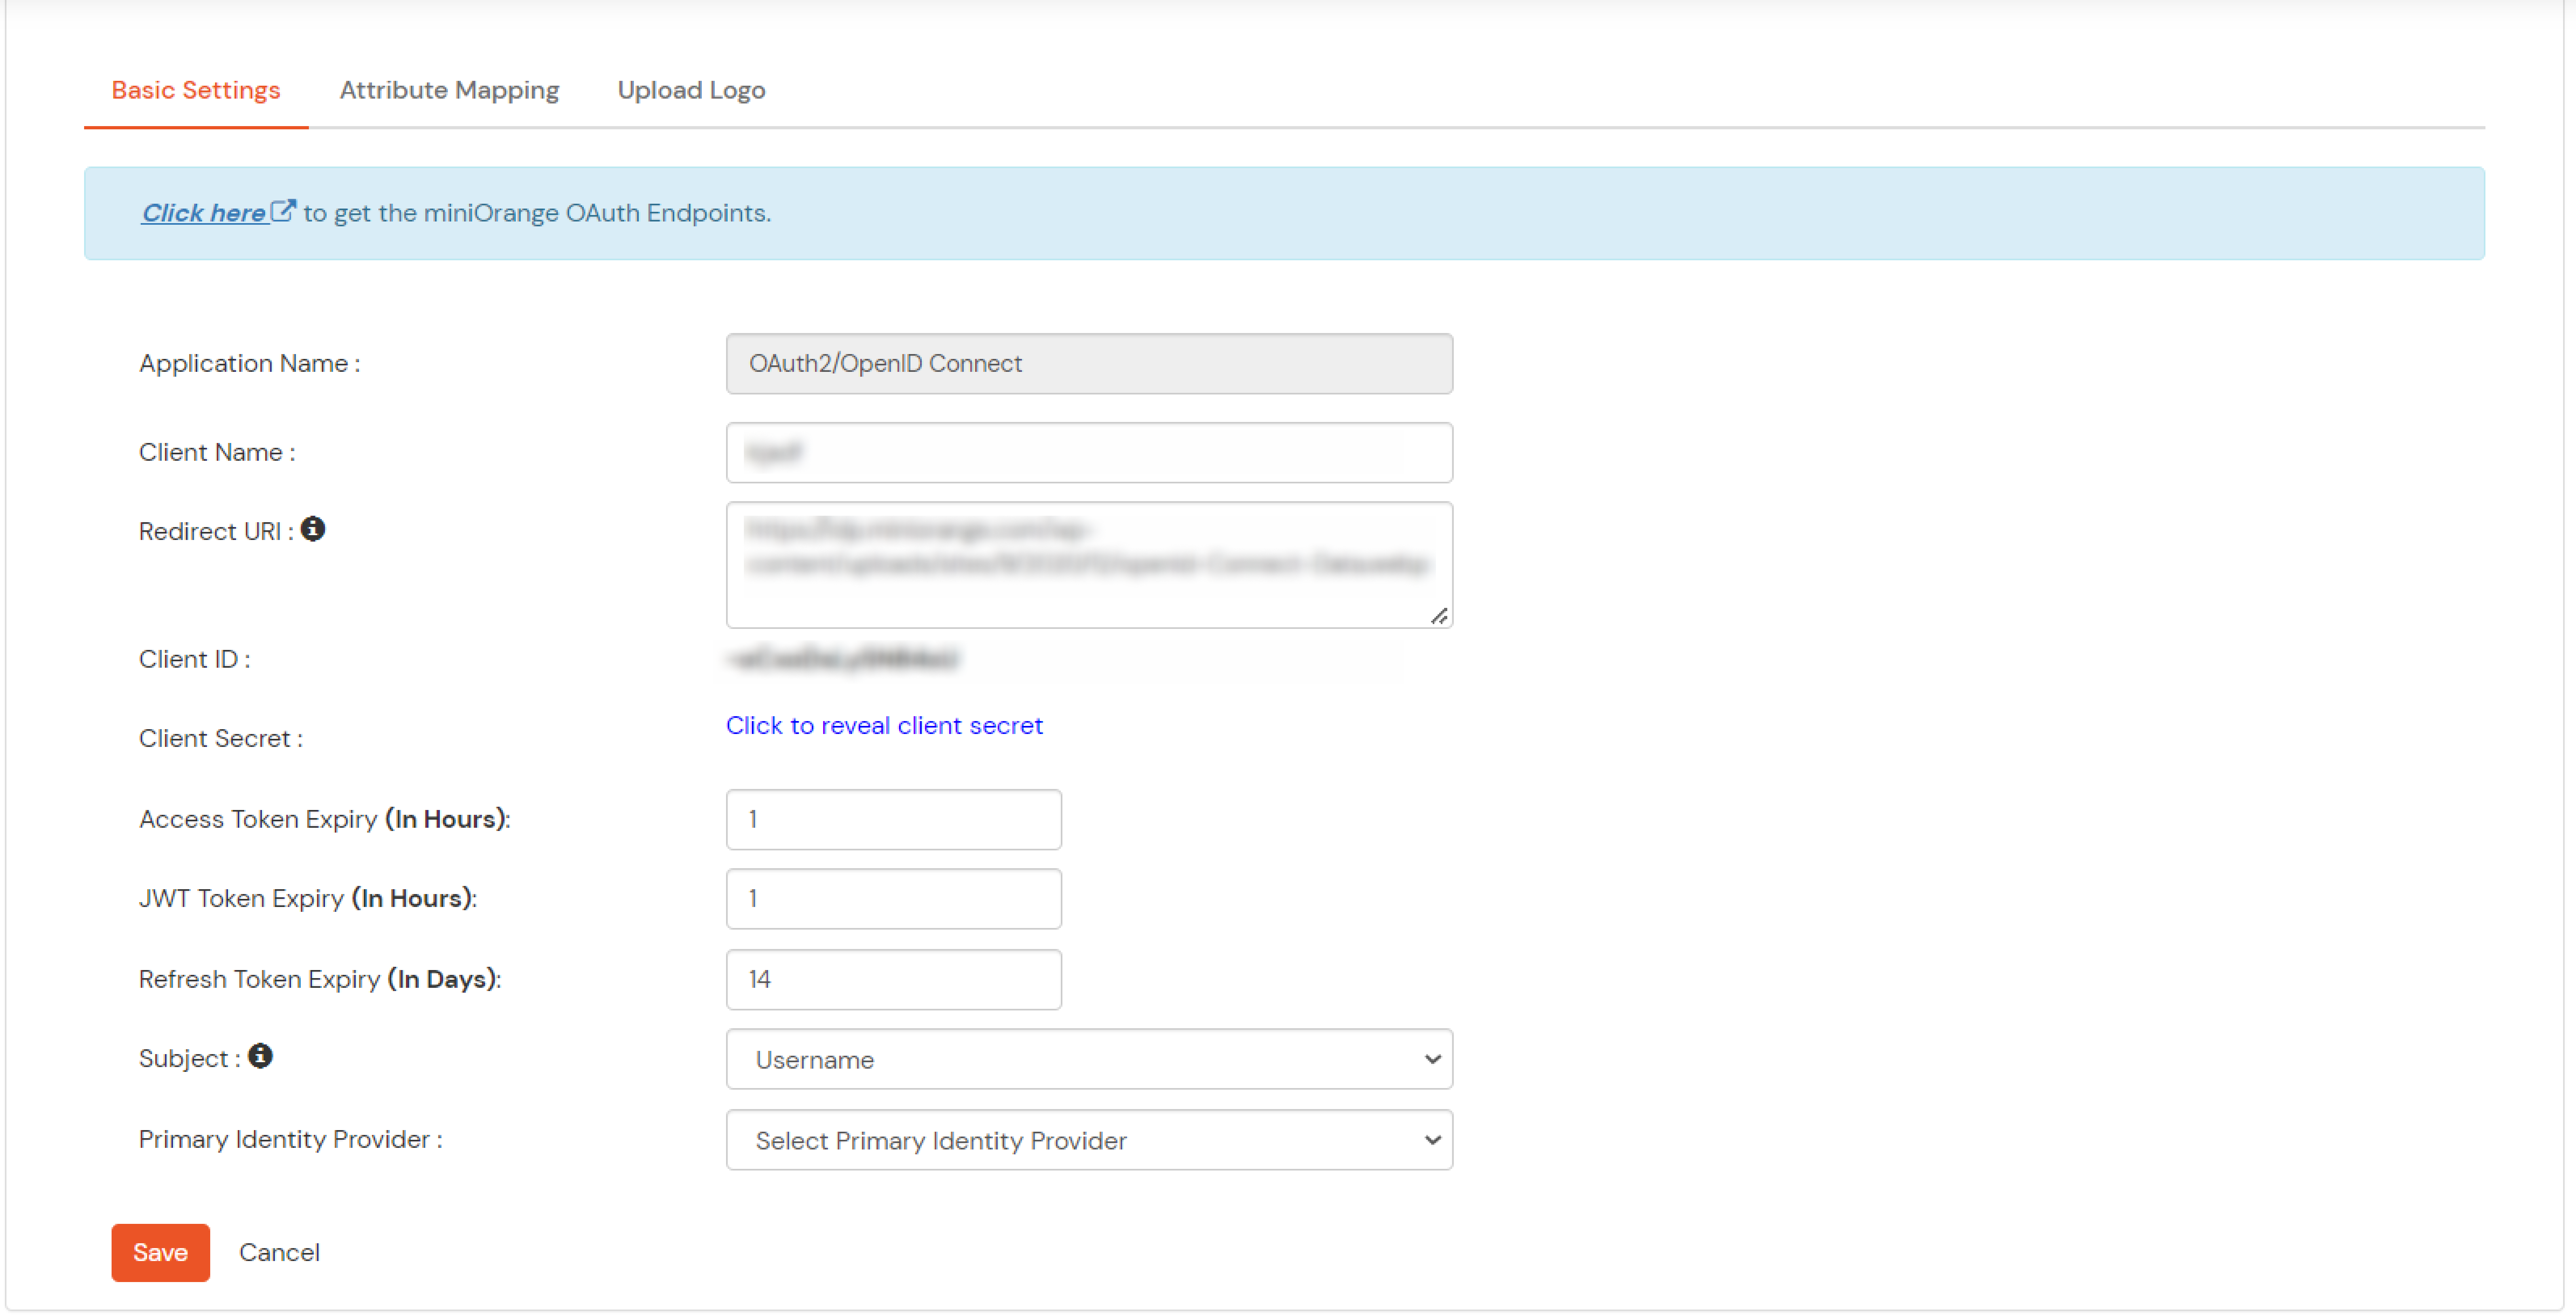
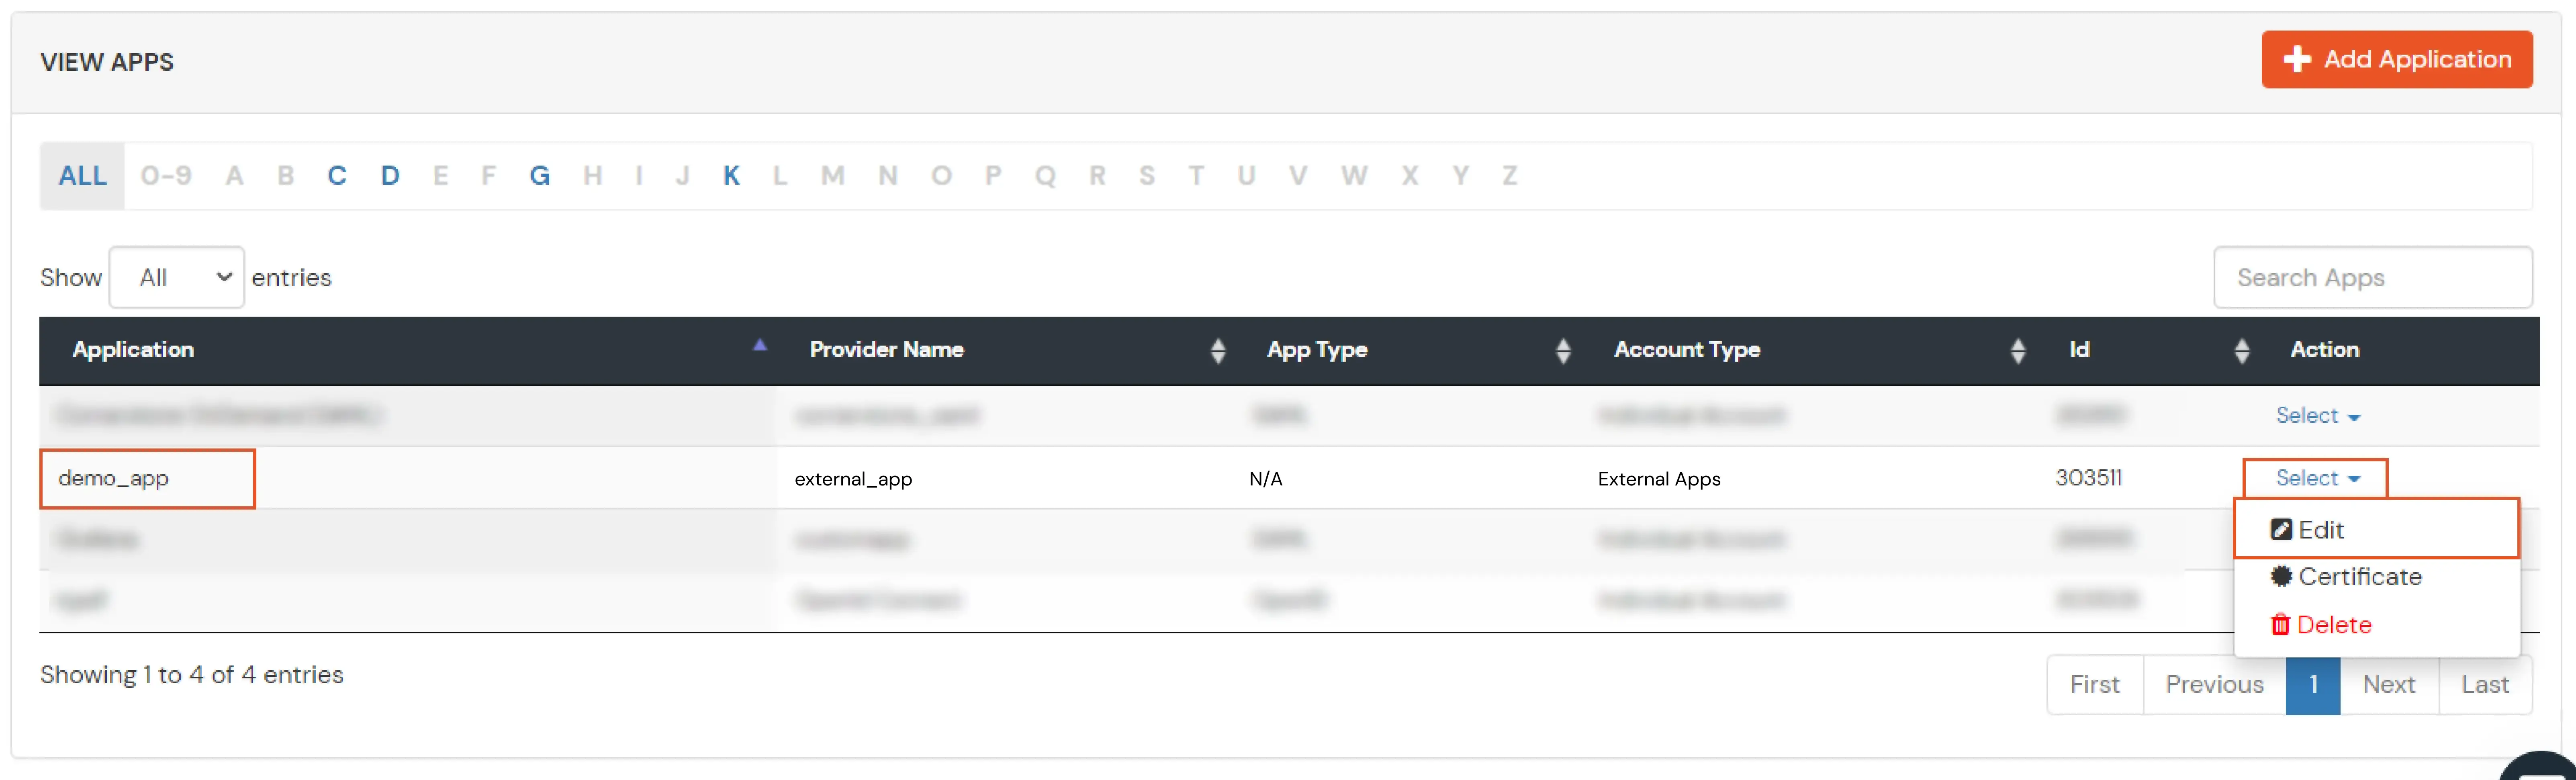
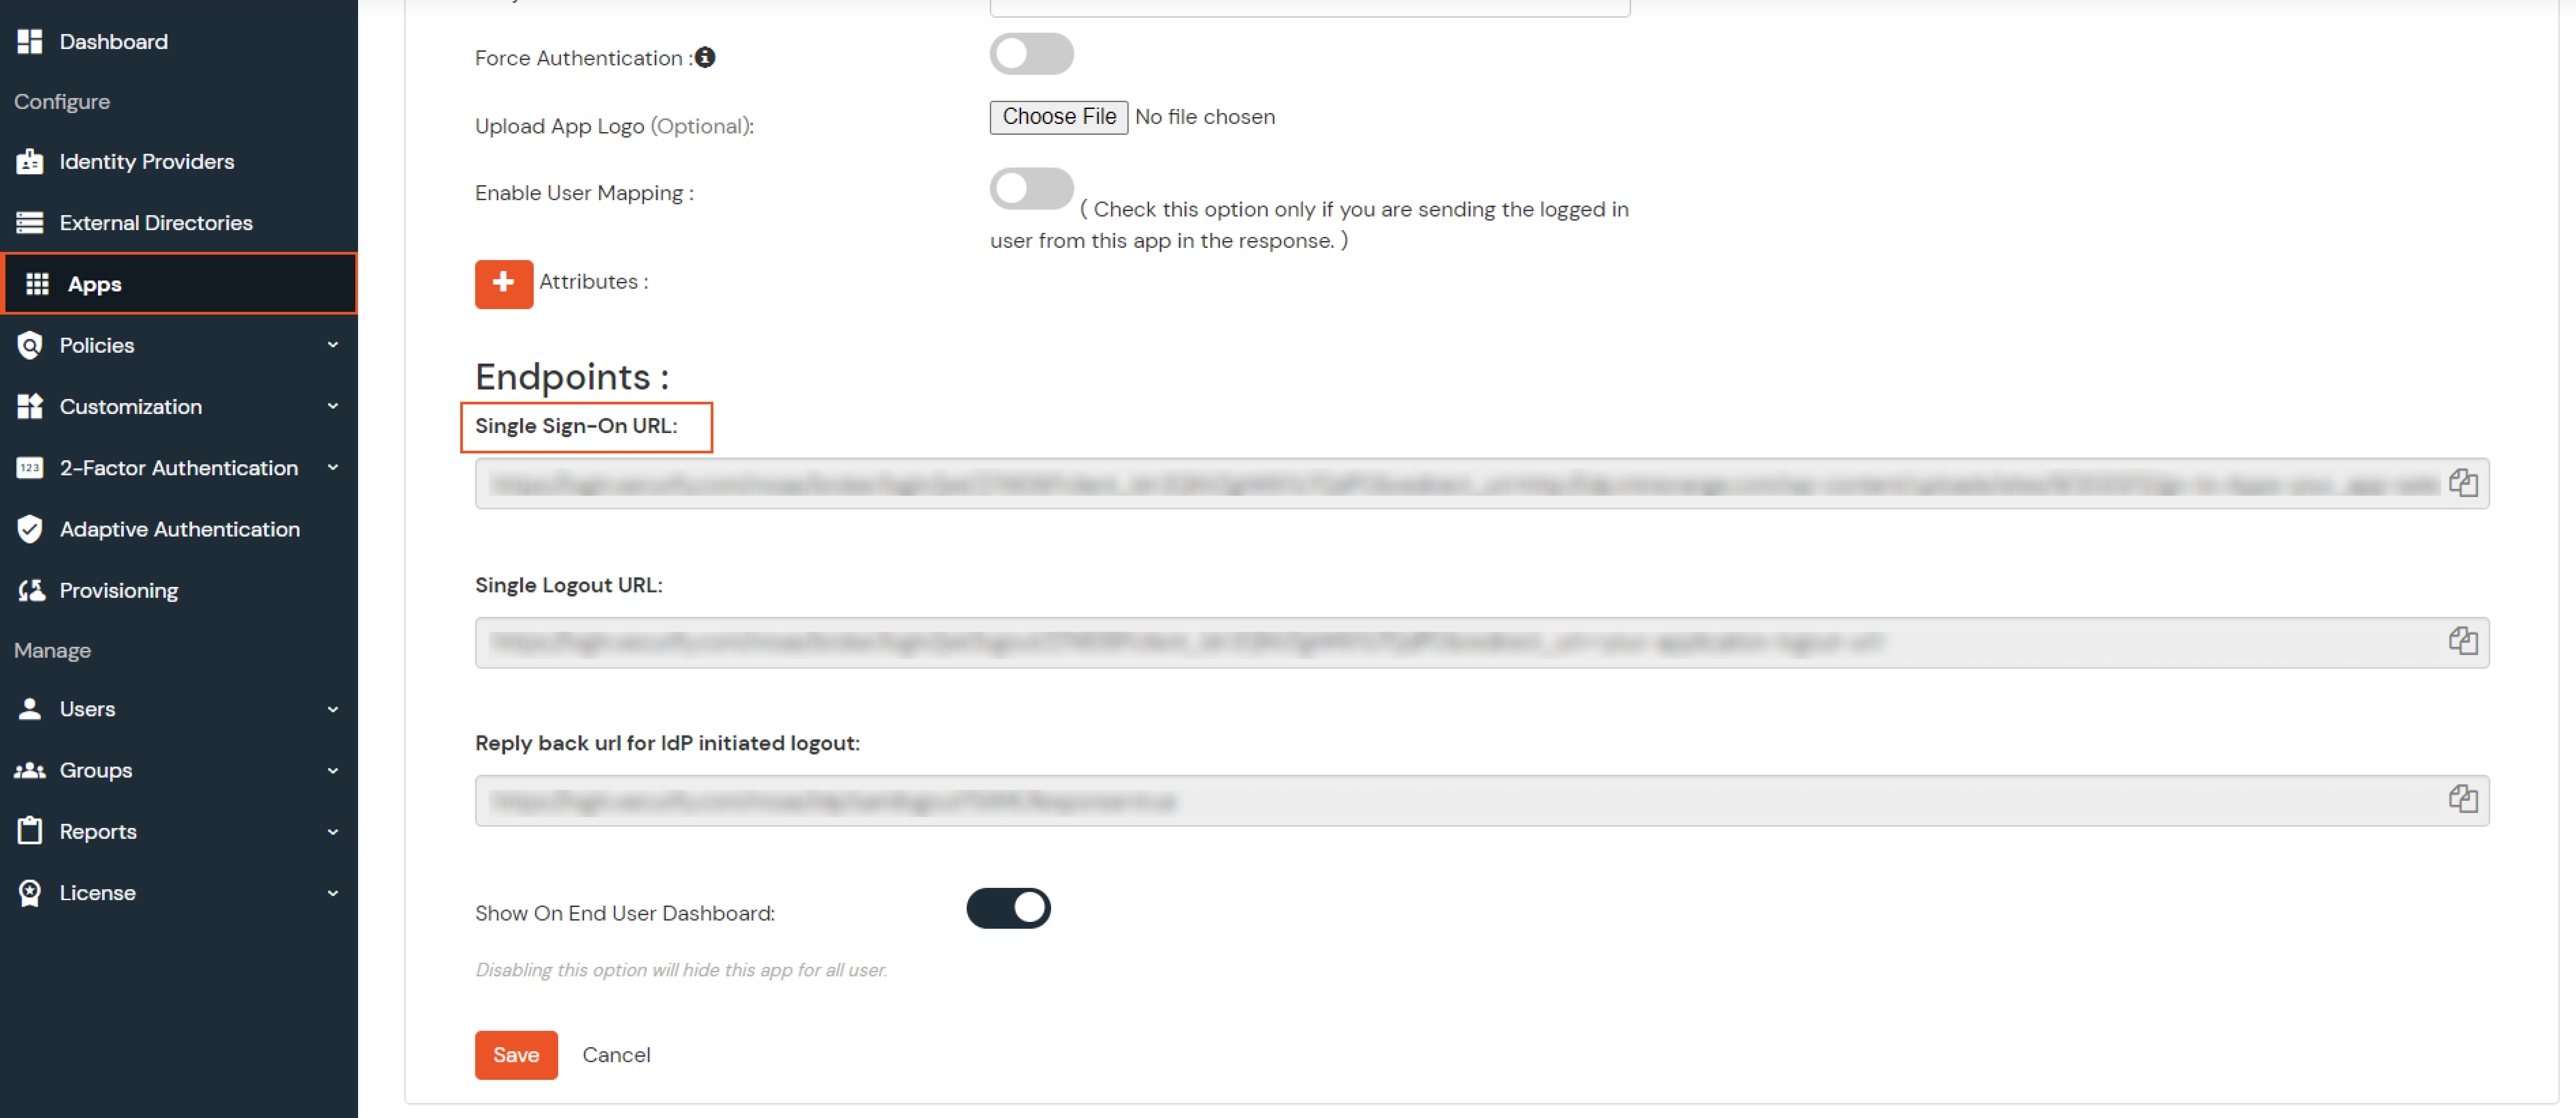
- Now to get the IDP metadata of the app configured, Go to apps >> your_app >> select >> metadata tab.
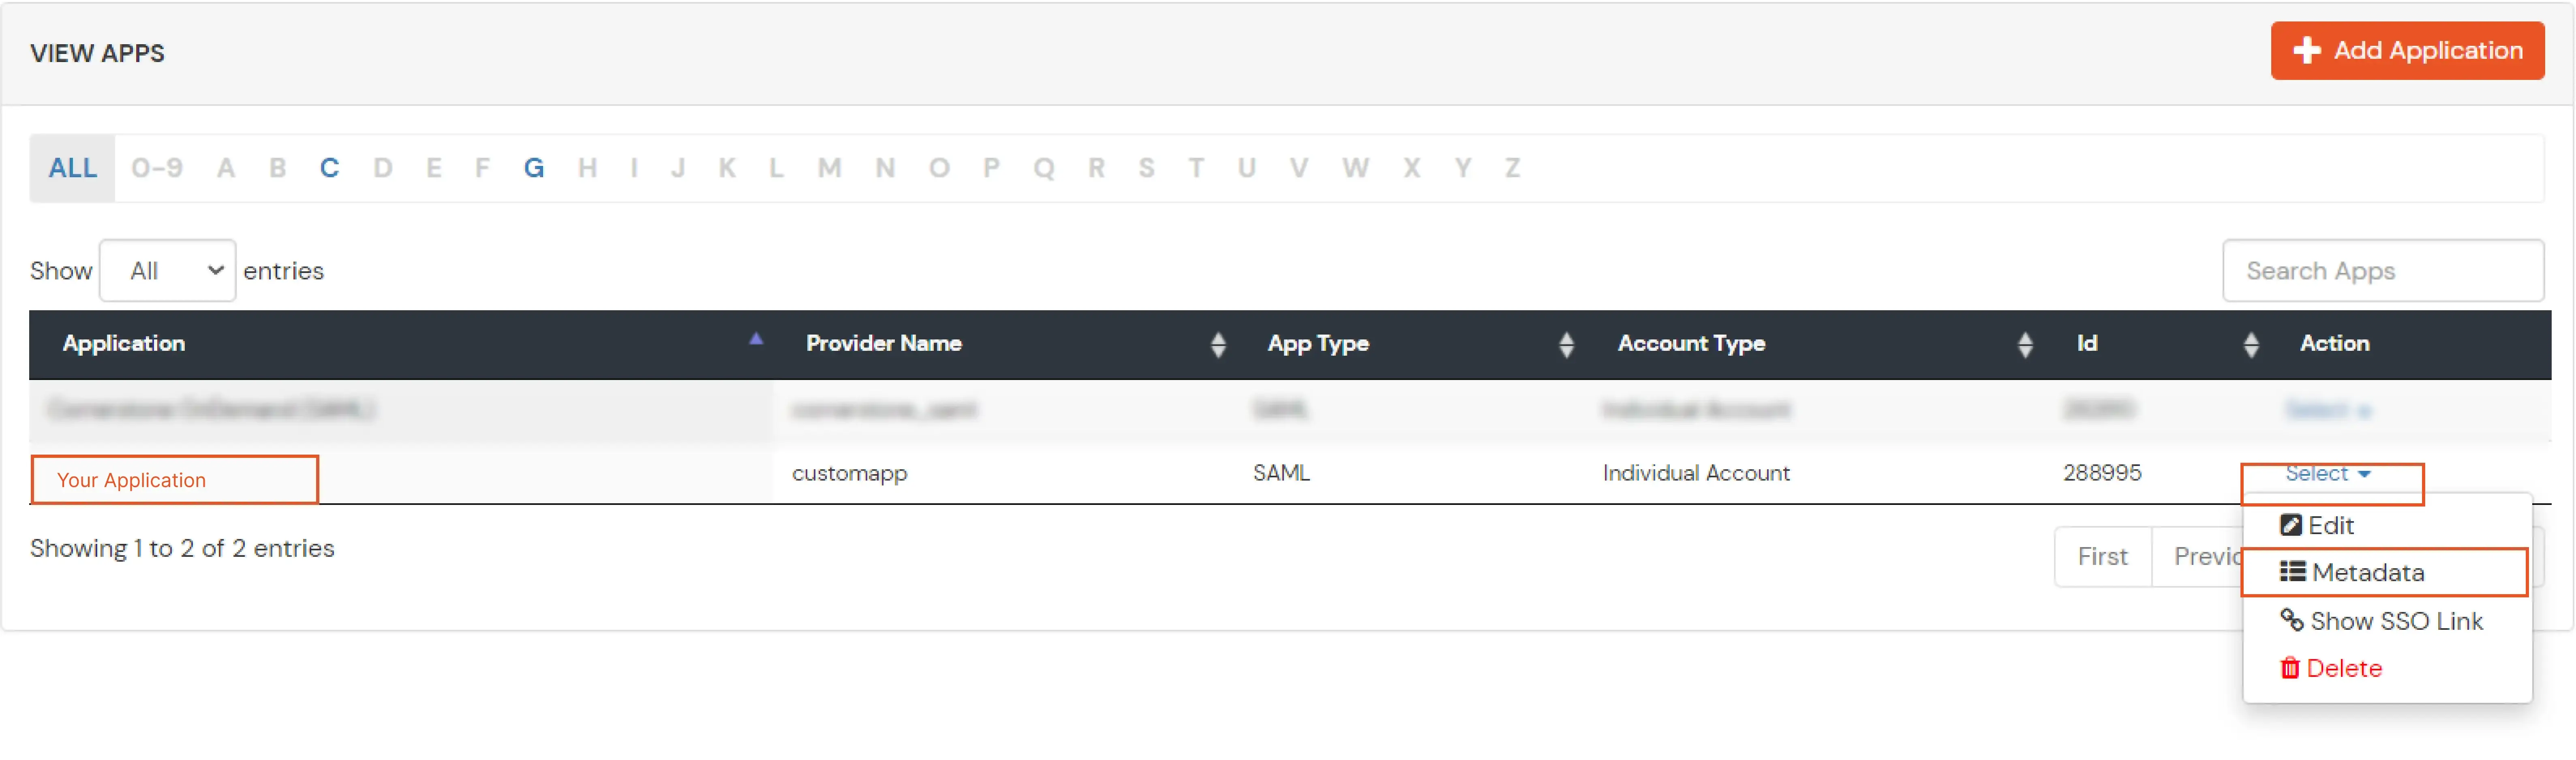
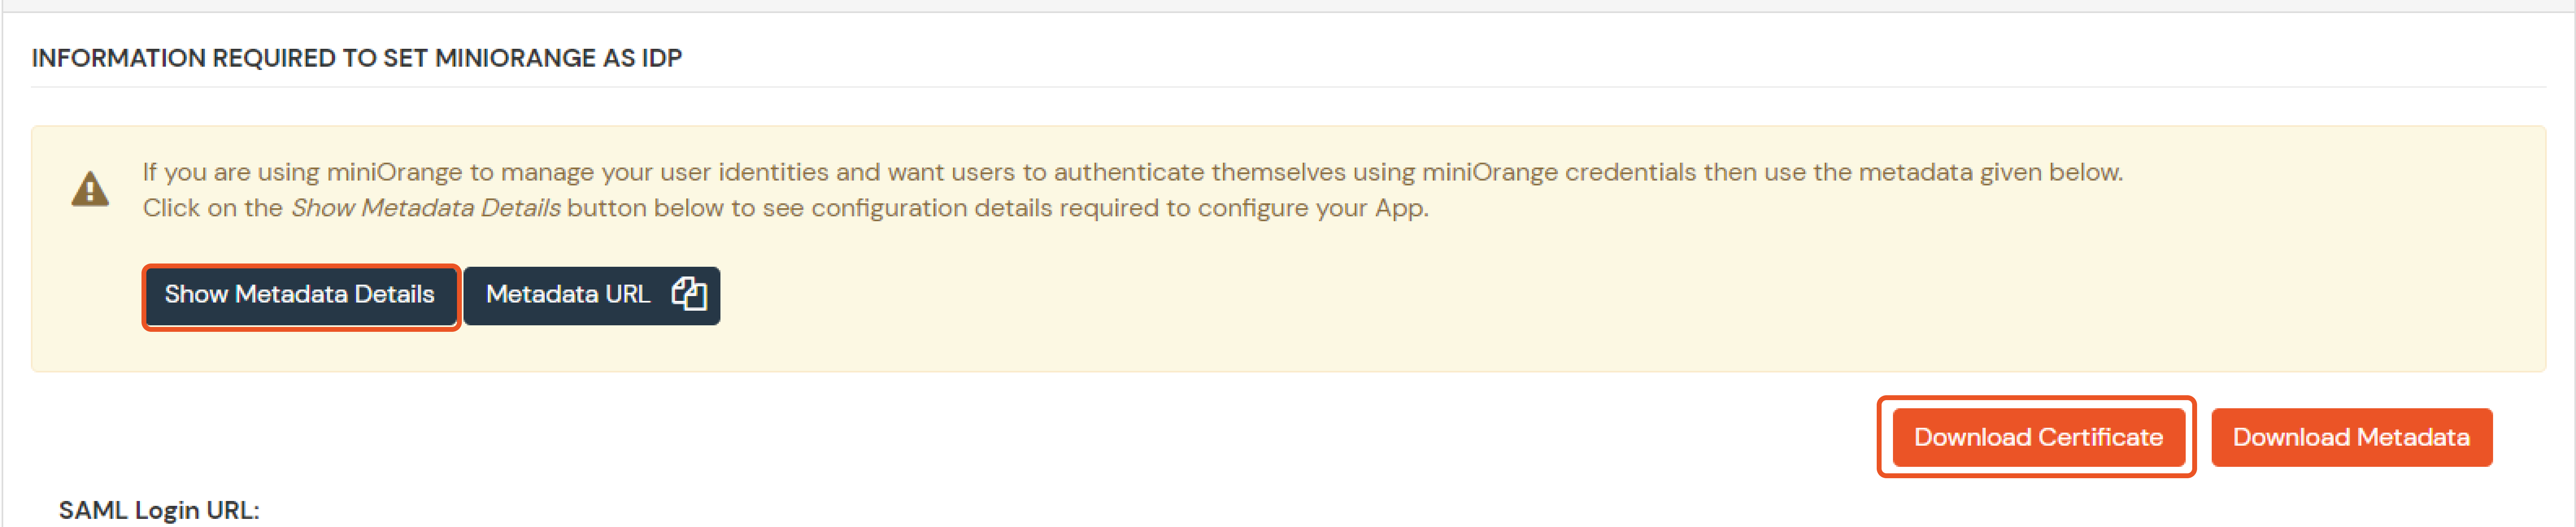
- Click on the Show Metadata details in the Information required to Authenticate via External IDPs section. Download the metadata XML file by clicking on Download Metadata button or copy the Metadata URL link.
- You need to Upload this metadata in your application.
4. Setup Multiple IDPs (Optional)
- You can configure multiple IDPs (Identity Providers) and give users the option to select the IDP of their choice to authenticate with.
For Example - It could be multiple AD domains belonging to different departments or multiple okta organizations.
Few usecases where customers configure multiple IDPs -
- Suppose you have a product which many of your clients use and each client has their own unique IDP so you want them to SSO into your product as well using their existing IDP only. miniOrange provides a centralized way to connect with all IDPs in a very easy manner and integrate SSO into your application.
- Suppose you are providing a course to many universities, each having a unique SAML, OAuth protocol supported IDP's like Shibboleth, ADFS, CAS, etc. You can provide Single Sign-On (SSO) into your course application to all these universities by integrating with all of them using a single platform provided by miniOrange.
- This is the endpoint to call from your SAML application -
| For Cloud IDP - |
https://login.xecurify.com/moas/discovery?customerId=<customer_id> |
| For On-Premise IDP - |
https://yourdomain.com/discovery?customerId=<customer_id> |
- You should copy the Customer Key from admin console-> Settings -> and replace it with <customer_id> here. Once configured in SP, when you initiate the login from Service Provider, a user will be redirected to IDP Selection Page listing all IDPs configured for that account.
You can see the screenshot below of the IDP Selection Page with a list of IDPs.
Note: To view the IDP in drop-down list, go to Identity Providers tab > against your configured IDP > Select >Edit , here Enable the Show IdP to Users option.

- You can also change the look and feel of this page. Login to miniOrange Admin console. Navigate to Customization -> Branding Configuration. See the below screenshot for reference-
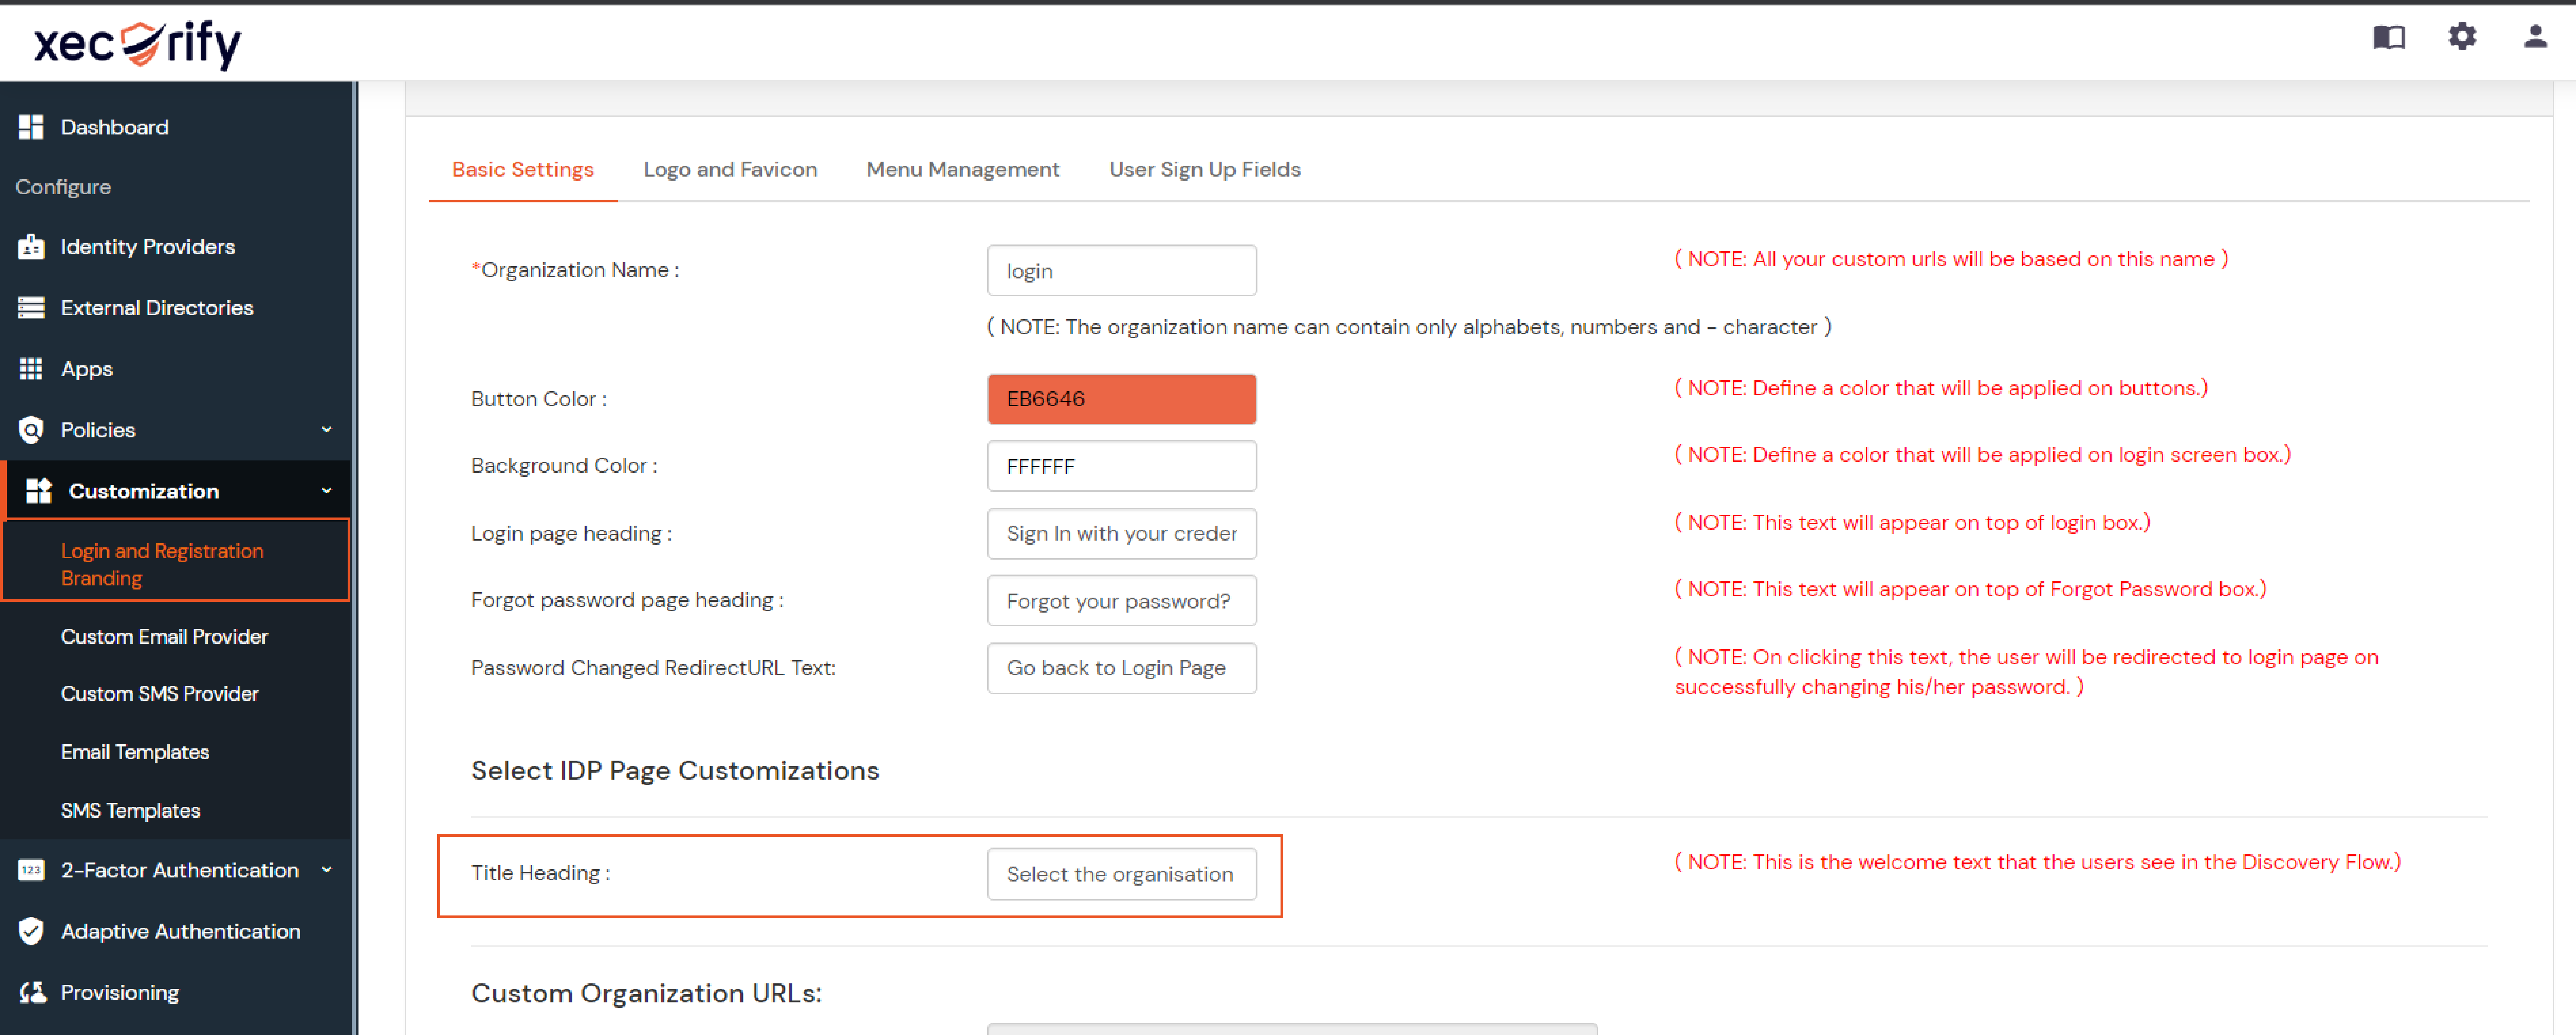
- You can customize the title of this page.
- Change the logo and favicon for this page.
- Change the background and button color for this page from admin UI.
External References