Need Help? We are right here!
Need Help? We are right here!
Thanks for your Enquiry. Our team will soon reach out to you.
If you don't hear from us within 24 hours, please feel free to send a follow-up email to info@xecurify.com
Search Results:
×The miniOrange identity provider (IdP) is a service that stores and verifies user identity. IdPs are typically cloud-hosted services, and they often work with single sign-on (SSO) providers to authenticate users.The purpose of this guide is to get you up and run as quickly as possible so that you can play with and test-drive various features that miniOrange has. It is a standalone application with default database and packaged tomcat and does not cover any complex deployment options. We support both windows and linux os for installation.
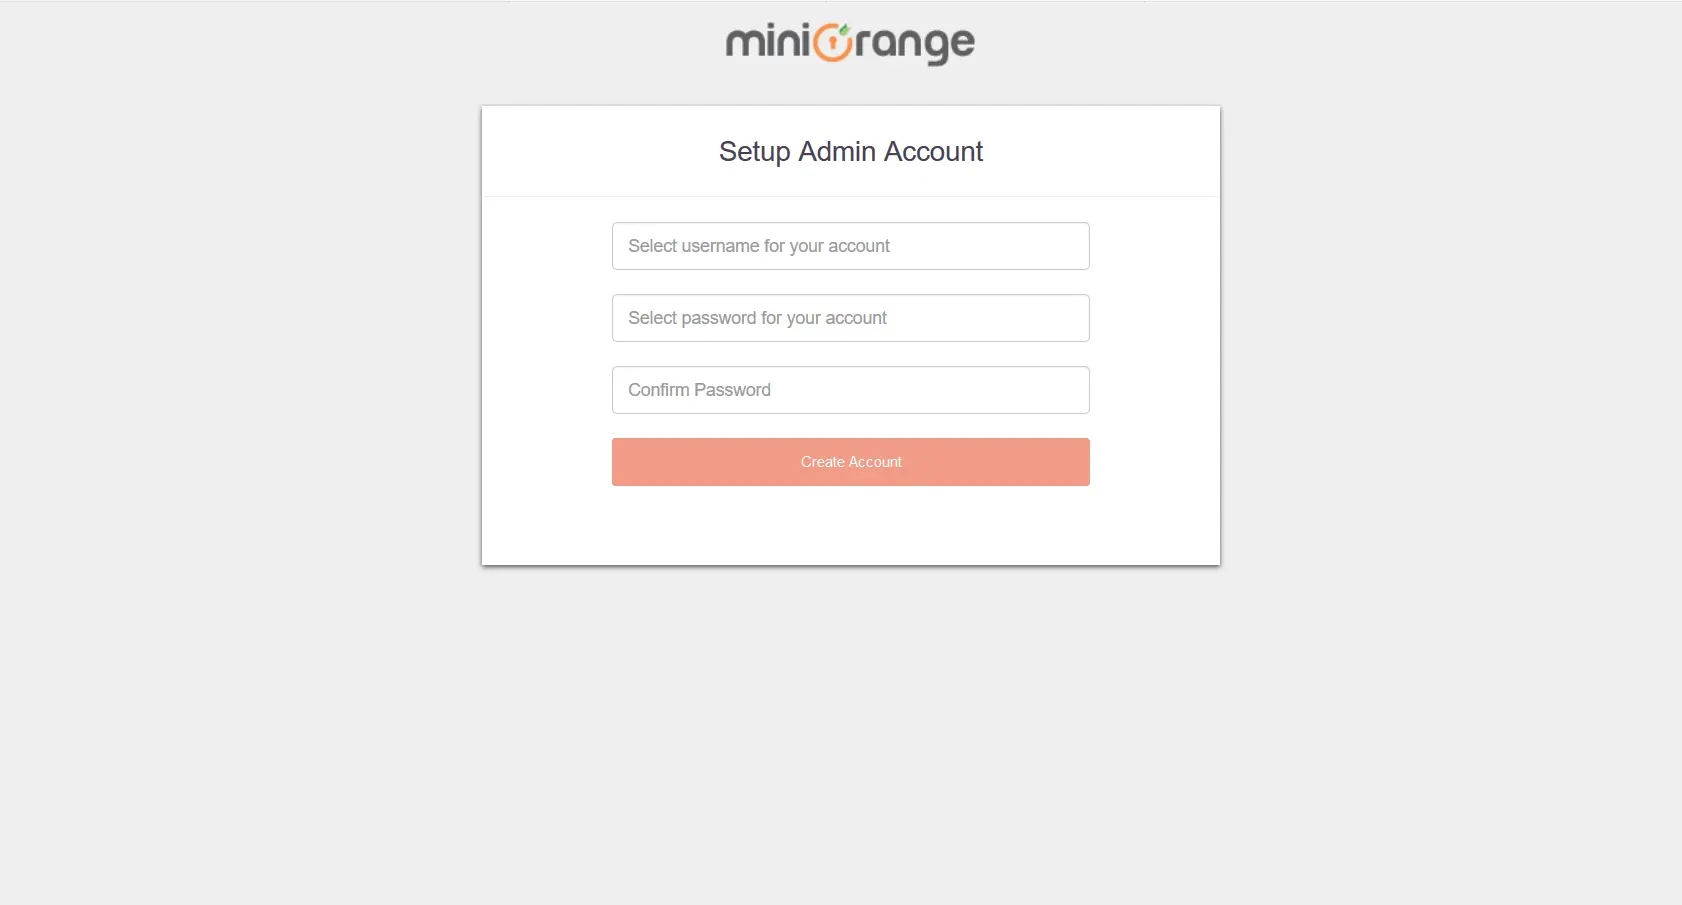
This short tutorial walks you through starting up the server in standalone mode, setting up the initial admin account, and logging into the miniOrange admin dashboard.
miniOrange On-Premise server has the following system requirements. This section lists recommended versions and requirements.
You can download miniOrange On-Premise server from here
Follow the steps to deploy miniOrange On-Premise server on your operating system:
You can verify the integrity of the installer using the SHA256 checksum. To verify the checksum, please follow the below steps:
CertUtil -hashfile mo-idp-server-3.8.0-installer.exe SHA256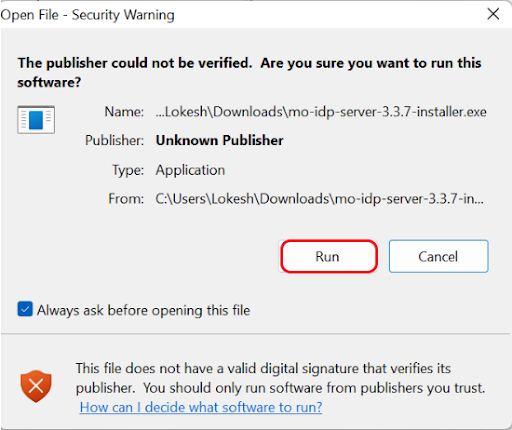
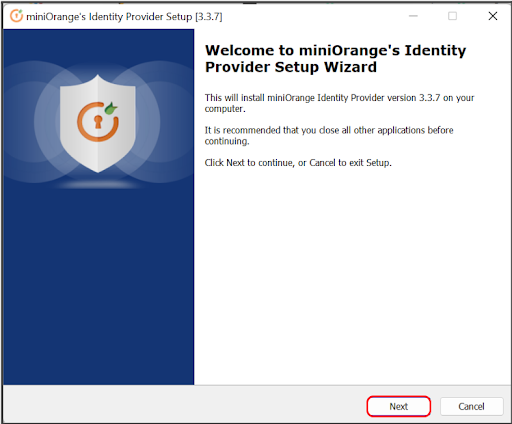
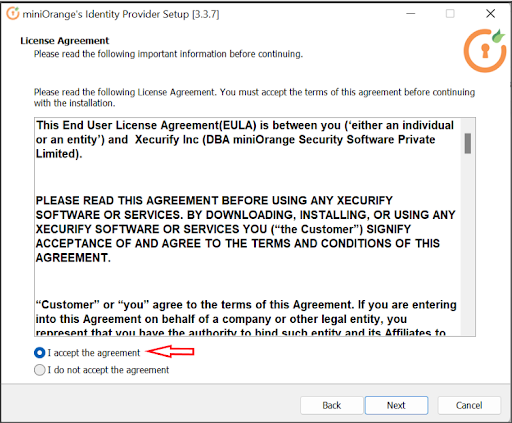
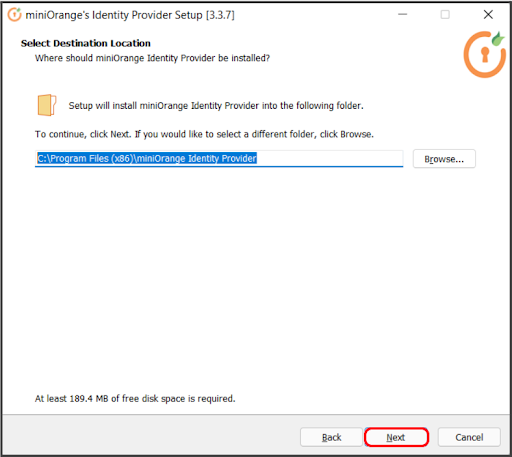
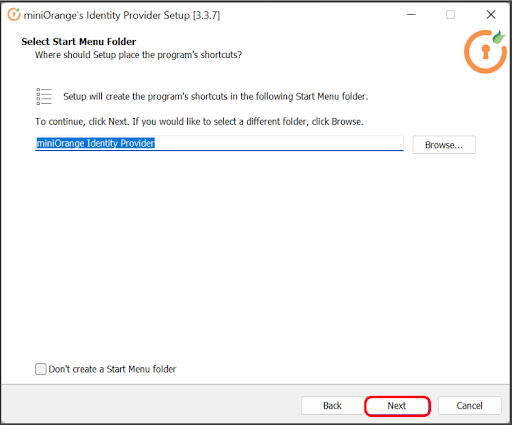
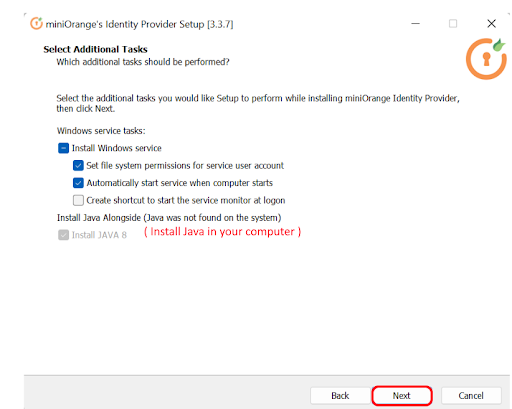
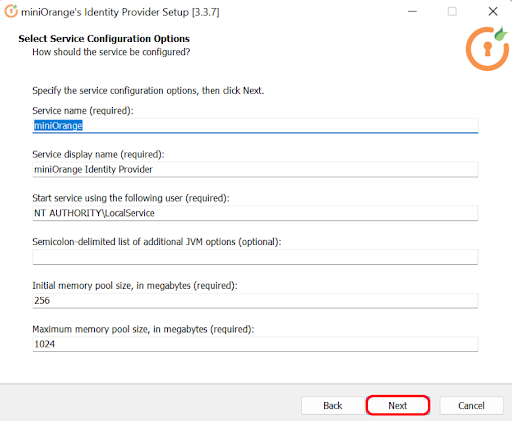
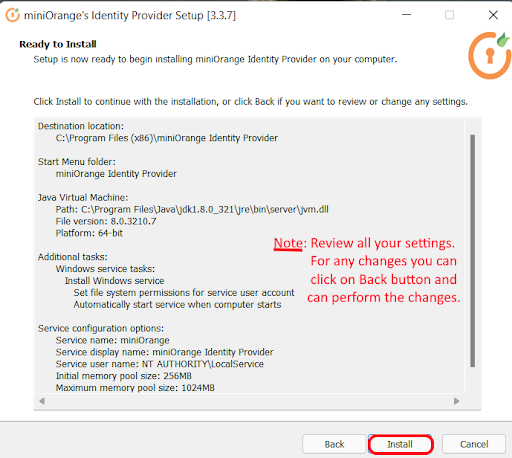
In case of no internet connectivity. You can choose and download the offline installer from here.
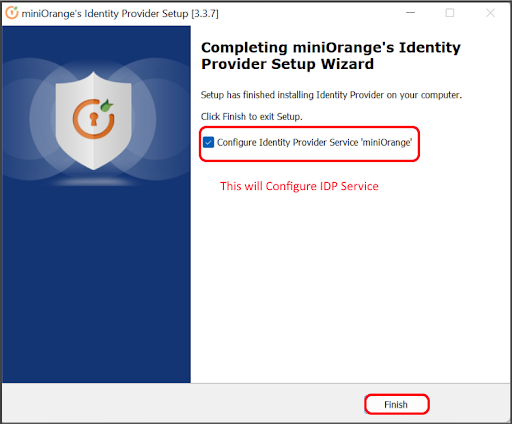
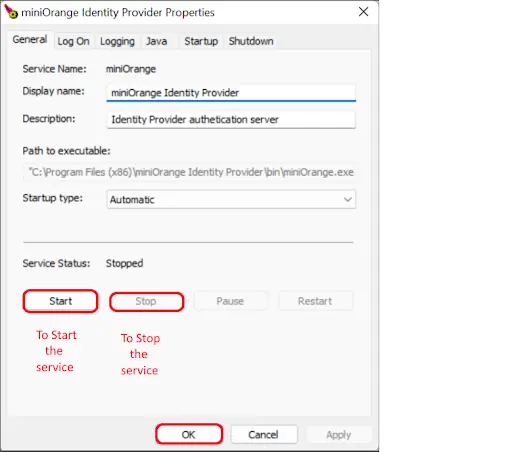
Once the Java installation is complete, check that the JAVA_HOME environment variable has been set correctly.Open a command prompt and type echo %JAVA_HOME% and hit Enter. If you see a path to your Java installation directory, the JAVA_Home environment variable has been set correctly. If nothing is displayed, or only %JAVA_HOME% is returned, you'll need to set the JAVA_HOME environment variable manually.
echo %JAVA_HOME%
echo %JRE_HOME%
> ...\bin\startup.bat
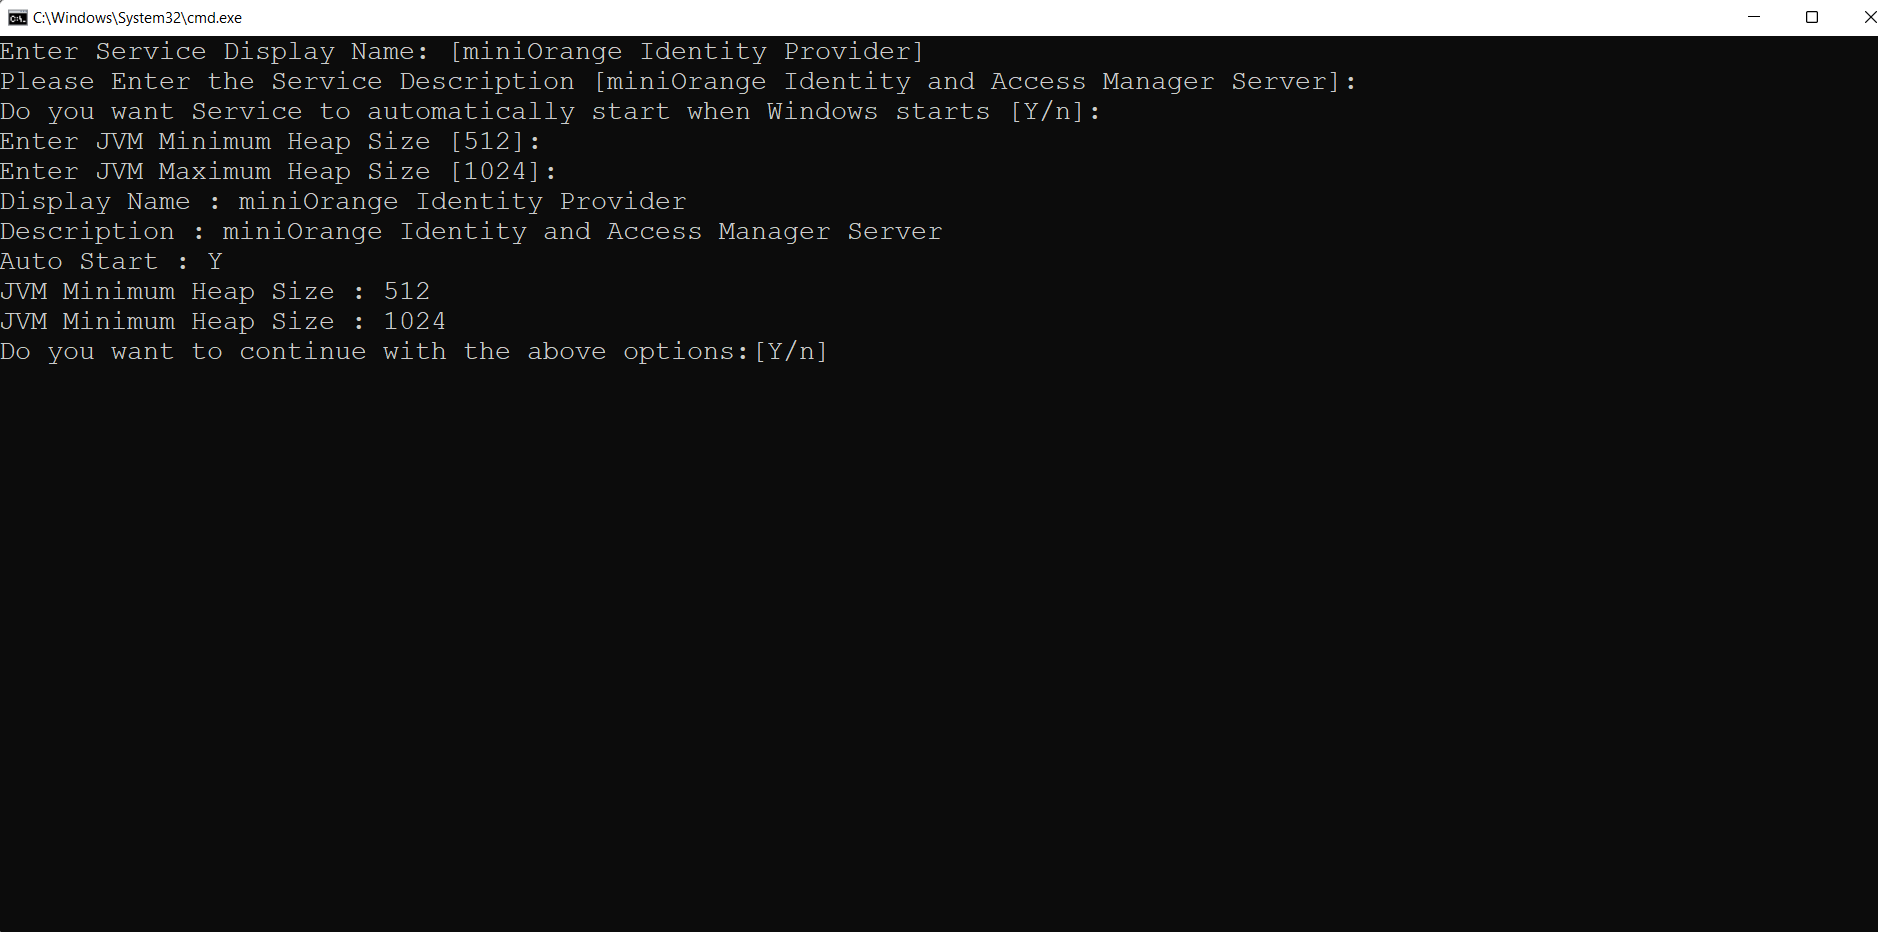

sh mo-idp-installer.sh


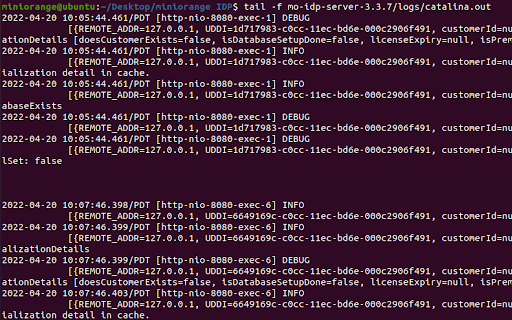
apt install openjdk-8-jdk for Debian, Ubuntu, etc. OR
yum install java-1.8.0-openjdk for Fedora, Oracle Linux, Red Hat Enterprise Linux, etc.
Once the Java installation is complete, check that the JAVA_HOME environment variable has been set correctly. Open a terminal and type echo $JAVA_HOME and hit Enter. If you see a path to your Java installation directory, the JAVA_Home environment variable has been set correctly. If nothing is displayed you'll need to set the JAVA_HOME environment variable manually.
export JAVA_HOME=/path/to/jdk
export JRE_HOME=/path/to/jre
echo $JAVA_HOME
echo $JRE_HOME
$ .../bin/startup.sh
 groupadd tomcat
 useradd -s /sbin/nologin -g tomcat -d /opt/mo-idp-server tomcat
 passwd tomcat
chown -R tomcat.tomcat /opt/mo-idp-server
        #!/bin/bash
        ## Change the path of mo-idp folder below
        ### BEGIN INIT INFO
        # Provides: tomcat
        # Required-Start: $network $remote_fs $syslog
        # Required-Stop: $network $remote_fs $syslog
        # Default-Start: 2 3 4 5
        # Default-Stop: 0 1 6
        # Short-Description: Start Tomcat at boot time
        # Description: Start Tomcat at boot time
        ### END INIT INFO

        export JAVA_HOME=/usr/lib/jvm/jre
        export CATALINA_HOME=/opt/<PATH OF MiniOrange IDP Folder>
        export JAVA_OPTS="-Xms250m -Xmx1024m"

        RETVAL=$?
        case $1 in
        start)
        if [ -f $CATALINA_HOME/bin/startup.sh ];
        then
        echo $"Starting Tomcat"
        su -p -s /bin/sh tomcat $CATALINA_HOME/bin/startup.sh
        fi
        ;;
        stop)
        if [ -f $CATALINA_HOME/bin/shutdown.sh ];
        then
        echo $"Stopping Tomcat"
        su -p -s /bin/sh tomcat $CATALINA_HOME/bin/shutdown.sh
        fi
        ;;
        *)
        echo $"Usage: $0 {start|stop}"
        exit 1
        ;;
        esac

        exit $RETVAL
chmod ug+x /etc/init.d/tomcatsudo update-rc.d tomcat defaults # Debian, Ubuntu
sudo chkconfig --add tomcat # Red Hat & co.sudo update-rc.d -f tomcat remove # Debian, Ubuntuservice tomcat [start | stop]/etc/init.d/tomcat [start | stop]Before you proceed with Embedded H2 database, make sure your system has given write permission to the IdP folder i.e. mo-idp-server-<version> folder. If not then first assign the write permission to the IdP folder to avoid getting stuck in permission issues. Write permission is required because Embedded H2 database is created in IdP folder with the folder named data.
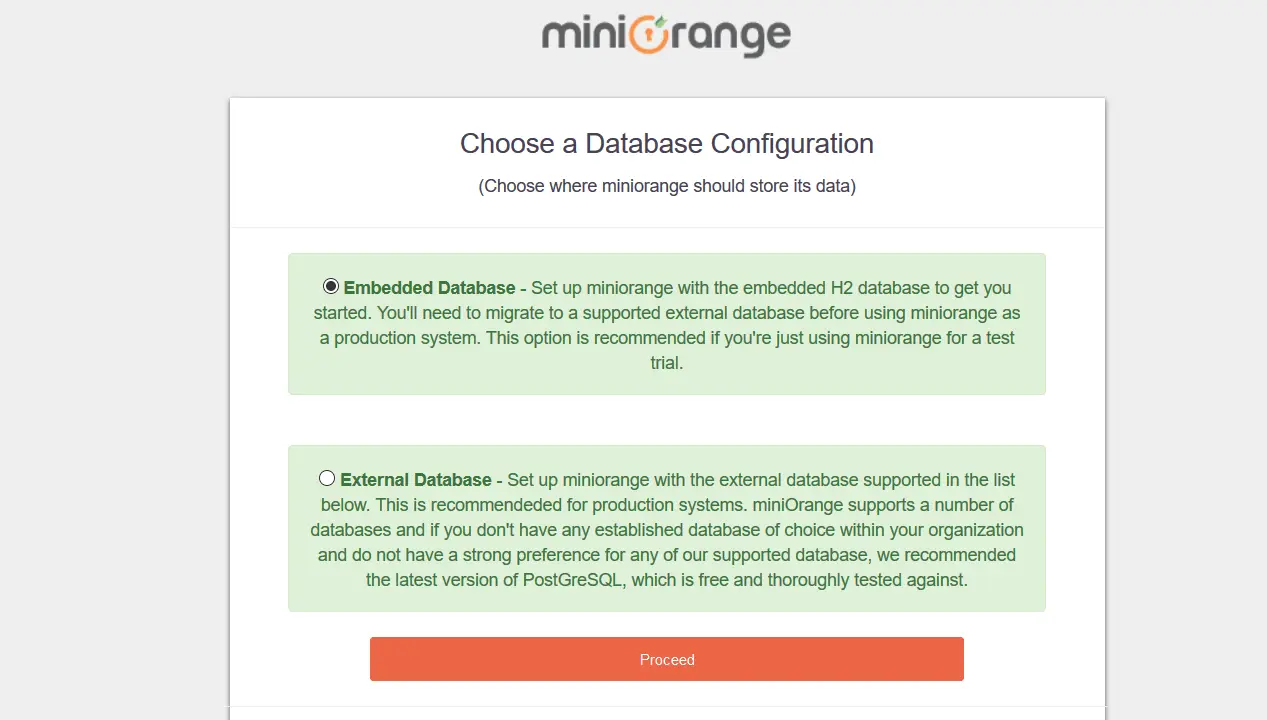
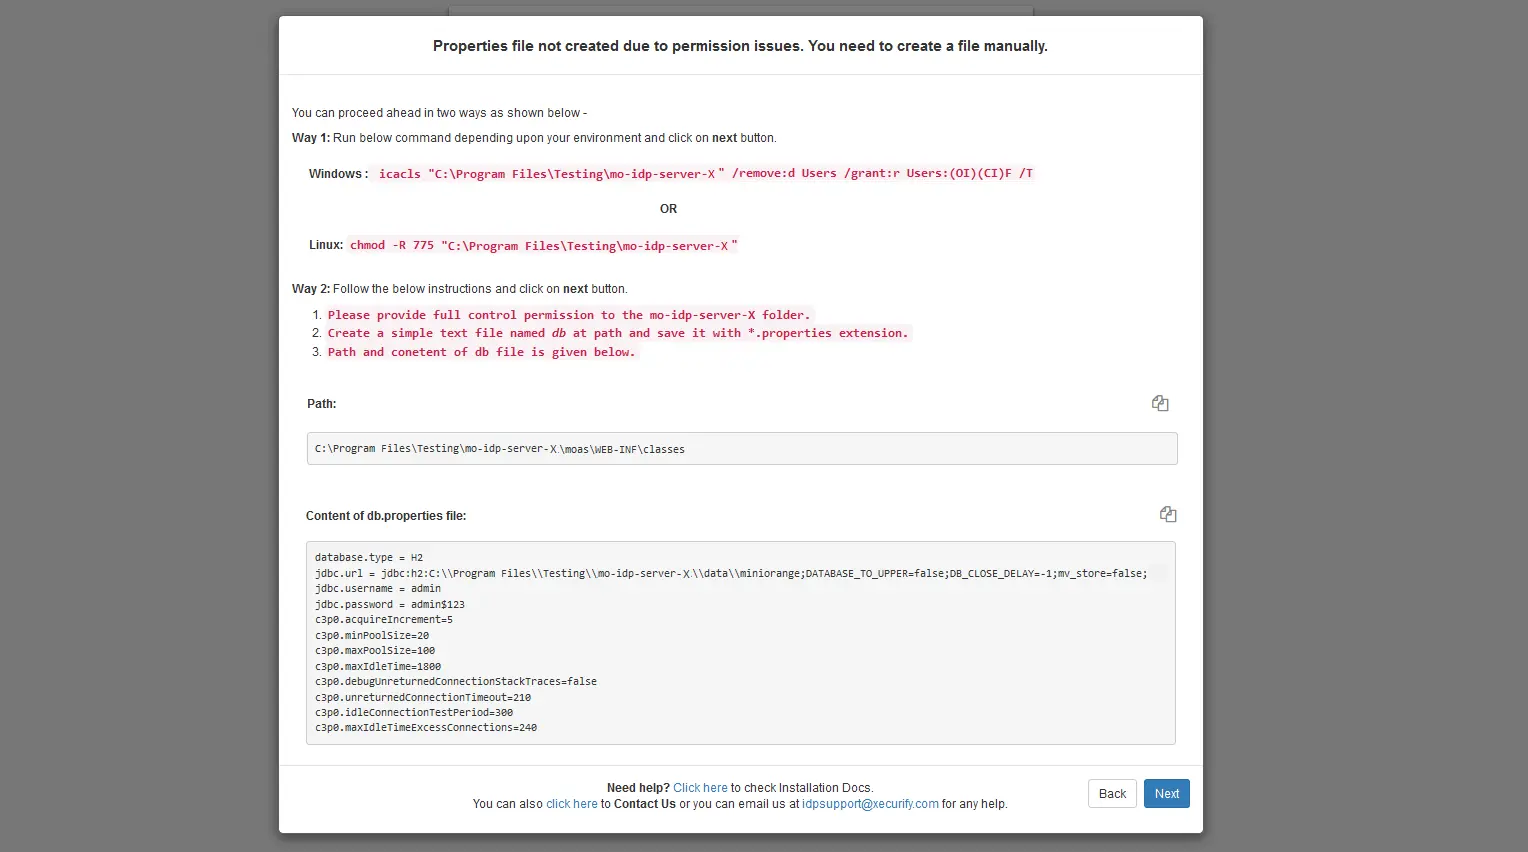
In case if you are stuck in permission issues, you can run commands specific to your OS to perceed or you can follow the instructions given on pop-up.
| Windows | icacls “path upto mo-idp-server-X ” /remove:d Users /grant:r Users:(OI)(CI)F /T |
| Linux | chmod -R 775 “path upto mo-idp-server-X” |
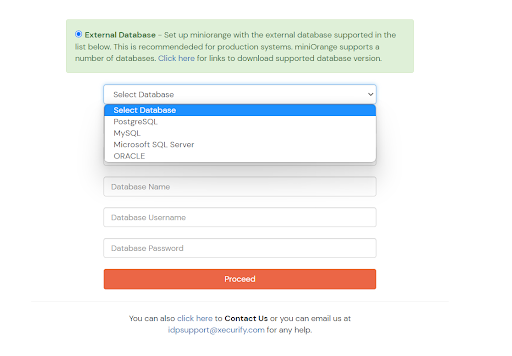
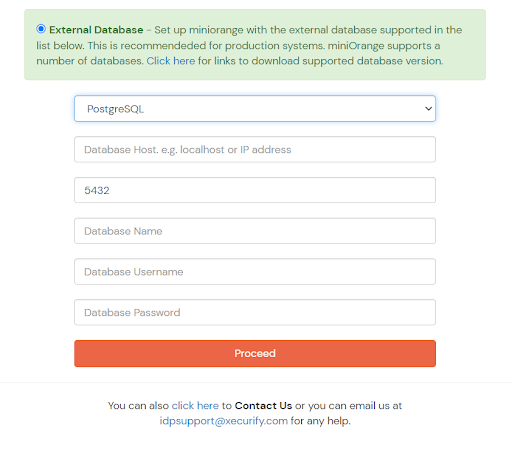
If you already have a database setup which is not in the list below, you can contact us to add support for that database.

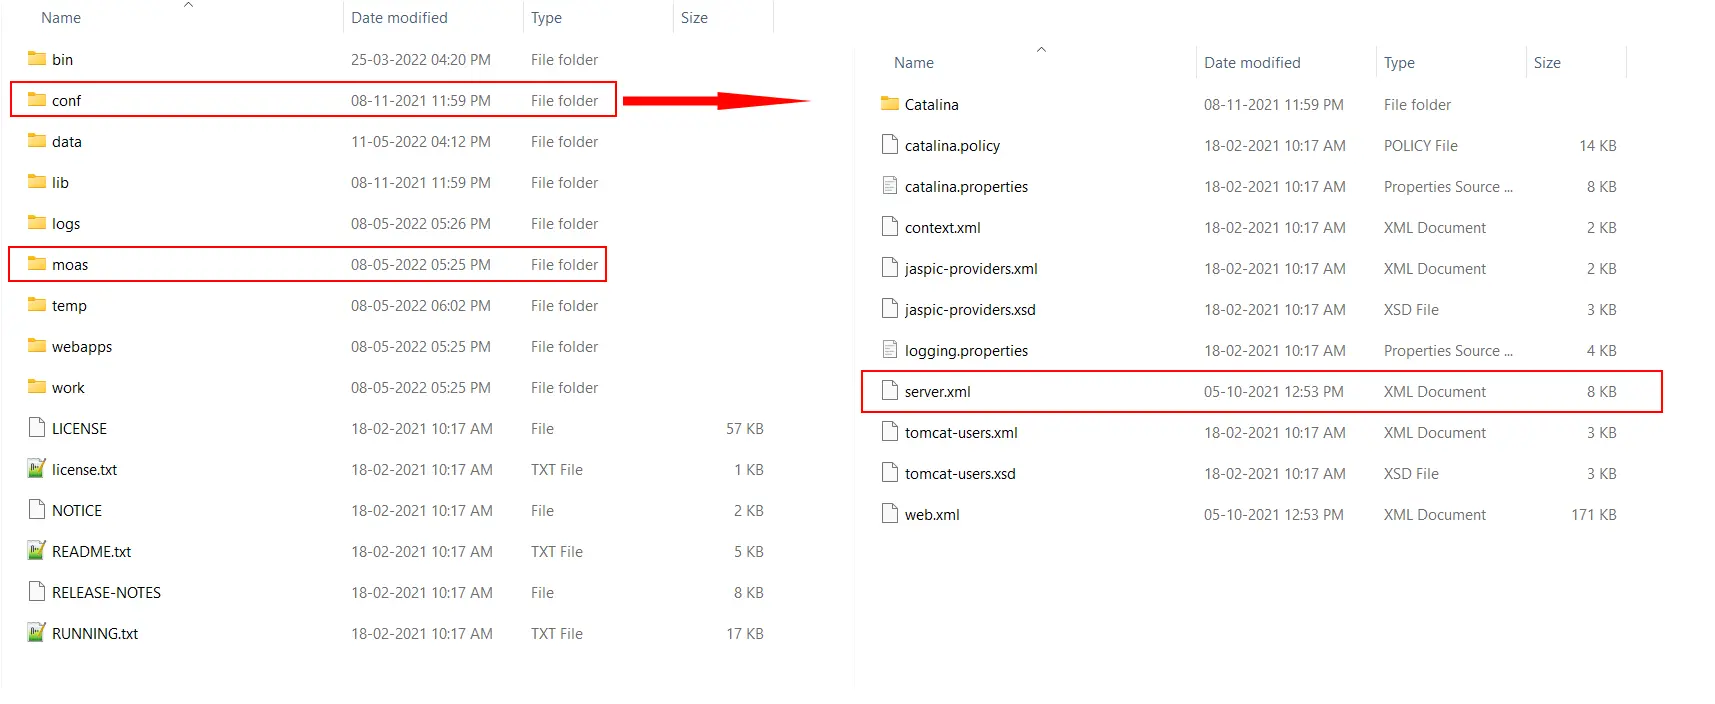
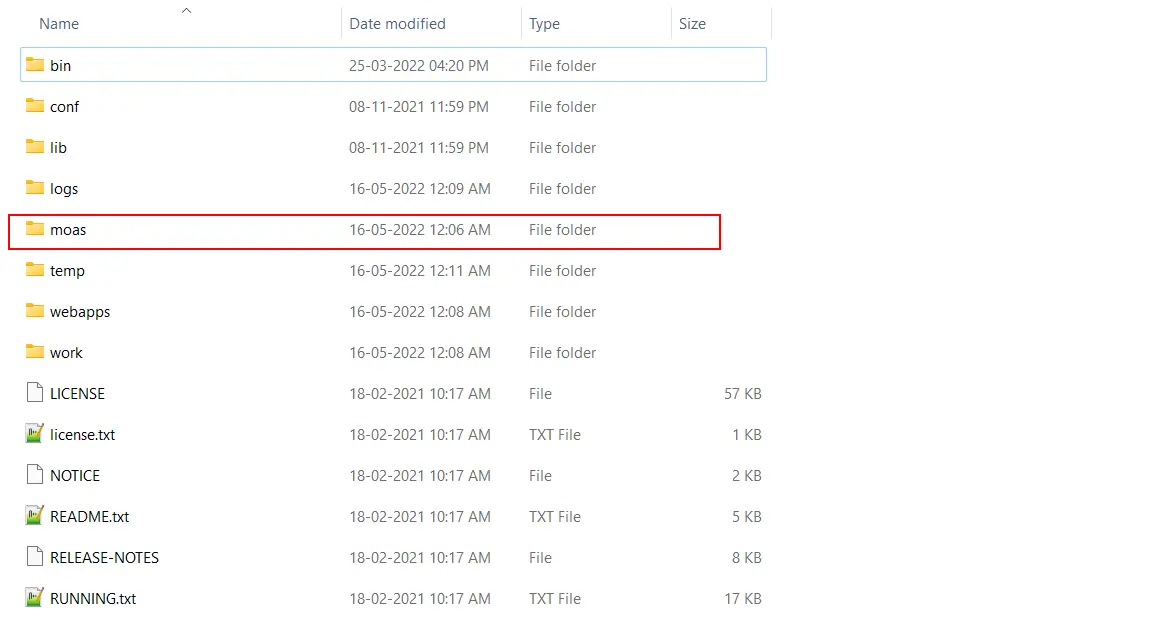
Before moving forward, you need to make two changes related to same site cookie. Starting with version 80, Google Chrome will change the default value for the SameSite cookie parameter to Lax. Therefore, changes are required and SameSite parameter has to be set to NONE.
To do changes, follow the path: mo-idp-server-<version>/moas/WEB-INF/classes. In this folder search for the file spring-context-onpremise and open it in editor. Search for bean id="customCookie". you will see a bean with name,samesite and secure properties. Update value of samesite from LAX to NONE and of secure to true.
keytool -genkey -alias onpremssoidp -keyalg RSA -keystore onpremssoidp.jks
<Connector port="443" protocol="HTTP/1.1" SSLEnabled="true" maxThreads="150" scheme="https" secure="true" clientAuth="false" sslProtocol="TLS" keystoreFile="<JKS Keystore Path>" ciphers="ALL" keystorePass="<Password while keystore generation>"/>
Using a certificate from Trusted CAs like LetsEncrypt, GoDaddy, Comodo SSL.
certbot certonly --standalone -d.example.com#:/etc/letsencrypt/live/example.com# ls
cert.pem chain.pem fullchain.pem privkey.pem README
 <Connector port="443" protocol="org.apache.coyote.http11.Http11NioProtocol"
                    maxThreads="150" SSLEnabled="true">
                    <SSLHostConfig>
                    <Certificate certificateFile="conf/cert.pem"
                    certificateKeyFile="conf/privkey.pem"
                    certificateChainFile="conf/chain.pem" />
                    <SSLHostConfig>
                    <Connector>
keytool -genkey -alias onpremssoidp -keyalg RSA -keystore onpremssoidp.jks
keytool -delete -alias onpremssoidp -keystore onpremssoidp.jks
openssl pkcs12 -export -in <GoDaddyCertificate>.crt -inkey <PrivateKey>.key
 -out <PublicPrivateKeyPair>.p12 -name tomcat -CAfile gd_bundle-g2-g1.crt -caname root
<Connector port="443" protocol="HTTP/1.1" SSLEnabled="true" maxThreads="150" scheme="https" secure="true"
                    clientAuth="false" sslProtocol="TLS" keystoreFile="<JKS Keystore Path>" ciphers="ALL"
                    keystorePass="<Password while keystore generation>"/>
Creating a New Keystore
keytool -genkey -alias server -keyalg RSA -keysize 2048 -keystore your_site_name.jks
Creating a CSR on Tomcat Servers
keytool -certreq -alias server -file csr.txt -keystore your_site_name.jks
How to Install an SSL Certificate on Your Tomcat Server
keytool -import -alias server -file your_site_name.p7b -keystore your_site_name.jks
Configuring Your SSL/TLS Connector
<Connector port="443" maxHttpHeaderSize="8192" maxThreads="100"
                    minSpareThreads="25" maxSpareThreads="75"
                    enableLookups="false" disableUploadTimeout="true"
                    acceptCount="100" scheme="https" secure="true"
                    SSLEnabled="true" clientAuth="false"
                    sslProtocol="TLS" keyAlias="server"
                    keystoreFile="/home/user_name/your_site_name.jks"
                    keystorePass="your_keystore_password" />
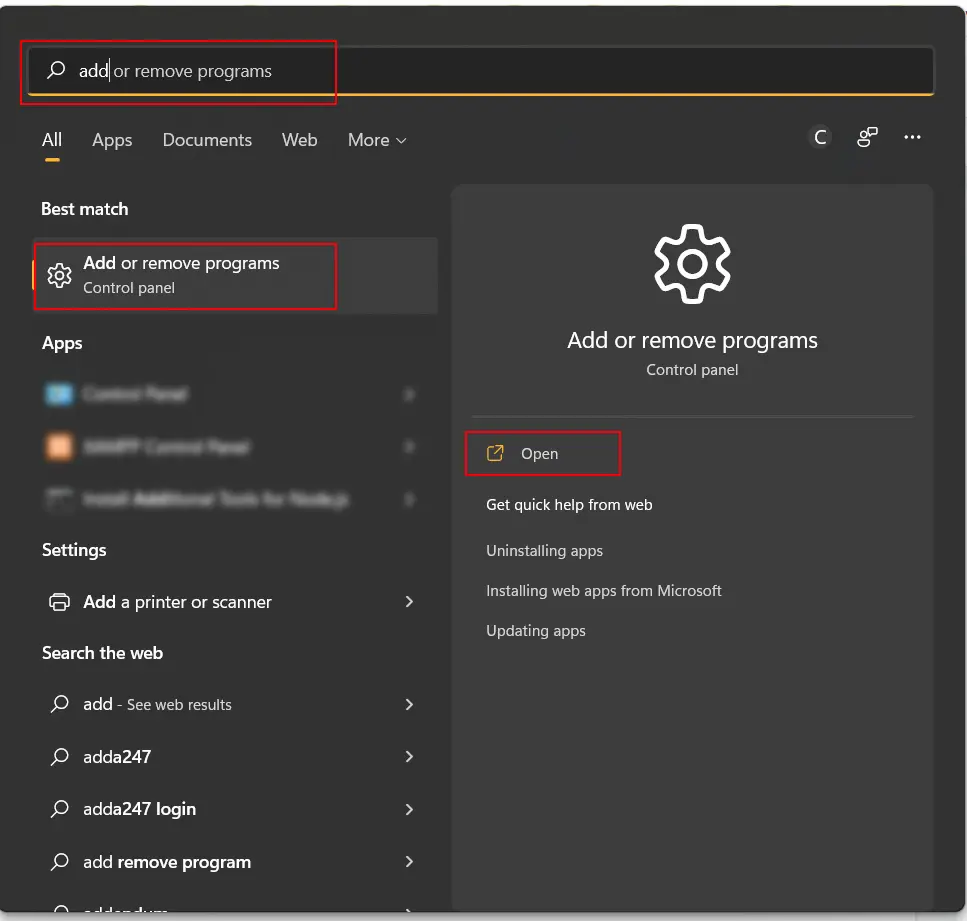
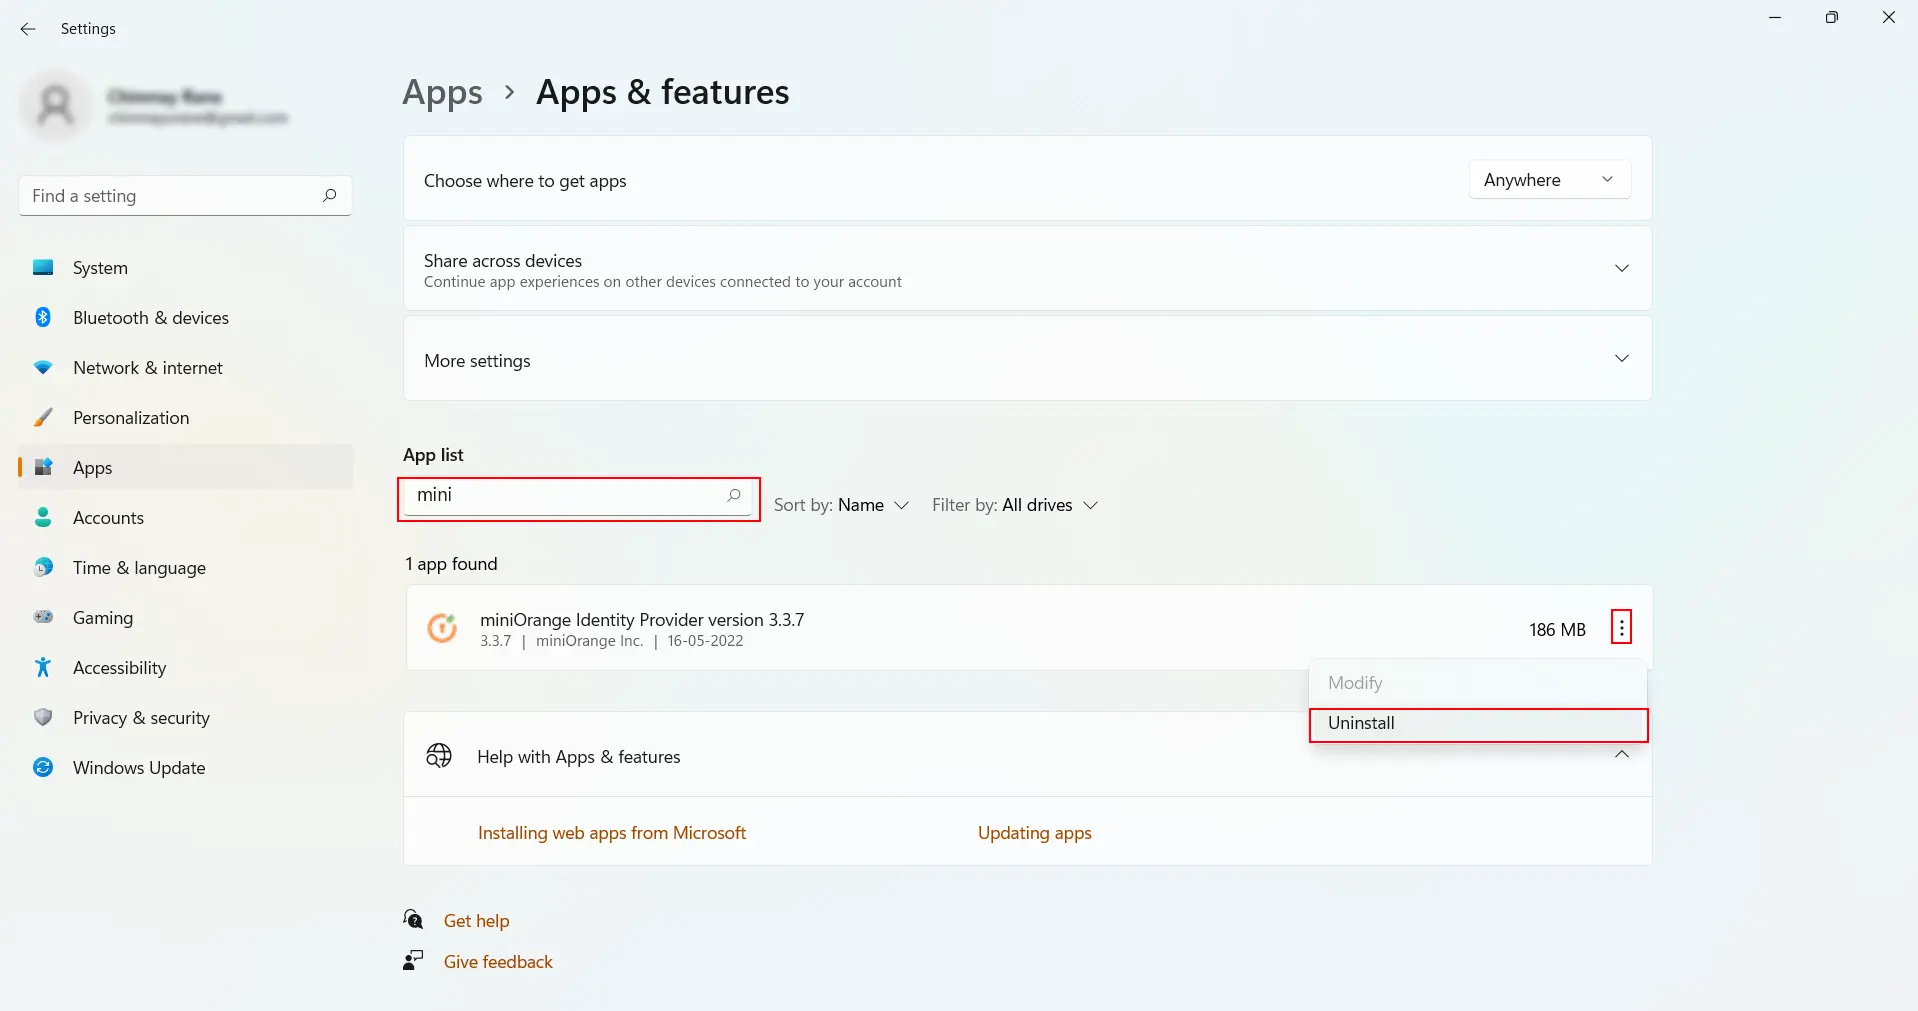
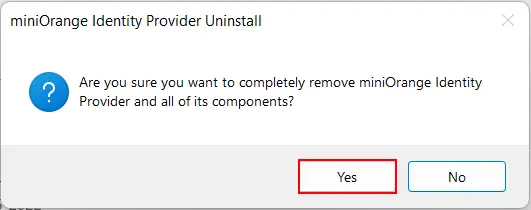
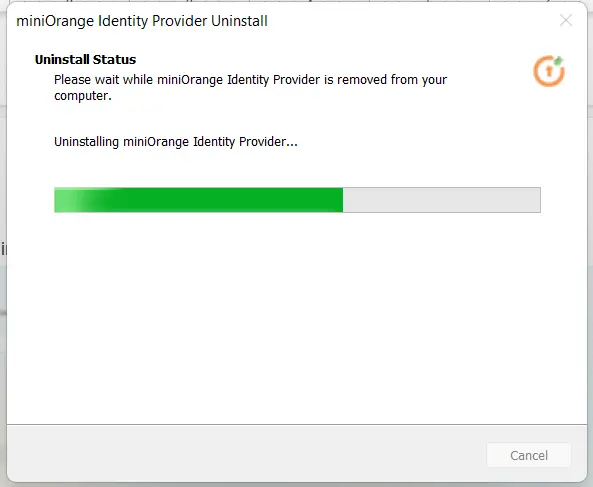
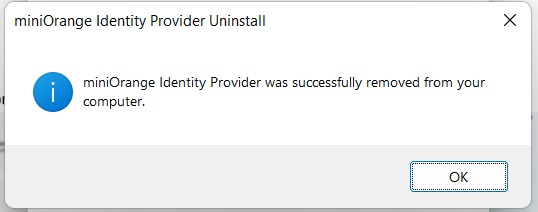
mo-service.bat uninstall
Our Other Identity & Access Management Products