Need Help? We are right here!
Need Help? We are right here!
Thanks for your Enquiry.
If you don't hear from us within 24 hours, please feel free to send a follow-up email to info@xecurify.com
Search Results:
×SAP Successfactors Provisioning is an automated solution for Identity and Access Management that helps users provision their SAP Successfactors user’s identities or accounts to their existing or new applications in no time making Successfactors provisioning a fast solution for identity and access management.
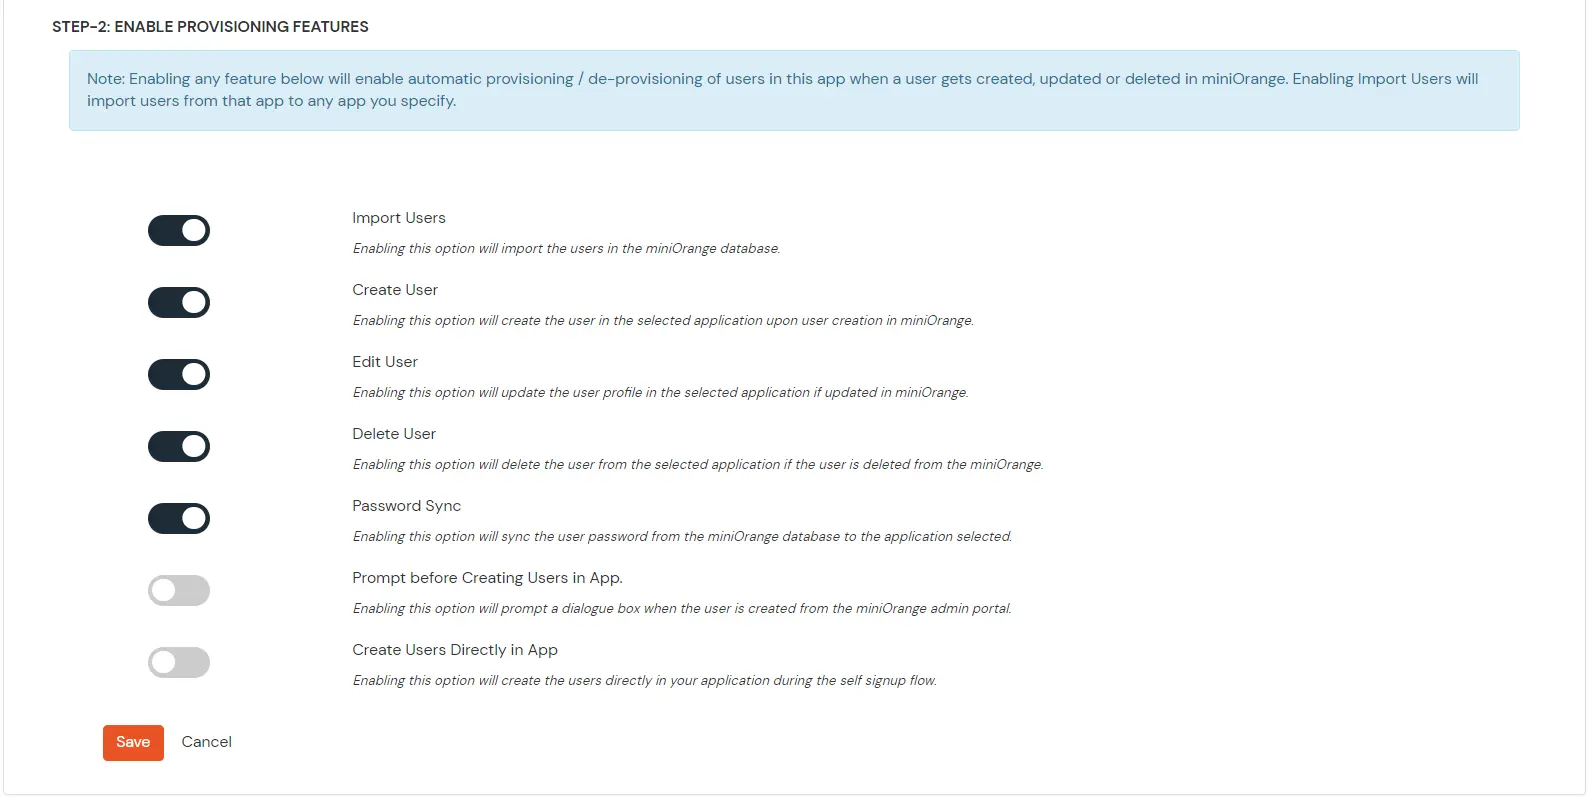
SAP Successfactors User Provisioning and deprovisioning actions are bi-directional that create accounts inside an external application as well as import them into miniOrange, or alternatively create the accounts in miniOrange and then import to any linked external applications. miniOrange user provisioning allows you to update & manage the user information in your database or applications when you perform creation (new hire), updation (role change) or deletion (termination) in your miniOrange service. SAP Successfactors Deprovisioning involves the removal of an user and their access from multiple applications and network systems at once during termination and role change within the organization.
Thus SAP Successfactors Provisioning helps in the synchronization of their attribute’s data across multiple user stores and downstream applications , management of their access privileges and user data throughout the user lifecycle and enhancement of their security profile by removing access to sensitive applications and content.
This step-to-step provisioning guide will help you to configure User Provisioning for SAP SuccessFactors to enable automated provisioning in all the integrated applications.

miniOrange provides solutions for all scenarios of enabling provisioning, which includes AD Integration, LDAP Integration and automated provisioning for all External Applications such as Office 365, Google Workspace, SAP Successfactors, etc
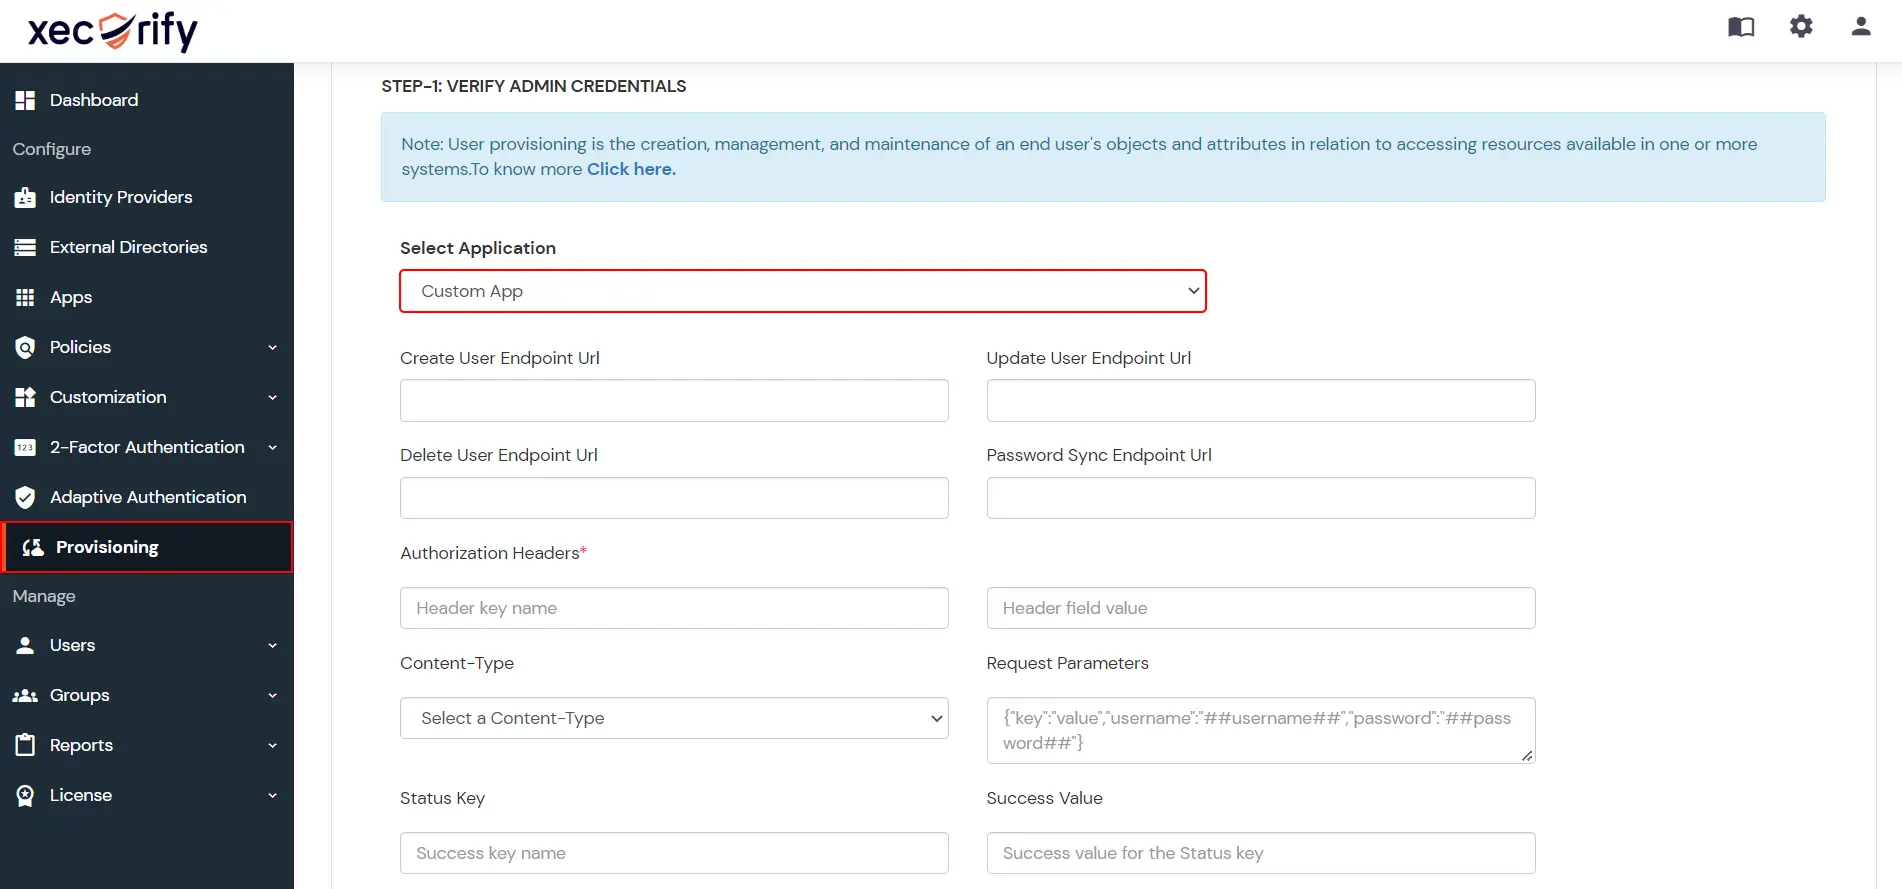
| Create User Endpoint Url | Enter the create user endpoint url |
| Update User Endpoint Url | Enter the update user endpoint url |
| Delete User Endpoint Url | Enter the delete user endpoint url |
| Password Sync Endpoint Url | Enter the password sync user endpoint url |
| Authorization Header Key Name | Enter the headers for the API call |
| Authorization Header Field Name | Enter the header field name for the API call |
| Content Type | Select the content type for API Request |
| Request Parameters | Enter the API Request parameters |
| Status Key | Enter the key containing the status of the ARI Response |
| Success Value | Enter the success value for the status key |
| Error message | Enter the key containing the error message |





Our Other Identity & Access Management Products